About Floors

Vinyl Flooring…What’s the Draw?

landscape widescreen large.2100.1180

Vinyl flooring is a highly popular option and a great choice, due to advanced technology that has helped vinyl manufacturers to create realistic, stunning floors that look like hardwood, tile, or stone. It’s durable, cost-effective, and low maintenance, which makes it advantageous for those who want comfort, beauty, and longevity in every day, high-traffic areas of their home. We hope the following reasons will help you make an informed decision for your next flooring project in your home:

ECONOMICAL

Luxury vinyl flooring is a smart choice, as it can be maintained easily, is economical, and is long-lasting. The beautiful look of wood grain from an exotic tree species is printed onto the vinyl, so you have the look without the high costs of hardwood flooring. It comes in an array of hues, patterns, and grain sizes, to give the appearance of hardwood floors. Whether you go for traditional, exotic, or rustic wood looks, there are many design ideas for you to choose from that will fit your personal style!

COMFORTABLE

Vinyl floors have a foam layer that creates a comfortable and soft feel, while still being durable and stain-resistant. So if you’re standing for extended periods of time, this is the perfect choice for you. Some vinyl floor products also come with a sound barrier layer to muffle footsteps.

DURABLE

Vinyl floors are used in commercial and residential spaces as it’s tolerant of high traffic, resistant to spills and abrasions. Its waterproof and low maintenance capabilities make it a highly sought-after option at restaurants and commercial offices.

STYLE

The trends, designs, grains, and hues that are available in vinyl floor options on the market, are extensive. In 2019 vinyl manufacturers will be producing even more looks that will mimic the latest texture trends and the most sought-after hardwood flooring style.

CONTACT US

GC Flooring Pros is proud to offer the latest trends in vinyl flooring as well as hardwood flooring. To book your free in-home consultation, please contact us at:214-814-1177 or fill out the estimate request form by clicking here.

GC Flooring Pros
About Floors, Blog, Tips & Tricks

Water Damaged Floors

If you have water damaged floors and are questioning whether to repair or replace them, we are here to help you through the entire process and make it a worry-free experience.

WOOD

Wood as an organic material absorbs water and moisture due to indoor humidity levels, spills, or in some cases leaks and flooding. The water can cause swelling or cupping of the wood planks. To prevent damage to your floor and decor, it’s expedient to assess if the floors need to be repaired or replaced.

SIGNS OF WATER DAMAGE

Water damage can also seep into the subfloors and can be detected by some telltale signs such as these:

  • Buckling/Cupping
  • Musty Odors
  • Discoloration
  • Nails popping out
  • Sagging

If you suspect water damage, the first step is to have the floor’s condition assessed. Call GC Flooring Pros at 214.814.1177 for an estimate, to determine if your floors need to be repaired or replaced.

Quality Flooring in Frisco TX
About Floors, Blog, Carpet Flooring, Tips & Tricks

Choosing the right floor for elderly

Aging is a real thing that happens to all of us. With age, our motor skills get sloppier and we become more prone to falls and slips. We also have less energy to spend on mundane tasks like cleaning. The way out is to adjust.
Choosing the right floor will help seniors avoid all these complications in their everyday life.
The ideal flooring material should be soft enough to offer needed support to bones and joints in case of accidents. At the same time, the floor should be relatively easy to maintain since some elderly also struggle with mobility problems.
Here is our overview of the best flooring options for seniors that balance ease of maintenance and safety.

Carpet

Being warm and soft, carpet is often the go to flooring material for children’s rooms. It’s a great flooring choice for elderly for the very same reason. Carpet’s cushioned surface offers much-needed support in case of accidental falls. The warmth it offers underfoot can also be beneficial to elderly, who often experience lack of body heat or have a problem retaining it.

However, carpet flooring might not be the perfect choice for all seniors.
Carpet tends to collect dust particles in the fibers and sets it free every time someone steps on its surface. This can harm the indoor air quality of the space and cause health related issues, especially for seniors dealing with respiratory illnesses.
Maintaining carpet isn’t the easiest of tasks. Because of its structure spills and stains can go deep into the cloth. This can make upkeep difficult for seniors, especially those who experience mobility problems. If not cleaned properly, over time carpet can become a home for bacteria and insects and lead to sanitation problems.

Vinyl Floors

Vinyl is made out of rubber which gives the floor certain flexibility and protective ability in case of accidental slips. Installing additional felt or cork paddings underneath can make the surface even more cushiony.
Caring for a vinyl floor is as easy as it gets. Being a resilient floor it’s almost impenetrable to stains and water. Sweeping on a regular basis goes a long way to keep the floor clean. This makes vinyl flooring a truly hassle-free solution for senior citizen’s flooring needs.
The only drawback installing a vinyl floor has is its impact on the environment.
Vinyl is made from a non-renewable resource. The manufacturing process consumes fuel while setting free toxins and other dangerous byproducts.

Cork Floors

Cork floors are famous for their soft underfoot which is the very thing seniors need.
What’s less known about cork is that in addition to making tumbles and falls less painful it also helps minimize heat loss and outside noise.

Caring for a cork floor is relatively easy as long as the sealant is in place. The cork itself is a porous material, the sealant is what protects its surface from stains and spills. To keep cork floor clean all you’ll need to do is sweep or vacuum on a regular basis.

As in with every porous flooring material the major drawback with cork floors is its ability to soak up liquids. To avoid any damage of the kind, cork floor should be resealed at least once a year.
Because of its softness cork floor can easily be harmed by furniture legs, high heels or any sharp object that could poke or scrape its surface.

Subfloor in Frisco TX
About Floors, Blog, Laminate Flooring, Recommended Blog

Choosing subfloor for hardwood, tile and laminate floors

The subfloor is the base for your flooring. Having the right subfloor is just as important as choosing the right floor finish, even if it’s going to hardly ever see the light of day.
Vinyl, laminate or tile or even expensive hardwood – doesn’t matter which one you choose, without proper support their durability will be compromised and you’ll end up wasting your money.
Who wants that? Noone! Here is how to make sure your subfloor is the right choice for your desired flooring.

What is a subfloor?

Subfloor is the very bottom layer of the floor that sits directly on the joists. Once the floor is installed it, subfloor gets hidden underneath. Because it’s hard to reach position, making changes to a subfloor is quite an expensive and difficult endeavor. Most subfloors stay the way they were built during the construction of the house.
The most common subfloor is 1/2″ or 3/4″ A/C-graded plywood. A/C means that the boards are smooth on the top side and rough on the bottom.
Oriented-strand board (OSB) also known as flakeboard is an alternative subflooring material. As a composite material, it shares great similarities with plywood. A single sheet of OSB is made by sealing large flakes of wood together with phenolic resins.

Underlayment

Subfloor is not to be confused with underlayment. Underlayment is what comes between subfloor and flooring surface to guarantee your floor’s best performance and keep the moisture and noise away. While subfloor is typically standard and consistent throughout the entire home, the type of underlayment used can vary from room to room depending on what type of flooring is being installed.

Cement underlayment

Cement board is the underlayment to use when installing tile flooring. It sits on the plywood or concrete surface and holds the tiles together.
Foam and cork underlayment
Foam and cork padding is the most common underlayment for laminate floors. Laminate is a hard floor and can often feel uncomfortable under your feet. The padding underneath helps cushion your step.
Plywood underlayment
Plywood can also be used as underlayment. It adds strength and helps set the height of the finish floor. In this case, you’ll have two layers of plywood present, one a subfloor layer and one an underlayment layer.

Subfloor for hardwood flooring

If you are installing hardwood flooring plywood is the best subfloor for you. Any plywood ranging from 1/2″ to 3/4″ and rated A/C will serve both solid or engineered hardwood well. If you decide to upgrade your subfloor choose tongue and groove plywood. It’s easier to install and will minimize squeaks caused by walking.

Subfloor for laminate flooring

Laminate can also be installed on a plywood subfloor. However laminate is a fairly thin floor so adding thin plywood as a secondary subfloor is advised, especially if you are installing laminate flooring in an older house. Subfloors in older houses are often no thicker than ½’’ plywood, unlike the ¾’’ thick layers in newer buildings. Because laminate is so thin it can easily show imperfections. To protect your flooring from grooves and dents you should install an underlayment, best foam or cork padding to provide some give and help smooth out any imperfections of the subfloor.

Subfloor for tile flooring

The main danger to tile flooring is cracking. Old and infected joists can be a cause for fractures. Installing stable plywood subfloor will help prevent any movement that can lead to damage. Underlayment too should have no give and be strong to support the tile floor properly. Cement board can be installed directly on top of the plywood layer.

GC FLooring Pros
About Floors, Blog, Hardwood Flooring

How To Choose The Right Hardwood Flooring Species

If you are thinking about choosing a hardwood floor for your home chances are you are looking for a durable flooring option. The durability of any wood floor depends on its hardness.
The harder the floor is the better can it resist scratching and wear-related damage.
However, whatever the name might suggest, not all hardwood is hard. Some woods are harder than others. How do you find out which one is right for you? Fear not, we’ve got you covered!

How hard is hardwood really?

The hardness of wood is determined by how much pressure it can withstand. The Janka Hardness Test measures the hardness of different wood species and classifies them by the results. During the testing, a steel ball with an 11.28-millimeter diameter is pressed into the wood to half the ball’s diameter. This creates a circular indention in the wood with an area of 100 square millimeters. The amount of force spent on the task is measured in pounds-force (lbf) or newtons (N). The more force this procedure requires the stronger is the wood species. Because the testing is done on the surface of the plank and the force is applied horizontally to the wood’s grain it’s possible to also determine side hardness.
To get reliable results the wood used in the test has been air-dried to a 12% moisture content.
The Janka Hardness test also gives insight into how well a particular wood can take on dents and daily wear.

Because of the different characteristics of various wood species, the difference between wood hardnesses is substantial.
The softest hardwood ever tested by the Janka hardness test is Cuipo and can withstand no more than 22-pound force. Australian Buloke is the strongest wood on the list. With 5060 pound force, it’s well above some of the most famous exotic woods like Brazilian Walnut and Bolivian Cherry. It’s almost twice as strong as Red Mahogany and Southern Chestnut and three times stronger than the ever-so-popular flooring choice of Americans – Hickory.

Testing and collecting data is one thing but successfully applying the results to your next remodeling project is another thing. Knowing in advance what to expect from certain wood species will make it easier for you to choose the right kind of floor for your home.

What is the optimal hardness your desired wood species should have?

As long as you are installing a floor for residential use there is little chance you’d need something from the top of the Janka Hardness list. The most popular wood species used for home flooring purposes are usually of medium strength. Red Oak, White Oak or Maple are some of the most popular domestic flooring choices across North America. Most of the domestic wood species tend to be of a lighter color unless stained or otherwise distressed.
Exotic woods come usually in more colors and differ from board to board. Their grain pattern is also more unusual and less continuous than in the case of domestic wood. This unique look has caused a massive spike in exotic wood floor sales in the last decade in the US. Most exotic wood species are also harder and consequently more durable than standard domestic wood species.

However, hardness isn’t always good. Most of us install a hardwood floor to avoid the trouble of removing and installing a new one years later. Solid hardwood floors can be sanded and refinished up to five times. But sanding and refinishing a truly hard hardwood floor isn’t all that easy. Because of the strong built most hard floors require very precise work and could splinter. This is also the reason why exotic wood species are more expensive to treat and require a specialist who has experience in the matter.

Domestic Hardwood Species

Red Oak

1290 lbf

Red Oak is somewhat the classic flooring choice. It’s so popular that every other wood is measured against its hardness and durability. The species usually has average to heavy graining with moderate color variations. The color of a Red oak floor can be anywhere from creamy pinks to light reds all the way to darker tones like shades of brown. Unlike white oak that has more earthly colored undertones (browns and greys), red oak is known for its more pinkish appearance.

Maple

1450 lbf

This wood species is native to the northern regions of the US and Canada. Maple hardwood is mostly of a faint white color that might slightly vary from board to board. The continuity of tone throughout the board depends on the grade of the wood. Maple flooring can contain minimal to a lot of brownish/black mineral streaks. The higher the grade is the least marks of this kind occur. Maple graining (sometimes straight lines, other times curly patterns) is so fine that oftentimes it goes unnoticed. “Birdseye” graining is also characteristic of maple. Birdseye is a distinctive pattern that resembles tiny eyes and is common in many wood species. Even though maple hardwood is mostly known as a very hardwood species, it contains areas that have softer structures. This can sometimes lead to the uneven color distribution when staining the floor. To avoid blotchiness it’s recommended to use a liquid wood conditioner prior to applying a stain to your maple floor.

Hickory

1820 lbf

Hickory is one of the hardest species of wood that’s native to North America. Because of the great variety of color and unique graining, it’s one of the widely used woods too.
Coloring for Hickory hardwood flooring can range from creamy whites to medium browns and even to darker browns. To get the most out of the unique grain variation of Hickory it’s common to cut it in 5″ and wider planks.

Exotic Hardwood Species

Brazilian Cherry

2820 lbf

Brazilian Cherry is an exotic wood species known for its extreme color variations. Also known as Jatoba, it’s on the top of the Janka hardness rating. When installed it created a beautiful reddish/brown pattern with reddish/blonde highlights and occasionally deep red selections.
Unlike many flooring alternatives that tend to fade when exposed to the sun, Brazilian Cherry gets richer and darkens with exposure to light. The unique graining also plays a role in creating an interesting and inviting environment.

Santos Mahogany

2200 lbf

This hardwood species is the second-most popular choice among the exotic kind. Compared to Brazilian Cherry, the most popular exotic wood on the market, the tone of this wood remains mostly homogenous throughout the plank. The color variation ranges from medium brownish/orange to dark brown. Santos Mahogany hardwood has a wavy grain that incorporates an open pattern. Just like Brazilian Cherry, when exposed to light Santos Mahogany will become richer.

Bamboo

Unlike other woods bamboo doesn’t have a set Janka hardness rating. The hardness of bamboo depends on the harvesting time. Cheaper bamboo has usually been harvested earlier than more expensive grass and is less hard.

tips on how to choose the prfect stain for your hardwood floor
About Floors, Blog, Floor Care, Hardwood Flooring, How-to, Recommended Blog, Tips & Tricks

How to choose the right stain for your hardwood floor

Hardwood floors are a beautiful addition to any home. Their timeless and natural look has the power to brighten even the dullest of places. From white oak to Brazilian walnut hardwood floors offer a decent flooring choice for every taste and wallet. However, the species of hardwood isn’t the only thing to determine the appearance of the floor, the stain is just as important.

Not all floors stain the same way

Different wood species come with different natural characteristics. This doesn’t only determine their performance in a certain environment but also dictates how they absorb stain so that using the same stain on two different kinds of hardwood can lead to absolutely non-comparable results. The reason behind this is their contrasting hardness. Some harder woods are denser while others are more porous and soft. This makes it easier for the staining liquid to get into the pores.

To avoid any color inconsistency it’s important to test your stain prior to application. This will give you the advantage of knowing exactly what the stain of your choice will look like on your species of wood. At GC Flooring Pros we test sample spots for our customers to find the perfect match. We only use high-quality wood stains. Some of the colors you may choose from are listed on the DuraSeal website.

stain test e1499630700931
Doing a stain sample will help you get the stain color for your specific hardwood species just right without having to play the guessing game.

Stain makes the room

A room is like an organism, it’s an amalgamation of different goods with different purposes that function as one. Ideally, nothing’s out of place and every detail is carefully thought through.
The floor being one of the largest surfaces in a room can greatly affect the dynamics of the space. Wrong stain tone can not only clash with your décor but affect the quality of the time you spend in the room. But the right stain can tie the place together and make your stay more enjoyable. So before making a decision, consider how it will compliment everything else in the room including the wallpaper, furnishings as well as general style and accent colors.

The most popular colors these days are Ebony, Antique Brown, Provincial, Dark Walnut, Medium Brown, Weathered oak and some combinations. If you’re going for a lighter color we suggest using white oak rather than red oak.
To give your hardwood floor an even richer look we use polyurethane varnish.
Keep in mind that the type of polyurethane can affect the color of the stain after application so there is even more reason to do a stain test first. As a general rule, oil based polyurethane tends to darken the wood a bit but it’s slightly better at resisting scratches, moisture and heat when compared with the water-based alternative. Then again, applying a water-based poly won’t lead to any changes in tone and will preserve the wood’s natural tone. You also have to choose a matte, satin, semi-gloss, or gloss polyurethane. Matte and satin are becoming more trendy, we are seeing that wood floor conglomerates do not want as much sheen these days.

Even though choosing the right stain colors can be difficult, there is not much to worry about. With solid or even thicker engineered hardwood floors you can easily refinish them to give the flooring desired tone.
Meanwhile here are some tips to help you find the perfect stain color for your hardwood floors:

Light stain

A lighter stain can help make a dark room appear brighter and more spacious than it really is. If you have dark furniture, installing lighter hardwood with somewhat matching stain will create a beautiful contrast and help your decor stand out. By choosing a lighter stain, you won’t have to clean nearly as often as in the case with dark stained floors since dust is less visible on a lighter surface. However, light stains aren’t as good at hiding hardwood’s natural imperfections as its darker alternatives.
The contrast they create with darker

Medium stain

If you aren’t one for dramatic changes this is the stain for you.
While medium stain won’t really affect the overall colour scheme of the room, it will most certainly compliment many other wooden details in your decor and still help tie the room together. A medium stain is also a reasonable option if you haven’t decided on the look of the space yet and would like to keep as many options for wall & furniture colors open as possible.

Dark stain

Dark stained floors are elegant and will help ground your bright room nicely. The balance between darker bottom and lighter top parts of the room will make the space more inviting and help the accent colors in your interior stand out more. A darker stain is superior for hiding hardwood’s natural flaws but it falls short when dealing with inflicted imperfections like scratches. Pet hair and dust aren’t easy to hide either. In a word, if you have a dog or a small child or expect above average wear because of any other reason it’d be a safer bet to go with lighter stain.

is it worth the money to install hardwood flooring
About Floors, Blog, Hardwood Flooring

Is installing hardwood flooring worth the money?

Hardwood is one of the most popular natural materials available for flooring purposes. Solid and engineered hardwood floors both can successfully transform any space into a more warm and welcoming environment. Praised for its beauty and richness it also possessed impressive durability capabilities.
Despite being more expensive than most alternative flooring options, hardwood’s ability to be refinished is a convincing argument for many who are looking to install a new floor.

But really, how far can you stretch your hardwood floor’s life? And is it worth it at all?

How much does new hardwood flooring cost?

There are dozens of different hardwood floors available on the market and the prices vary just as much. As a rule, the grade of the wood is one of the biggest factors to determine the price. Higher the grade more expensive the floor. Hardwood of the highest grade comes in a longer boards has no blemishes and is a uniform color. The cheapest hardwood is the least “tame”, it’s rich with knots and blemishes and shows the raw character through the mixed color. The boards of this grade also tend to be as short as 24”.
The species of the wood, as well as your location, also play a significant role in determining the price for your hardwood floor installation. The rare types of wood like Sakura or Kempas tend to be more expensive than Maple or Oak which are more common in the US.
Typically, flooring suppliers quote the cost for installing a hardwood floor on a square-foot basis. The price for a lower to upper-grade hardwood varies between $4-8. Prefinished floors cost on average $2 more than unfinished.
There are other costs to consider In addition to what you pay for the floor itself. The price for installation varies depending on whether the floor needs to be nailed down, glued to the subfloor, or floated. Laying hardwood in a smaller room can also get more pricey since a lot of complicated trimming needs to be done to ideally fit the boards to your room’s borders and around other tightly located obstacles. There are also expenses that have little to do with the actual flooring, including delivery, moving furniture, and preparing the subfloor.

How durable is Hardwood really?

Both engineered and solid hardwood are durable flooring options. Even though they are built differently – solid wood is made from a single wood board while engineered hardwood is a composite product – the surface layer is in both cases real wood and has similar resistance to wear.
Density plays a big role in hardwood’s durability and is directly proportional to the floor’s hardness. Unlike what the name implies, not all hardwood floors are hard. Some are soft enough to get scratched. According to the Janka hardness test, which is used to measure how well different woods can withstand pressure, most hardwood species used for flooring purposes are of average hardness. Hickory, for example, can take 1820 lbf, most types of maple around 1400 lbf, white oak 1360 lbf and red oak 1290 lbf.

How much does refinishing cost?

The cost of refinishing hardwood floors varies based on floor material, floor condition, used equipment and the length of required labour. Usually, a 100 square feet room can be refinished in about 4-5 hours. The average price to refinish hardwood floors lies between $1.50 – $5.00 per square foot. This excludes the more exotic types of hardwood. They are difficult to work with and require extra care when being sanded. Some exotic floors can easily burnish due to their hardness if not treated carefully. Others leave dust behind that can harm people’s health and should be treated by an experienced flooring professional who will take adequate measures when working on such floor. These demands for extra care makes refinishing exotic wood more expensive.

How often can you refinish your floor?

The thicker the floor the more times can it be refinished. On average, solid hardwood floors can be refinished up to 5 times. Engineered hardwood floors with a wear layer of 2mm or thicker can be sanded and refinished as well.
However, thickness isn’t the only factor to be concerned with when refinishing your floor. Who does the work is just as important. Refinishing a floor means sanding off the top layer full scratches and blemishes to reveal new wood underneath and then re-applying color treatments and seal. More precise sanding will leave you with a thicker board and prolong your hardwood floors life.

What floor to install if you have a dog
About Floors, Blog, Carpet Flooring, Tips & Tricks

What floor to install if you have a dog

Flooring advice for pet owners

If you are a devoted human to your four-legged friend, you’d want to choose the one flooring that best suits their needs, Preferably, besides offering good enough support (for your pet), it should be also durable and easy to clean (for your own sake).
In this blog, we have set out to help you on this hard but noble quest. To start it off, here are some general tips to help you select the best floor for your furry friend.

Pet nails are a menace

Pet nails can scratch or snag and this can damage some types of floor. So you need to find a solution that’s most resistant to this danger. ing more than others. Trimming nails is not a solution either. Blunt, broad-tipped nails can still gouge the sealer, creating long, shallow dents. Forget floor runners, you definitely don’t have as much power over your dog (even if you believe you do). So it’s better to match your floor to your pet and not the way around.

Bladder control is hard

Once your dog has been trained it’s very rare that you’ll have to face this problem but if your pup is young there is a good chance that it won’t make it outside every time to relieve itself. In addition to unpleasant odor pet urine can leave bad stains. Some types of floors are better at dealing with that than others.

Muddy paws are fun

All that dirt from running through puddles won’t just stay out. No matter how well-behaved your dog is, parts of it will definitely end up on your new floor. You have been warned./Consider yourself warned. So choose the floor that can be cleaned effectively without any fuss.

Dogs can have allergies too

Allergies are a huge topic when choosing a new floor, but rarely in regard to our pets. Sadly, dog allergies are real and could put your four-legged friend in danger. You might not know of any existing allergies if your dog’s never been in contact with the irritant before. That’s why you should test/observe how a certain flooring material affects your pet beforehand.
Still, most floor-related allergies in dogs are a reaction to the floor cleaners and the chemicals they contain. Always use cleaning products that have been approved and are safe for your dog’s consumption. Because, you know, dogs like to lick everything.

Flooring Options

Woof, woof! Now that you’ve got an idea of what to look for, we can move to select that one perfect floor for your little pup.

Vinyl

Vinyl has proven itself as the finest example of resilient flooring on the market today. It’s full of controversies and benefits. Even though it offers soft enough padding to enjoy walking around barefoot, most quiet scratches and liquid spills don’t faze it. Vinyl doesn’t trap dust or allergens and all you’ll need to clean it is a simple mop and warm water. Vinyl also happens quietest flooring option after carpet, something dog owners will definitely come to appreciate.
The floors come in sheets and tiles as well as in all colors and patterns including different hardwood species and natural stone. Vinyl flooring is definitely a great alternative for those pet owners, who want to get a hardwood floor but would like something more durable.

Pros & cons for humans: Easy to clean, can mimic natural materials but real hardwood still looks better.
Pros & cons for dog: It’s soft and warm. No apparent cons.

Ceramic or natural stone tiles

Ceramic and natural stone tiles are hard surface floors that can match your pet’s claws pretty well. They don’t scratch as easily as other floors and if they do the scratches are barely visible and don’t really stand out from the natural pattern. Your dog’s mishaps don’t pose any problem either since both products can endure liquid spills when sealed properly and can be cleaned easily. The glazed option with an extra protective layer may keep the water out more efficiently but its slippery surface can be somewhat uncomfortable for your dog to walk on. Cold too unless your place has underfloor heating. If you go with tile or stone be sure to put down rugs throughout the house so your dog has plenty of space to relax.

Pros & cons for humans: Scratch and waterproof as well as easy to maintain but colder and louder than other floors.
Pros & cons for dog: Less allergenic and pleasantly cool in the summer months. However too hard to sleep on without a rug, requires underfloor heating in the winter.

Laminate

A laminate floor is designed to resist scratches. Its impenetrable clear top layer keeps the high-quality image layer underneath well protected. Like vinyl, laminate can mimic an array of natural materials including wood.  A damp mop can go a long way when trying to keep your floor clean. However, that same wear layer that’s responsible for most of laminate’s advantages can be uncomfortable for your dog. It allows little to no grip and can lead to accidents, especially with older animals.
It’s also louder than natural stone or ceramic tiles. It will amplify your dog’s footsteps like no other solid floor. So if you are an owner of an energetic breed you might want to skip this one.
Laminate isn’t as hard as tile but not as soft as vinyl ether. For better comfort for your dog, you still might consider using rugs here and there.

Pros & cons for humans: Easy to clean, can endure scratches but can be loud.
Pros & cons for dog: Warmer and more comfortable than tile but offers little to no traction at all.

Wood

Wood and sharp claws don’t go well together. Resisting scratches and spills aren’t most woods’ strong suit. Trimmed nails can still damage the sealer, leaving behind long shallow dents.
But if you absolutely have to have a wood floor, you could choose from these three options.

  • Go for the super-hard wood species
    Some wood species are naturally stronger than others. According to the Janka hardness test Brazilian Walnut, Hard Maple, Oak, and Hickory floors have a better chance against your furry friend.
  • Get already distressed wood
    Get a hardwood floor that has been already distressed. That way you won’t notice any new scratches. If anything they’ll add to the character of your wood floor!
  • Try SoftPaws
    SoftPaws are applicable nail caps for dogs. They cover your dog’s nails to keep them blunt and harmless and protect your floors, doors, and furniture from dreaded scratches.
Vinyl tile installation: How it's done
About Floors, Blog, How-to, Vinyl Flooring

Vinyl Tile Installation: A comprehensive guide

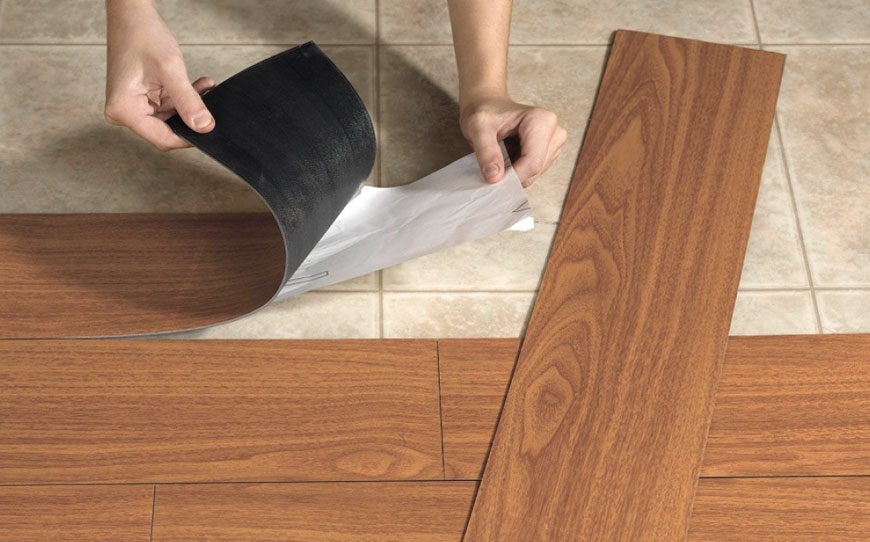
Vinyl tile is the perfect flooring option for those of us who prefer to do things on our own.
Even though it’s floor installation we are talking about here, the simplicity of it all twined with the ready-to-use adhesive backing of vinyl makes it seem more like a game of Tetris or Lego, something DIY buffs can definitely get behind. In addition to upgrading your home, these tiles guarantee that you will have a lot of fun doing it.
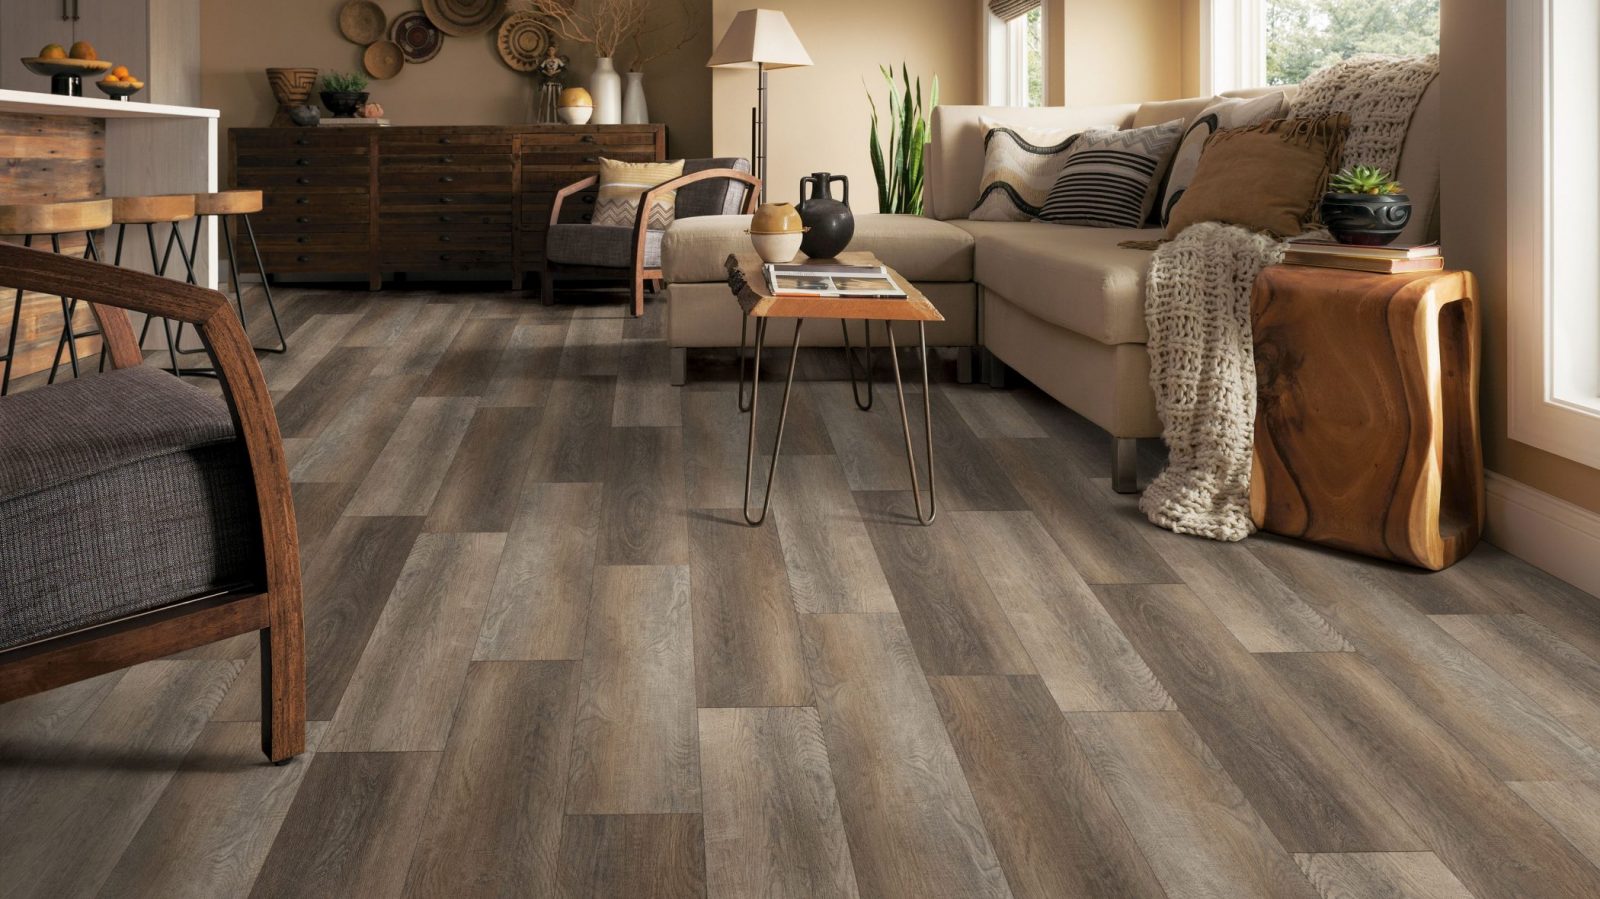
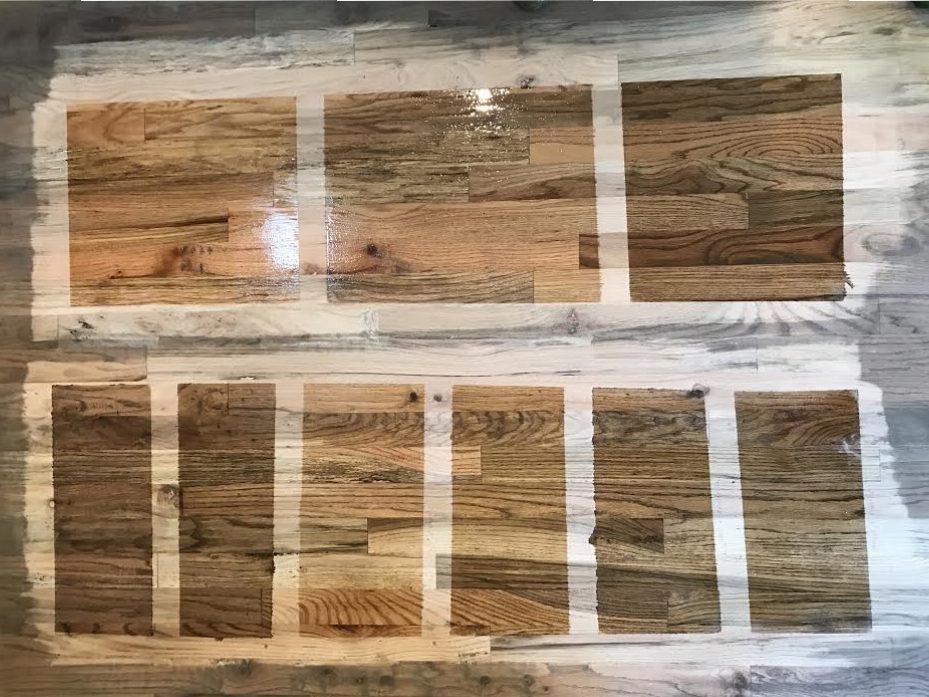
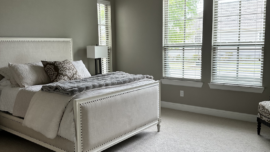
Vinyl tile floor has all the same qualities sheet vinyl is praised for. It’s water and dirt-resistant doesn’t stain and offers pleasantly soft support for your feet.
If vinyl tile is a floor you want in your home, here’s a comprehensive guide to help you get it there.

Do the calculating

The first thing on the list is to determine how much vinyl you’ll be needing. To do so, you’ll have to measure your floor. Don’t worry if the room has a complex shape, you can always measure individual areas and add them up.

Once the measuring is over there are two ways to find out how much vinyl you’ll need to cover the entire surface. Either divide the area of your floor by the area of a single vinyl tile to get the needed number of tiles or by the square footage contained in a carton for the number of cartons. Since it’s highly unlikely you’ll be buying the tiles one by one, the second method is more effective and time-saving.

Before you place your order, don’t forget to get some extra. Slip-ups do happen, you might cut some of the tiles too small to fit the borders or lay them down at the wrong angle. It’s always preferable to have some extra vinyl at hand. 10-15% of your estimated amount is usually enough to cover all possible accidents.

Figure out the layout

For a better visual appearance floor tiles are usually centered at a doorway.
When making a layout you want to cover to fit them in the areas where the tiles meet the walls but try to maximize their size and minimize the number. The goal is to end up with at least half a tile width at those edges. Try to place badly sized tiles as far out of the sight as possible, the trick is to hide them under trims or furniture later. To avoid any surprises and miscalculations on the way, draw a scale plan of your floor on a piece of paper and a scaled grid on tracing paper to correspond to the tiles. This way you can place the grid on the plan and move it around to choose the best layout for your room. While you are at it, you might also want to experiment with different patterns by using colored pencils to color into the boxes.

Arm yourself

It’s always smarter to have all the tools you may require at hand. Vinyl installation is a pretty simple process so chances you already own all the needed tools. To be sure, here’s a list:

  • Carpenter’s square
  • Tape measure
  • Utility knife
  • Safety glasses
  • Respirator
  • Chalk line
  • vinyl roller
  • trowel

Prepare your floor

Before you go ahead with actually laying down your vinyl tiles there are certain things to take into account.
Vinyl expands and contracts to depend on the environment it’s in. Before you install it, let the open boxes sit in the room for at least 48 hours for the tiles to get acclimated. Also, make sure you follow any product-specific instructions your vinyl manufacturer might have provided.

Clear your floor from all the trim on the edges. If you plan to reinstall them later, make sure to be extra careful with removing nails so there is as little splitting as possible. The safest bet is to pull the nails out through the trim from the backside.

The surface you are lying down the vinyl tiles on should be as flat and smooth as possible. Any unevenness or bumps will cause it to develop blemishes over time. Clean your floor properly, get rid of any debris, grease, or wax beforehand.

Subfloor

Vinyl tiles can be installed on pretty much any floor but there are some differences in the process you should be aware of in advance.

Installing vinyl tiles on concrete or ceramic tile

To install vinyl tiles on concrete or ceramic tiles, the surface should be clean, flat, and dry. If there are any cracks or imperfections they should be fixed using a sealer.
High spots can be flattened out using a coarse-grit abrasive on a belt or disc sander.
A cold chisel and a baby hammer can be used to remove any minor bumps from the surface.

Installing vinyl on the vinyl subfloor

It is possible to install vinyl tiles over an old vinyl flooring as long as the old floor isn’t in too bad of a shape. Any minor imperfections like small dents and dings can be fixed by applying a coat of embossing leveler. This will smooth the surface and prevent the new vinyl from following the shape of the floor underneath.
However, if there is more damage to your old vinyl floor than just some rough patches you should get rid of it altogether.

Installing vinyl on damaged floor

f the floor is far too damaged for any embossing leveler or sealer to do the trick and get rid of it is too difficult or expensive you can cover it with a layer of plywood.
Needless to say that the plywood itself should be smooth and cleared of any imperfections before the vinyl tile is laid down.

Underlayment

Underlayment can also be used for extra thickness or better grip. Plywood surface as well as glass, hardboard, lacquer, painted enamel, steel, aluminum, and many kinds of plastic offer the best adhesion. When laying down the underlayment make sure to leave a 32-inch gap between the panels and a 1/8-inch gap along the walls to allow the sheets to expand. It can be stapled onto the old floor with 7/8-in. narrow crown staples. For the best stability place staples 4 inches apart in the center of the sheet and 2 inches apart along the seams. Try to use as many full sheets as possible and trim the edges only when necessary.

Fit the doors openings

To ensure the smooth functioning of your doors you’ll need to trim down the door opening so the tiles will fit underneath. To do so place a tile upside down in front of the door frame to serve as a height guide. You can use a saw or utility knife and a sharp chisel for cuts that are tight.

Divide your floor

The next step is to transfer your desired layout from paper to the underlayment. Chalk lines are the easiest way to do so. The rule is to starts laying down tiles from the center. To find the center of the room you’ll have to find the centers of both sets of opposite walls. Use these points to snap a chalk line across the floor in both directions. You’ll end up with two lines crossing in the center creating four rectangles. Use a carpenter’s square to make sure the lines are straight.
Trial-fit a row of tiles down both lines following the width and length of the room without removing the peel and exposing the adhesive backing. It will give you a sense of what you are aiming for and show if there are any changes that should be made to your original layout. Use a pencil to darken the lines before you sweep the surface one last time.

Install the tiles

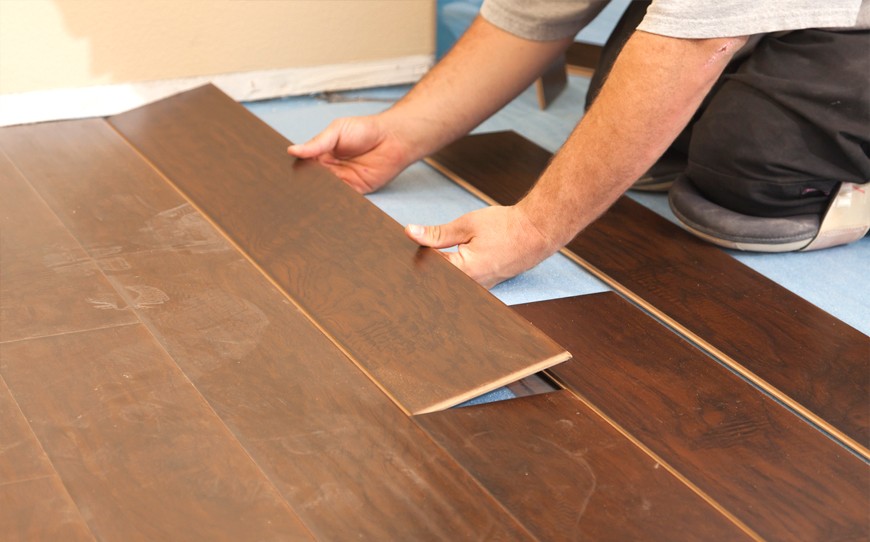
Finally, it is so far. Full tiles are installed first. Start at the intersection, peel off the protective backing, and lay down the vinyl tiles along the layout lines. Continue to work in a stair-step fashion to keep the tiles aligned. Use a floor roller every couple of rows to apply pressure and attach them securely to the underlayment.
Once you have covered the area with as many full tiles as you can you’ll need to cut vinyl to fit the borders. Use a heat gun for about a minute to warm the tile and make it flexible, then cut it with a utility knife. Then cut the tile using a utility knife.
Vinyl tiles that require to simply be trimmed to length, can be cut easily using his method
You can cut vinyl tiles that simply need to be trimmed along the length by placing the tile atop the last full tile close to the wall, then situate another one to overlap the loose tile. Use a knife to cut the overlapping section off the top tile. Use the trimmed section to cut tiles for the same row. Irregularly shaped tiles can be easily trimmed using a cardboard template.

Let it sit

Once the entire floor is covered, do a couple more rounds with a vinyl floor roller, and then let it sit undisturbed for the recommended period of time. This means no walking for at least a few hours, no moving furniture for 2 days, and certainly no cleaning at least for a week. This way the adhesive will have time to settle and develop a stronger bond.

why install carpet floor in the bedroom
Interior Design, About Floors, Blog, Carpet Flooring

Why install carpet flooring in the bedroom

How you sleep can make you or break you. The quality of sleep affects your energy levels and sets the mood for the day. A good night’s sleep can add to your productivity and decrease stress levels. However, not many people realize that there is a direct correlation between the sleep you’re getting and the environment you are in. Having the right floor in your bedroom can help you relax just as much as a soft pair of nightwear or silky sheets.

Carpet has a long history of being an integral part of sleeping arrangements in different cultures.
Today wall to wall carpets is one of the most popular flooring choices for bedrooms all over the world. It has many benefits other flooring choices lack. Here are the most prominent ones.

Carpet is comfortable

No one wants to feel a cold floor under their feet on their way to the bathroom in the middle of the night or even worse, the first thing in the morning. With carpet, you won’t have to. Predominantly made of fiber, natural or synthetic, carpet is the perfect choice for those who enjoy parading around barefoot or only in socks. Its soft surface will make your feet feel loved even after a long and tiring day at work. Available in every color and pattern, it will add warmth and character to your bedroom. And if you like your floors even softer than usual, that can be arranged too: the softness of carpet flooring can be easily boosted by choosing a high-quality cushion underpad.

Carpet is quiet

A quiet room is the best setting for uninterrupted sleep.
The soft surface of carpet flooring is good for more than spontaneous bladder calls.
While it keeps your toes warm and happy, it also allows you to move around the room without making much noise (and could potentially save your relationship).
Wall-to-wall carpet absorbs sounds up to ten times better than hardwood or any other hard-surfaced floor. Its sound-dampening qualities come in especially handy if you and your family members keep different hours and the noise source is located just below the bedroom territory.
By contributing to a more quiet environment, carpet floors considerably enhance the quality of sleep.

Carpet is healthier

Another factor that affects the quality of sleep greatly is the condition of air in the bedroom.
Studies have shown that carpet floors are indeed a fitting choice for people with asthma, allergies, or other breathing problems. Unlike hard-surfaced floors which let the dust and allergens flow freely, carpets trap them in the fibre and prevent them from becoming airborne and being inhaled.

Carper is safer

Slips are a big part of being human and floors.
But not with this floor. Carpet being mounted to all four sides leaves little room for accidents of this nature. So feel safe while you search for the trousers half asleep in the morning haze.

Carpet brings out the best

Carpet’s main competitor on the bedroom flooring market is hardwood. While it’s also a great flooring option for your bedroom it can make shopping for furniture a bit tricky. See, every wood type comes with a natural pattern that’s hard to match. And even if you do, you don’t really want to go over the top with wood everywhere. So, if you are thinking about having wooden or wood patterned furniture in your bedroom in the first place, maybe relinquish the idea of hardwood and opt for carpet flooring instead. Wall-to-wall carpet will create a pleasant contrast with the furniture and enrich the interior. The endless choice in the carpet department will give you the freedom to experiment with all sorts of colors and patterns to make your bedroom even cozier.