About Floors

white oak vs red oak flooring - flooring fireplace and piano
About Floors, Blog, Hardwood Flooring, Red Oak, White Oak

White Oak vs Red Oak Flooring: Differences, Hardness & Which to Choose

White Oak vs Red Oak Flooring: Differences, Hardness & Which to Choose

White oak vs red oak is one of the most common questions we hear from homeowners choosing hardwood. Both are beautiful, durable, and classic, so there’s no wrong answer. The difference between red and white oak comes down to color, grain, hardness, how they take stain, and how they handle moisture.

Quick answer: White oak is slightly harder, more water resistant, and has a calmer, tan-to-gray tone that suits today’s natural and light finishes. Red oak has warmer pink-to-red undertones, a bolder grain, takes stain evenly, and usually costs a little less. Choose white oak for a modern look and busy areas near water; choose red oak for warm, traditional style or to match existing oak floors.

Red Oak vs White Oak: Side-by-Side Comparison

White Oak Red Oak
Color / Undertone Tan to light brown with olive or grayish undertones Light brown with pink, salmon or reddish undertones
Grain Tighter, straighter, more subtle; long rays show as flecks Bolder, wavier, more open grain with strong “cathedral” patterns
Janka Hardness About 1,360 About 1,290
Stain Behavior Great with natural, light, gray and modern neutral finishes Takes stain evenly and predictably; warm tones show through light stains
Water Resistance Better; its pores are naturally plugged Good when finished, but open pores absorb water faster
Price $$ $

Neither oak is waterproof. Both need a quality finish and quick cleanup of spills. Want to compare oak with maple, hickory and other woods? See our hardwood flooring species guide.

Red oak hardwood flooring with warm reddish undertones

Red Oak Flooring: What to Know

Color

Red oak has a warm, inviting tone with pink to reddish undertones. It’s the classic oak you’ll find in many homes built in the 1980s, ’90s and 2000s, and it pairs beautifully with traditional and transitional styles.

Grain Pattern

Red oak’s grain is bold and lively, with lots of movement from plank to plank. That busy pattern has a hidden benefit: it does a great job disguising small scratches, dents and everyday wear.

Matching Existing Floors

If your home already has red oak floors, red oak is the easiest way to extend them into a new room so everything flows together after refinishing.

Water Resistance

With a good finish, red oak handles normal kitchen and entryway life well. Because its pores are open, it absorbs water faster than white oak, so wipe up spills promptly. Like any solid hardwood, it isn’t recommended in bathrooms with a shower or tub.

White oak hardwood flooring with a natural tan finish

White Oak Flooring: What to Know

Color

White oak ranges from light tan to medium brown, often with a slight olive or gray cast. That calm, neutral tone is why it’s the go-to choice for today’s natural, light and gray finishes.

Grain Pattern

White oak’s grain is tighter and straighter than red oak’s, giving floors a cleaner, more uniform look. In quarter-sawn and rift-sawn boards, white oak shows beautiful ray flecks. Learn more in our guide to plain, quarter and rift sawn flooring.

Water Resistance

White oak’s pores are naturally filled with tiny plugs called tyloses, which slow down how fast water soaks in. It’s the same reason white oak has been used for barrels and boats for centuries. That makes it a smart pick for kitchens, mudrooms and open living areas.

Which Is Harder, Red Oak or White Oak?

White oak is slightly harder. On the Janka hardness scale, which measures the force needed to press a steel ball halfway into the wood, white oak rates about 1,360 and red oak about 1,290. In everyday life, the difference is small; both are durable choices for families and pets. What matters more for dent resistance is the finish, plank construction and how the floor is cared for.

How to Tell Red Oak from White Oak

If you’re trying to figure out which oak you already have, here are a few easy clues:

  • Look at the color. On unfinished or lightly finished wood, red oak leans pink or reddish, while white oak looks tan, olive or grayish.
  • Check the rays. Look closely at the face of a board. White oak shows longer ray flecks (often more than half an inch). Red oak’s rays are shorter.
  • Look at the end grain. If you can see a cut end (inside a floor vent opening or at a transition), red oak’s pores look open, like tiny holes. White oak’s pores look filled in.
  • Ask a pro. When in doubt, we can identify your existing floors during a free in-home visit.

Which Stains Better?

Both oaks take stain well; they just shine with different looks.

Red oak absorbs stain evenly and predictably, which makes it forgiving for medium and dark stains like walnut, espresso or classic browns. Its warm undertone shows through lighter stains, so very gray or “natural” finishes can look slightly pink.

White oak is the favorite for natural, light, gray and Scandinavian-style finishes because its neutral base doesn’t fight cool tones. It also takes dark stains well with proper prep.

Crew tip: Always test your stain on a sample board of the actual wood. Stain color charts are printed, and real oak can look quite different, especially with red oak’s warm undertone.

Which Is More Popular in Frisco and Prosper Homes Right Now?

In newer homes around Frisco and Prosper, white oak is the look many homeowners are asking for: wide planks with natural, light or soft gray finishes that pair with white kitchens and modern farmhouse style. Red oak is still everywhere in established North Texas neighborhoods, and refinishing it is often the most budget-friendly way to refresh your floors.

Most homes here sit on concrete slab foundations, and North Texas humidity swings from season to season. For slab installs, we often recommend engineered white or red oak, which keeps the real oak surface while staying more stable as humidity changes. We carry both oaks from brands like Bella Cera, Jackson Hardwood and D&M, and our hardwood flooring installation team can help you pick the right construction for your home.

Red Oak vs White Oak: Which Should You Choose?

  • Choose white oak for a modern, natural or light look, slightly more hardness, and better moisture resistance in kitchens and open living spaces.
  • Choose red oak for warm, traditional style, even dark stains, a lower price, or to match existing red oak floors.

Still deciding between red oak and white oak? We bring real samples to your home during a free in-home estimate, so you can see both oaks in your own light, next to your walls and cabinets. Financing is available.

Schedule your free in-home hardwood estimate

White Oak vs Red Oak FAQ

What is the difference between red oak and white oak?

Red oak has pinkish undertones, a bold open grain and costs a little less. White oak is tan to gray, slightly harder, has a tighter grain, and resists water better because its pores are naturally plugged.

Is red oak real oak?

Yes. Red oak and white oak are both true oaks. They’re two different groups of oak species, which is why they look and perform a little differently.

Red oak vs white oak cabinets: which is better?

Both make sturdy cabinets. White oak suits modern and natural-wood kitchens, while red oak works well for warm, traditional styles and takes dark stains evenly. Choose the one that matches your floors and the look you want.
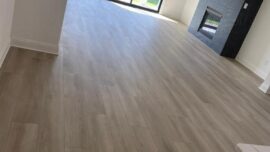
Shaw Oak Grove Baywood Brown laminate flooring in Prosper TX
About Floors, Floor Care, Hardwood Flooring, How-to

How to Clean Engineered Hardwood Floors (Without Damaging Them)

The quick answer

Sweep or vacuum (hard-floor setting, beater bar off) a few times a week, and damp-mop with a pH-neutral hardwood cleaner on a well-wrung microfiber pad.

Skip steam mops, vinegar, oil soaps, wax and soaking-wet mops. Too much water and heat are the two things engineered wood dislikes most.

Engineered hardwood is one of the best things you can put in a North Texas home: real wood on top, a stable core underneath, and a look that makes every room feel finished. The good news is that keeping it beautiful takes a few minutes a week and the right two or three tools, not a closet full of products. Here’s the routine our installers recommend to homeowners in Frisco, Plano and Prosper, plus straight answers to the “can I use…?” questions we hear most.

Why engineered hardwood needs a gentle touch

Every engineered plank has a thin layer of real hardwood, called the wear layer, bonded to a layered core. The wear layer is protected by a factory finish. Your cleaning routine has one job: protect that finish so the wood underneath never gets exposed. Harsh chemicals dull it, grit scratches it, and water or steam can slip into the seams and swell the edges. Want the full picture of how the layers work? See how engineered wood flooring is made.


“Can I use…?” The quick-verdict table

Product or tool Verdict Why
pH-neutral hardwood cleaner ✅ Yes Cleans without dulling the finish. Use the one your floor’s manufacturer recommends when possible.
Microfiber dust mop ✅ Yes Grabs the grit that causes fine scratches. Your best daily tool.
Vacuum (hard-floor mode) ✅ Yes Turn the beater bar or brush roll off. Spinning bristles can scuff the finish.
Robot vacuum ✅ Yes Great for daily grit. Use soft wheels and hard-floor mode.
Spray mop with wood cleaner ✅ Yes, lightly Fine with a hardwood-safe formula. Mist; don’t puddle.
Castile soap ⚠️ Only very diluted It can leave a dulling film, and many manufacturers don’t recommend it. A pH-neutral wood cleaner is the safer choice.
Vinegar and water ⚠️ Not recommended Vinegar is acidic. Over time it can etch and dull the protective finish.
Robot mop / wet mop ⚠️ Lowest water setting only Only if your flooring manufacturer approves it. Too much water seeps into seams.
Steam mop ❌ No Heat plus moisture can swell plank edges, weaken adhesives and void many warranties.
Oil soaps, wax or furniture polish ❌ No They build up a slippery, cloudy film and can make a future recoat harder.
Bleach, ammonia, abrasive pads ❌ No Too harsh for the finish. They can strip, haze or scratch it.

How to damp-mop engineered hardwood, step by step

  1. Remove the grit first. Dust-mop or vacuum the whole floor. Mopping over sand and crumbs just drags them across the finish.
  2. Mix or grab a pH-neutral hardwood cleaner. Follow the label. More cleaner doesn’t mean cleaner floors; it means residue.
  3. Use a microfiber flat mop, wrung out well. It should feel barely damp to the touch, never dripping.
  4. Work with the grain. Mop in the direction the planks run, a few boards at a time, starting at the far wall and working toward the door.
  5. Swap or rinse the pad when it looks dirty. A dirty pad just moves grime around.
  6. Let it air-dry in minutes. If the floor is still wet after 2–3 minutes, you used too much liquid. Dry it with a clean microfiber cloth.

Your easy cleaning routine

Daily, or as needed
Dust mop + wipe spills

Two minutes with a microfiber dust mop in the kitchen and entry. Wipe spills right away.

Weekly
Vacuum + spot damp-mop

Vacuum in hard-floor mode, then damp-mop high-traffic paths like the kitchen and hallways.

Monthly
Whole-floor damp mop

Mop every room, shake out the entry mats and check furniture felt pads.

Every few years
Screen and recoat

When the finish looks dull in traffic lanes, a fresh coat of finish restores the shine without sanding.

Is castile soap safe for hardwood floors?

Castile soap is a popular natural cleaner, and a very diluted mix (a few drops in a bucket of warm water) won’t ruin a floor. The catch is that soap tends to leave a thin film behind. On engineered and solid hardwood, that film slowly dulls the finish and can show footprints. Many flooring manufacturers recommend a pH-neutral hardwood cleaner instead. If you love castile soap, save it for occasional spot cleaning, and use a dedicated wood cleaner for regular mopping.

Can you steam mop engineered hardwood?

We recommend against it. A steam mop pushes hot moisture down into the seams between planks. Over time that can swell the edges, weaken the bond between the wood layer and the core, and cloud the finish. Many engineered hardwood warranties specifically exclude steam damage. A barely damp microfiber mop with a hardwood cleaner gets the floor just as clean without the risk.

🛠️
Crew tip: know your finish

Most engineered floors have a factory urethane or aluminum-oxide finish, and everything in this guide applies to them. Some European-style floors have an oiled finish instead, which needs its own soap and periodic re-oiling. Not sure which you have? Check your warranty care guide. If we installed your floor, just ask and we’ll send it over.

Spill emergency: what to do in the first five minutes

  1. Blot, don’t wipe. Press a dry towel onto the spill to soak it up without spreading it into more seams.
  2. Clean the spot. Use a cloth lightly dampened with your hardwood cleaner. For sticky spills, let the cleaner sit for a few seconds first.
  3. Dry it completely. Finish with a dry microfiber cloth, paying attention to the edges of each plank.
  4. Watch the seams for a few days. Raised or cupped edges mean water got underneath. Call your installer early, because small problems are easier to fix.

For pet accidents, blot first, then use an enzyme cleaner labeled safe for finished wood floors, followed by your regular hardwood cleaner.

Protect your floors between cleanings

Furniture
Felt pads everywhere

Chairs, tables and stools. Replace pads when they get thin or gritty.

Entryways
Mats inside and out

Most scratches start as tracked-in sand. Choose mats without rubber or latex backing, which can discolor some finishes.

Climate
Keep humidity at 35–55%

North Texas swings from humid summers to dry heated winters. A humidifier in winter helps prevent gaps.

Pets
Trim those nails

Short nails mean fewer scratches. Add rugs where the dogs love to sprint.

Sunlight
Rotate rugs

Sun gently changes wood color over time. Moving rugs now and then keeps it even.

When cleaning isn’t enough

Even well-loved floors eventually lose a little shine in the busiest paths. That’s normal, and it’s fixable. A screen and recoat lightly buffs the existing finish and adds a fresh protective coat, usually in a day. Deeper scratches can often be sanded and refinished, depending on how thick your wear layer is. If you’re weighing a refresh against new floors, our guide to hardwood vs engineered vs laminate walks through the options, and our team can take a look at your floors in person.

Floors looking tired? Let’s bring them back.

From recoats to brand-new engineered hardwood, we serve Frisco, Plano, Prosper and across North Texas. In-home estimates are always free.

Book my free in-home estimate

Frequently asked questions

What is the best thing to clean engineered hardwood floors with?

A pH-neutral hardwood floor cleaner on a microfiber mop. Ideally, use the cleaner your flooring manufacturer recommends, since it’s made for that finish and keeps your warranty happy.

How often should I mop engineered hardwood?

Damp-mop high-traffic areas about once a week and the whole floor about once a month. Dust-mop or vacuum more often, because removing grit is what prevents scratches.

Can I use a Swiffer on engineered hardwood?

Dry dusting cloths are great. Spray-style mops are fine if you use a wood-safe cleaner and mist lightly instead of soaking the floor.

How do I make engineered hardwood shine again?

Skip polishes and waxes, which build up a cloudy film. Start with a thorough clean using a hardwood cleaner. If it still looks dull, the finish is worn, and a professional screen and recoat restores the shine.

Is cleaning engineered hardwood different from solid hardwood?

The routine is the same: dry clean often, damp-mop gently, and avoid steam and harsh chemicals. Because engineered wear layers are thinner than solid boards, it’s even more important to protect the finish and avoid abrasive tools.

Does water damage engineered hardwood?

Quick spills wiped up promptly won’t hurt it. Standing water, leaks and repeated over-wet mopping can swell the edges and damage the core, so dry spills fast and keep mops barely damp.

Hardwood vs Vinyl Flooring Cost: Affordable Options

How Much Cost to Install Hardwood Floor (Hardwood vs. Vinyl Cost Guide)

Many homeowners begin their flooring research by asking one key question: how much cost to install hardwood floor compared to other options like vinyl. Flooring impacts the look, feel, and long-term value of your home, so understanding true cost ranges is essential before making a decision. This guide breaks down hardwood and vinyl pricing so you can confidently budget for your next project.

Understanding Hardwood and Vinyl Flooring Options

Before comparing how much cost to install hardwood floor versus vinyl, it helps to understand what sets these materials apart. Hardwood is a natural, timeless material valued for its beauty and longevity. Vinyl flooring, on the other hand, is synthetic, versatile, and budget-friendly, making it a popular alternative.

Key Differences

  • Material: Hardwood is natural wood; vinyl is a durable synthetic.
  • Design: Hardwood offers unique natural grains; vinyl can mimic wood, stone, or tile.
  • Cost: Hardwood is generally more expensive; vinyl is more budget-conscious.

Material Costs: Hardwood vs. Vinyl Flooring

One of the biggest factors in determining how much cost to install hardwood floor is the material itself. Hardwood flooring typically ranges from $6–$12 per sq. ft. depending on species (oak, maple, hickory, exotic woods, etc.). Premium options or wide planks may cost even more.

Vinyl flooring remains the more affordable choice, usually $2–$7 per sq. ft. Luxury vinyl products (LVP, LVT) may reach the higher end of that range but still cost less than hardwood.

Cost Comparison

  • Hardwood: $6–$12 per sq. ft.
  • Vinyl: $2–$7 per sq. ft.

Vinyl clearly provides cost savings upfront, but hardwood adds long-term value and can increase home resale appeal.

For homeowners wanting general industry averages, HomeAdvisor provides helpful ranges.

how much cost to install hardwood floor

Installation Costs and Process

Installation plays a major role in determining how much cost to install hardwood floor. Hardwood installation is labor-intensive and requires professional expertise, which increases final pricing. Depending on complexity, installation averages $4–$8 per sq. ft.

Vinyl installation is simpler—often using glue-down or click-lock systems—bringing costs down to $1–$3 per sq. ft.

Important Installation Notes

  • Hardwood: Skilled labor required; higher cost and longer installation timeline.
  • Vinyl: Faster installation, lower labor cost.

Maintenance and Long-Term Costs

Maintenance also influences how much cost to install hardwood floor over its lifetime. Hardwood may require refinishing every 7–10 years depending on wear, which can cost anywhere from $3–$7 per sq. ft.

Vinyl requires minimal upkeep—routine sweeping and mopping usually suffice. There is no refinishing, and damaged planks must be replaced, but overall long-term care is affordable.

Maintenance Breakdown

  • Hardwood: Occasional refinishing, periodic polishing.
  • Vinyl: Low-maintenance, water-resistant.

Durability and Lifespan

Hardwood is prized for its longevity—well-maintained hardwood can last 30 years or more, making the investment worthwhile. Vinyl typically lasts 10–20 years, depending on thickness and quality.

Lifespan Highlights

  • Hardwood: Extremely durable; can be refinished multiple times.
  • Vinyl: Durable for everyday use but not refinishable.

Aesthetic Appeal and Design Options

Hardwood offers unmatched natural beauty and warm tones that elevate any room. Vinyl flooring provides excellent design versatility, including wood-look and stone-look options at a fraction of the cost.

Design Features

  • Hardwood: Natural texture, premium appearance.
  • Vinyl: Wide range of colors and patterns.

Environmental Impact

Hardwood sourced responsibly can be an eco-friendly choice due to its renewable nature. Vinyl is synthetic and petroleum-based, but today’s low-VOC vinyl provides safer indoor air quality than older versions.

Eco-Friendly Considerations

  • Hardwood: Renewable, sustainable when sourced properly.
  • Vinyl: Low-VOC options available.

Room Suitability and Lifestyle Needs

Hardwood works beautifully in living rooms, bedrooms, and hallways. Vinyl excels in moisture-prone spaces like kitchens, bathrooms, and basements. Your lifestyle and room usage should guide the decision.

Where Each Works Best

  • Hardwood: Best in dry rooms where longevity matters.
  • Vinyl: Best in kitchens, baths, laundry, and basements.

How Much Cost to Install Hardwood Floor? Final Comparison

If you’re trying to determine how much cost to install hardwood floor versus vinyl, consider the full picture—materials, installation, maintenance, durability, and long-term value. Hardwood costs more upfront but offers long-lasting beauty and resale benefits. Vinyl remains a top choice for affordability and practicality.

Key Takeaways

  • Hardwood has higher initial costs but exceptional longevity.
  • Vinyl is budget-friendly with low installation and maintenance costs.
  • Your choice should reflect lifestyle, room type, and long-term plans.

Choosing the Best Flooring for Your Budget

When comparing flooring choices, remember that how much cost to install hardwood floor depends on material grade, installation complexity, and long-term care. Both hardwood and vinyl offer excellent solutions depending on your needs.

For more detailed guidance, visit our Hardwood Flooring page for expert insights and product options.

Ready to Upgrade Your Home?

Schedule a free in-house estimate today and let our team help you choose the right flooring solution for your home.

Request an In-House Estimate

A Simple Guide to Carpet Padding and Why Your Home Needs It

A Simple Guide to Carpet Padding and Why Your Home Needs It

Carpet padding is one of the most important parts of a carpet installation, even though it stays hidden under the surface. Many homeowners focus on the color, style, or softness of the carpet itself, but carpet padding is what creates most of the comfort under your feet. When you know how carpet padding works and why it matters, it becomes easier to choose the right materials for your home.

Why Carpet Padding Is Necessary

The main role of carpet padding is to act as a cushion between the carpet and the floor. This cushion helps soften each step, protects the backing of the carpet, and helps reduce stress on the fibers. Without dependable carpet padding, the carpet would flatten quickly, show wear sooner, and feel much less comfortable.

Good carpet padding also helps with sound control. It absorbs noise so footsteps do not echo or travel through the floor as much. This makes bedrooms, living rooms, and upstairs spaces feel calmer and quieter. Another benefit is insulation. The cushion layer adds warmth and helps keep floors from feeling cold, especially in winter.

How Carpet Padding Wears Out Over Time

All materials break down with age, and carpet padding is no different. Daily foot traffic slowly flattens the cushion, even in homes without heavy use. Once the padding becomes compressed, it no longer supports the carpet. You may begin to notice soft spots, crunching sounds, uneven areas, or wrinkles. These early signs often mean the cushion layer has reached the end of its lifespan.

Moisture can also damage the material. Spills, pet accidents, or water from cleaning can soak into the cushion. When moisture reaches the lower layers, odors may stay trapped even after cleaning. In those cases, replacing the worn material is usually the best solution.

How Long Carpet Padding Usually Lasts

The chart below shows the typical lifespan of different types of carpet padding. The actual life depends on traffic levels, room use, and the quality of the carpet placed over it.

Type of Carpet Padding Typical Lifespan Notes
Rebond Padding 8–12 years Common, budget-friendly choice made from recycled foam.
Memory Foam Padding 10–15 years Soft feel with strong comfort for bedrooms.
Rubber Padding 15–20 years Very durable and stable in high-traffic spaces.
High-Traffic Areas Shorter lifespan Pressure causes cushion layers to break down faster.
Low-Traffic Areas Longer lifespan Less daily wear extends performance.

What Rebond Is Made Of

Rebond is one of the most widely used materials in homes. This type of carpet padding is created from pieces of recycled foam that are blended and bonded together. The mixed colors you see inside the cushion come from different types of foam scraps. This gives the material a firm and springy feel while keeping the cost affordable.

Rebond cushions come in a range of densities, usually measured in pounds. A higher pound rating means the material is firmer and more supportive. Many homes use an 8-pound cushion, but some choose a thicker version for rooms that need more comfort.

Why Density and Thickness Matter

The density of carpet padding affects how much support the carpet receives. Higher density helps the floor feel more stable and keeps the carpet fibers from crushing. Thickness also plays a role, but thicker is not always better. Some carpet styles are designed to work with a firmer and slightly thinner cushion to prevent movement or stretching.

In general, plush carpets work well with softer cushion layers, while looped styles do better with firm support. Your flooring professional can help guide the right pairing for your space.

What Happens if You Skip Carpet Padding

If you install carpet without the right cushion layer, it will not last long. The fibers will wear out faster because they take all the pressure from footsteps. The carpet may also slide or wrinkle because there is no support holding it in place. Rooms will feel noisier and colder, and the carpet may lose its shape within a short time.

Using proper carpet padding is one of the best ways to protect your flooring investment and make sure your home feels comfortable.

Internal and External Resources

For homeowners comparing premium options such as Napa or Coronado, here is a helpful internal resource: Napa vs. Coronado Carpet Padding Comparison. This guide explains how different cushion types perform and which rooms they work best in.

For industry standards, the Carpet and Rug Institute also provides guidance on cushion recommendations. You can view their information here: Carpet & Rug Institute.

Frequently Asked Questions

Can I reuse my current carpet pad?

Most professionals do not recommend reusing older material. Over time, it breaks down and becomes uneven, which can shorten the life of your new carpet.

Does thicker cushion always mean more comfort?

Not always. Some carpets need firm support to stay stable and avoid stretching.

How can I tell when my cushion layer needs replacing?

Signs include soft spots, ripples, bad odors, or a crunching sound when you walk across the floor.

Is the cushion layer important for sound control?

Yes. A quality base layer helps absorb noise and makes rooms feel quieter.

What type works best for rooms with pets?

Moisture-resistant options help prevent odors and protect your flooring.

Final Thoughts

Choosing the right carpet padding makes your home feel softer, quieter, and more comfortable. It also helps your carpet last longer and look better. When you understand how carpet padding works, what it is made of, and when it should be replaced, you can make confident decisions and keep your floors performing well for many years.

Ready to Upgrade Your Home?

Schedule a free in-house estimate today and let our team help you choose the right flooring solution for your home.

Request an In-House Estimate

Carpet rolling over carpet pad
About Floors, Carpet Flooring, Floor Care, Uncategorized

Carpet Pad Guide: Types, Benefits, and How to Choose

The Complete Carpet Pad Guide for Your Home

A carpet pad plays a major role in how your carpet feels, how long it lasts, and how well it performs. Many people focus only on carpet style or color, but the layer underneath matters just as much. In this guide, we explain what a carpet pad does, why it helps protect your carpet, and how to choose the best one for your home. We also compare popular options such as Napa, Coronado, SmartCushion, and rebond choices.

What a Carpet Pad Does and Why It Matters

A carpet pad sits between the carpet and the floor. Its purpose is simple: add comfort, reduce wear, and support the carpet backing. When you step on carpet, most of the softness you feel comes from the carpet pad. It absorbs impact and helps slow down damage to the carpet fibers.

This cushion layer also reduces sound between floors and helps the home feel quieter. Some versions include moisture protection or antimicrobial features. These details help prevent odors, slow mildew growth, and keep your home healthier. Without a strong carpet pad, even a high-quality carpet may wear out faster.

Important Features to Compare

Each type of carpet pad has features that affect comfort and durability. Here are the most important details to understand:

  • Thickness: Most options range from 0.30 to 0.50 inches. Thicker feels softer but may not be right for high-traffic areas.
  • Density: Higher density means better support and longer life.
  • Moisture Barriers: Helpful for families with pets or kids.
  • Antimicrobial Properties: Designed to help reduce odors and moisture issues.
  • Air Quality Certifications: These show the material is safe for indoor use.

When you understand these features, comparing each carpet pad becomes much easier.

Carpet Pad Guide for Your Home

Types of Carpet Pads and Their Benefits

This guide highlights four well-known options: premium foam, rubber, memory foam, and rebond. Each one supports carpet in a different way and is meant for specific needs.

Leggett & Platt Napa

The Napa option is a premium foam cushion known for comfort and high performance. It includes top and bottom moisture barriers plus antimicrobial protection. This makes it a strong choice for bedrooms, living rooms, and quiet spaces where softness matters.

Its thick support layer helps reduce sound and improves comfort under many carpet styles. For more details on how Napa compares to Coronado, you can read our earlier post about the Napa and Coronado carpet pads.

Leggett & Platt Coronado

Coronado is a durable rubber option built for strength and long life. Rubber pads stay firm, resist crushing, and hold their shape well. It includes antimicrobial features and a spill barrier, making it a reliable choice for busy areas.

This cushion works well on stairs, hallways, and high-traffic rooms. It also handles heat from radiant flooring, which makes it a great fit for homes with heated systems.

Mohawk SmartCushion

SmartCushion is a memory foam layer designed for comfort and support. It includes a moisture barrier and is certified for good indoor air quality. Many families choose it because it performs well in homes with pets and children.

Its soft feel makes it ideal for bedrooms, playrooms, and family spaces. You can view the full product specs here:
Mohawk SmartCushion Specifications.

Rebond Cushion

Rebond is made from recycled foam pieces and offers an affordable, reliable choice. It comes in many thickness and density options, so homeowners can balance comfort and price easily. While it may not offer the same luxury feel as premium materials, it works well in rental homes, guest rooms, and medium-traffic areas.

Carpet Pad Comparison Chart

The chart below compares all options so you can see the differences at a glance and choose the right carpet pad more easily.

Carpet Pad Type Material Comfort Level Durability Moisture Protection Best Use Cost Range
Leggett & Platt Napa Premium Foam Very High High Top + Bottom Moisture Barrier Bedrooms, living rooms, quiet spaces $$$$
Leggett & Platt Coronado Rubber High Very High Spill Barrier + Antimicrobial Stairs, hallways, high-traffic areas, radiant heat $$$
Mohawk SmartCushion Memory Foam Very High Moderate to High Moisture Barrier Homes with pets, family rooms, playrooms $$–$$$
Rebond Pad Recycled Foam Pieces Moderate Moderate Varies by model Rentals, guest rooms, low to medium traffic $–$$

Which Option Works Best for Your Carpet?

Choosing the right carpet pad depends on carpet type, room use, and how much comfort you want. Here is a simple guide:

  • Plush, soft carpet: Napa or Coronado works best for support and comfort.
  • High-traffic areas: Coronado offers the strongest durability.
  • Homes with pets: SmartCushion helps with spills and odors.
  • Rental or budget rooms: Rebond is dependable and affordable.
  • Moisture-prone rooms: Napa or SmartCushion with moisture protection is ideal.
  • Heated floors: Coronado works well with radiant systems.

Frequently Asked Questions

Is a carpet pad necessary?

Yes. A carpet pad protects the carpet backing, adds comfort, and helps the carpet last longer.

How thick should it be?

Most options work best between 0.30 and 0.50 inches. The right thickness depends on your carpet type and room use.

What is the best choice for stairs?

Coronado is a strong pick because it holds its shape and resists crushing.

Do I need moisture protection?

It helps in homes with pets, kids, or rooms where spills may happen.

What is the most budget-friendly option?

Rebond is usually the most affordable choice.

Final Thoughts

A carpet pad affects comfort, noise, and carpet life. When you choose the right one, you improve both performance and value. Whether you want luxury comfort, strong durability, pet-friendly protection, or a budget option, the right carpet pad can make a big difference throughout your home.

Ready to Upgrade Your Home?

Schedule a free in-house estimate today and let our team help you choose the right flooring solution for your home.

Request an In-House Estimate

Ensuring a High Quality Flooring Installation: The Importance of Proper Floor Preparation

Floating Floor Preparation and Manufacturer Requirements

Installing a floating floor, or any hard surface such as laminate, luxury vinyl plank (LVP), or engineered wood requires more than just selecting the right color and style. The most important step is proper floor preparation. Every flooring manufacturer specifies strict subfloor flatness requirements that must be met before installation begins. Without proper prep, even the best flooring products will fail over time.

Why Floor Prep Matters for All Flooring Types

Before a single plank or tile is laid, your subfloor must be flat, clean, and structurally sound. This rule applies to every flooring system—not just a floating floor. Subfloor irregularities create movement, gaps, noise, and long-term wear issues that void manufacturer warranties. Major brands like Shaw, Mohawk, and COREtec require subfloors to be within:

  • 3/16” flat over 10 feet or 1/8” over 6 feet.
  • Free of debris, moisture, and high or low spots.
  • Strong enough to support the flooring system without flexing.

Ignoring these guidelines can cause click-lock failure, hollow spots, cracked grout, or premature damage, issues that are preventable with the right prep.

Manufacturer-Approved Requirements

Each brand outlines its own installation instructions, but most follow a similar standard:

  • Shaw Floors: 3/16” in 10 ft flatness tolerance.
  • Mohawk: 1/8” in 6 ft flatness tolerance.
  • COREtec: 3/16” in 8 ft tolerance.
  • Mannington: 1/4” in 10 ft tolerance.
  • Armstrong: 3/16” in 10 ft tolerance.

These numbers may seem minor, but small dips or humps can compromise the entire installation. That’s why floating floors, known for their interlocking design, are especially sensitive to uneven surfaces.

What Happens Without Proper Prep?

A floating floor that’s installed over an unprepared surface can experience:

  • Plank separation or click-lock failure.
  • Squeaking and noise caused by shifting panels.
  • Uneven wear leading to warranty voids.
  • Moisture buildup under the underlayment.

For glue-down vinyl, tile, or hardwood, the same rules apply. Without flatness, adhesives fail, grout lines crack, or boards flex underfoot. In other words—floor prep isn’t optional; it’s mandatory for every flooring type.

Common Floor Prep Challenges

We often discover hidden issues once demo begins, especially when older floors or multiple layers have been installed. Typical problems include:

  • Uneven concrete slabs or plywood seams.
  • Old thinset, adhesive residue, or patchwork repairs.
  • Termite or moisture damage beneath previous flooring.
  • Construction debris, drywall mud, or paint buildup.

Even new construction homes can have high or low spots due to framing, plumbing runs, or poor slab pours. Regardless of age, the slab’s flatness determines the success of your installation.

How Float Compound Is Used

At GC Flooring Pros, we use professional-grade float compound to smooth irregularities. Each 25-lb bag costs $65 (including materials + labor). On average, a 1,000 sq ft area may require 8–12 bags or around $520–$780 total. The exact amount depends on the condition of your subfloor, as some rooms may need only touch-ups while others require extensive floating.

This process ensures the floor meets manufacturer flatness tolerances. We float to make the floor flat, not to make the house level. Leveling addresses structural movement, something handled by a framer or concrete specialist if needed.

Floor Prep Across Flooring Types

Floating Floors (Laminate, LVP, Engineered Click-Lock)

Depend on a flat foundation for tight locking seams and noise-free performance. Even a 1/8” dip can cause failure.

Glue-Down Vinyl or Hardwood

Requires a smooth surface for adhesives to bond securely. Hollow sounds or lifting occur without it.

Nail-Down Hardwood

Irregular subfloors create bounce and deflection, stressing the tongue-and-groove joints over time.

Tile

One of the most demanding installations for flatness—any unevenness can crack tile or grout.

Why Floor Prep Can’t Be Fully Quoted Before Demo

We provide a good faith estimate to determine the average amount of bags you may expect for the size of the area where we’ll install. However, this estimate is affirmed based on years of experience and is not guaranteed. Until we remove the existing flooring, we can’t see what’s underneath. Hidden issues like old adhesive, damaged underlayment, or moisture intrusion only appear once demo is complete. After removal, our team evaluates:

  • The overall flatness and high/low spots.
  • The soundness of the substrate.
  • Moisture readings using professional testing tools.

This approach ensures accuracy and transparency by having the benefit of knowing your expected end bill. You only pay for the amount of floor prep that’s truly necessary for your floating floor or any other installation. If we overestimate, we reduce the final invoice on copletion.

The Bottom Line: Flat Floors Equal Long-Lasting Floors

Proper floor prep is the foundation of every successful project. A flat surface supports the locking systems in floating floors, the adhesive bonds in glue-down vinyl, and the grout joints in tile. Skipping or minimizing prep may save short-term costs but leads to long-term repairs and warranty loss.

At GC Flooring Pros, we follow each manufacturer’s installation standards to guarantee that your floors perform exactly as intended—flat, stable, and built to last.

Start Your Flooring Project the Right Way

Every great floor starts beneath the surface. If you’re considering a floating floor installation or any hard surface flooring, we’ll assess your subfloor and explain what’s required for a perfect finish. Click here to schedule your in-home estimate with GC Flooring Pros.

Want to learn more about manufacturer standards? Visit FlooringStores’ guide on floating floor installation for additional insights.