Tips & Tricks

Newly installed porcelain tile flooring in a residential laundry room.
Floor Care, Hardwood Flooring, House Renovation, Laminate Flooring, Tile Flooring, Tips & Tricks, Uncategorized, Vinyl Flooring

Types of Flooring: How to Choose the Right Floor and Installation Method

Types of Flooring: How to Choose the Right Floor and Installation Method

Choosing between the different types of flooring is about more than deciding whether you like hardwood, luxury vinyl plank, laminate, tile, or carpet.

You also need to think about how the floor will be installed.

That decision can affect:

  • How long installation takes
  • How much preparation your existing floor needs
  • How permanent the new floor will be
  • How difficult it will be to remove later
  • Whether your baseboards need to be removed or adjusted
  • Whether door jambs and casings need to be undercut
  • How much the finished floor raises the height of the room
  • How easy individual boards are to repair or replace in the future

Two homeowners can choose floors that look almost identical and end up with very different projects depending on whether those floors are floated, glued, nailed, or installed over a completely removed existing floor. If you are planning a flooring project, it helps to start with two questions:

What type of flooring fits the room?

And:

How permanent do I want this installation to be?

This guide explains both.

What Are the Main Types of Flooring?

Most homeowners shopping for new flooring will encounter several major categories.

Flooring Type Common Uses Common Installation Methods General Character
Luxury vinyl plank or tile Living areas, kitchens, bedrooms and many moisture-prone spaces Floating or glue-down Practical and versatile
Laminate Living rooms, bedrooms, offices and general residential areas Usually floating Budget-conscious and fast
Engineered hardwood Living areas, bedrooms and upscale interiors Floating, glue-down or nail-down depending on product Premium with installation flexibility
Solid hardwood Living areas, bedrooms and long-term homes Usually nail/staple-down; some systems use adhesive assistance Permanent and traditional
Tile Bathrooms, kitchens, entries and other appropriate areas Mortar/thin-set Durable and permanent
Carpet Bedrooms, living spaces and offices Stretch-in or glue-down depending on application Soft and comfortable

The important thing to understand is that flooring type and installation method are not always the same decision.

For example, engineered hardwood may be compatible with floating, glue-down, or nail-down installation depending on the specific product and substrate. With a floating installation, the planks connect to each other instead of attaching directly to the subfloor.”

That flexibility is why homeowners should consider the installation method before buying flooring, not after.

The Four Flooring Installation Approaches Homeowners Should Understand

While installation requirements vary between manufacturers and products, most residential projects can be understood through four broad approaches:

Floating, glue-down, nail-down, and mortar-set installation.

Each works best for a different type of homeowner and project.

1. Floating Flooring: Best for Speed and Future Flexibility

Installers do not fasten a floating floor directly to the subfloor. Instead, the planks connect to each other, commonly through a locking system, and the finished floor rests over the prepared substrate or approved underlayment.

This is common with many laminate and luxury vinyl plank products, as well as certain engineered hardwood floors.

Shaw Endura Plus White Sand laminate flooring installed in a Frisco TX bedroomWho Is a Floating Floor Best For?

Think of floating flooring as the choice for the homeowner who says:

“I want a good-looking floor, I want the project moving quickly, and I am not necessarily married to this house or this exact floor forever.”

That does not mean floating flooring is temporary or low quality. Quality varies enormously between products.

It means the installation itself generally involves fewer permanent attachments to the structure.

If you expect to remodel again, change styles in several years, sell the house, or simply value flexibility, a floating floor can make a lot of sense.

How Fast Is Floating Floor Installation?

Among common plank-flooring methods, floating installation can often be one of the faster options because installers do not have to spread adhesive across the entire floor or mechanically fasten every plank.

Actual project time still depends on factors such as:

  • Furniture removal
  • Existing flooring demolition
  • Floor leveling
  • Moisture conditions
  • Layout complexity
  • Closets and hallways
  • Transitions
  • Baseboard work
  • Product acclimation requirements

The floor may be quick to click together, but preparation still matters.

A fast installation over a poorly prepared substrate is not a good installation.

What Happens If You Want to Replace a Floating Floor Later?

Easier future removal is one of the biggest advantages of a floating floor. Because many floating systems do not attach permanently to the substrate, future remodeling can require less demolition. Still, homeowners should not assume every floating floor can be dismantled and reused.

How Floating Floors Affect Baseboards

Floating floors normally require room around the perimeter for movement according to the flooring manufacturer’s specifications.

That space has to be concealed.

One approach is to remove the existing baseboards before installation and reinstall them over the finished flooring.

Another is to leave the baseboards in place and add an approved trim detail such as shoe molding or quarter round where appropriate.

For homeowners who want the cleanest finished appearance, removing and reinstalling or replacing the baseboards is often worth discussing during the estimate.

What About Door Jambs?

Door jambs and casing are another important detail.

Instead of cutting flooring around a door casing and leaving visible gaps, installers commonly undercut the casing or jamb where appropriate so the new flooring can extend underneath it.

The thickness of the new flooring and underlayment matters.

Changing from a thin existing floor to a thicker flooring system can also reduce clearance beneath doors.

That is why finished floor height needs to be evaluated before installation begins.

2. Glue-Down Flooring: Best for Homeowners Who Want a More Permanent Installation

With glue-down flooring, an approved adhesive attaches the flooring directly to the prepared substrate.

Glue-down installations are common with certain luxury vinyl products and engineered hardwood floors.

Who Is Glue-Down Flooring Best For?

The glue-down homeowner tends to say:

“I plan to keep this floor for a long time, and I want it firmly integrated with the house.”

This is less about speed and more about commitment.

Glue-down floors can provide a firm feel underfoot and may be appropriate for applications where a floating system is not preferred or permitted.

The specific flooring and adhesive must always be compatible with the substrate and manufacturer requirements.

How Fast Is Glue-Down Installation?

Usually, glue-down projects involve more installation steps than a basic floating installation.

The installer may need to:

Prepare and flatten the substrate, address moisture requirements, apply adhesive correctly, maintain the appropriate working time, place the material and follow product-specific curing or traffic instructions.

With wood flooring in particular, adhesive choice and moisture conditions matter. Industry guidance emphasizes matching the adhesive system to the flooring, substrate, and moisture conditions rather than assuming every wood floor can simply be glued down.

The actual installation speed therefore depends heavily on the floor being installed.

What Happens When You Want to Remove It?

Future remodeling deserves extra consideration with glue-down flooring. Removing an adhered floor usually takes more effort than dismantling a floating system and may require scraping, mechanical tools, adhesive removal, and additional substrate preparation.

If you already know you change interior styles frequently, that should be part of your decision.

If you want a floor that feels more permanent and do not expect to replace it anytime soon, the additional commitment may not bother you at all.

How Does Glue-Down Affect Baseboards and Door Jambs?

Baseboard decisions depend primarily on flooring thickness, required perimeter clearances, existing trim and the desired finished appearance.

Door jamb height also needs to be considered.

Even when a floor is directly adhered, adding a thicker flooring system can change the finished elevation enough to affect door clearance and transitions into neighboring rooms.

3. Nail-Down Flooring: Best for the Long-Term Hardwood Homeowner

Nail-down or staple-down installation is strongly associated with hardwood flooring.

The flooring is mechanically fastened to an appropriate wood substrate.

In some applications, particularly with wider wood planks, an installation may combine mechanical fasteners with adhesive according to manufacturer and industry requirements. Current wood-flooring guidance includes nail-down, glue-down, floating, and assisted installation methods rather than treating every hardwood installation the same way.

Who Is Nail-Down Flooring Best For?

This is for the homeowner whose attitude is:

“I love real wood, I expect this floor to stay here, and I am investing in the house long term.”

Traditional hardwood is not usually chosen because someone wants the easiest floor to remove five years later.

It is chosen because the homeowner wants a substantial, long-term flooring system.

How Fast Is Nail-Down Installation?

Nail-down installation can be efficient in the hands of an experienced hardwood crew, but it generally requires more individual fastening than assembling a click-lock floating floor.

Project time also depends heavily on:

Subfloor condition, hardwood acclimation requirements, plank width, room layout, fastening specifications and whether glue assistance is required.

The manufacturer’s installation instructions ultimately determine what fastening system and schedule are appropriate for a particular product.

What Happens If You Change It Later?

Nail-down floors can be removed, but they are not designed around easy future demolition.

Boards have been mechanically attached to the subfloor, so removing them is more labor-intensive than dismantling many floating systems.

That added commitment does not make nail-down flooring inferior—it simply suits a different homeowner. Someone who values permanence may gladly accept more difficult future demolition in exchange for the hardwood installation they want today.

Baseboards and Door Jamb Height

Hardwood thickness makes planning especially important.

If you are replacing a thinner floor with thicker hardwood, installers need to evaluate transitions, doors, baseboards, cabinets and other fixed elements. Adding new flooring on top of an existing floor can increase overall elevation enough to create issues with interior or exterior doors, appliances, cabinets and stairs.

For that reason, the question should not simply be:

“Can we install over this floor?”

A better question is:

“What will the finished floor height be if we do?”

4. Tile and Mortar-Set Flooring: Best for Homeowners Thinking Long Term

Newly installed porcelain tile flooring in a residential laundry room. Tile is a different category from click-together plank flooring.

Ceramic, porcelain, stone and similar materials are typically bonded to a properly prepared surface using an appropriate mortar or setting material.

Who Is Tile Best For?

The tile homeowner usually says:

“I want durability, I am willing to spend more time on installation, and I do not plan to change this floor casually.”

Tile can be an excellent solution in the right room and under the right conditions, but it is not usually the flooring you select because you want the easiest demolition later.

How Fast Is Tile Installation?

Compared with many floating-floor projects, tile is usually more labor intensive.

Installation may involve:

Substrate preparation, layout, cutting, mortar application, setting, curing, grouting, cleanup and transition work.

Patterns, large-format tile, small rooms with many cuts and substrate correction can all increase the project timeline.

What Happens When You Want to Remove Tile?

Tile demolition can be significant.

The tile itself has to be broken or removed, and the underlying setting material may also need to be mechanically removed or flattened before another floor is installed. That makes tile a good example of why homeowners should think about the entire life cycle of the floor, not simply the day it goes in.

Which Flooring Installation Method Matches Your Personality?

Flooring decisions get easier when you stop asking which method is universally “best.”

There is no universally best installation method.

There is a best method for a particular product, substrate, home and homeowner.

Your Personality Installation Direction to Consider Why
“I am in a rush.” Floating Often faster with fewer permanent attachment steps
“I may move in a few years.” Floating Generally offers more future flexibility
“I change my style all the time.” Floating Future removal can be less involved
“This is my long-term house.” Glue-down, nail-down, tile or an appropriate permanent system Future demolition is less important
“I want real hardwood.” Nail-down, glue-down or approved floating engineered hardwood Depends on flooring construction and substrate
“I care about a solid, attached feel.” Glue-down or nail-down where appropriate Flooring is attached to the substrate
“I want the easiest future remodel.” Often floating Usually less attachment to remove
“I want something permanent.” Glue-down, nail-down or tile Designed with a longer-term installation mindset

These are decision-making guidelines, not substitutes for product specifications.

A manufacturer may require one installation method and prohibit another.

The product, substrate, moisture conditions and installation instructions always come first.

How Flooring Installation Speed Really Works

Homeowners often ask:

“How long will it take to install my floor?”

The installation method is only part of the answer.

Consider two identical 1,000-square-foot homes. One has a clean, flat substrate with the furniture already removed. The other has tile that needs demolition, several low and high spots, large furniture, complicated doorways and baseboards that need replacement. Even if both homeowners buy the exact same flooring, those projects will not take the same amount of time.

The biggest variables are often what happens before the first plank goes down.

That includes demolition, substrate preparation, moisture evaluation, leveling or flattening, furniture movement, trim work and layout. When comparing flooring estimates, ask what preparation is included instead of comparing installation speed alone.

Should You Remove the Existing Flooring or Install Over It?

Sometimes a new flooring system can be installed over an existing surface.

That does not automatically mean it should be.

Keeping the existing floor may reduce demolition, but it can create another issue:

height.

Every layer you add raises the finished floor.

That can affect:

  • Door clearance
  • Door jambs
  • Baseboard proportions
  • Transitions between rooms
  • Appliances
  • Cabinets
  • Exterior doors
  • Stair geometry

Industry guidance specifically warns that installing over existing floor coverings changes floor elevation and can create problems around doors, cabinets, appliances and stairs.

This is why demolition should be evaluated as part of the complete flooring system instead of automatically being treated as an expense to avoid. Sometimes removing the old floor gives you a cleaner starting point and better height alignment. In other situations, keeping a suitable existing floor may make sense. The right answer depends on what is already there and what is going on top of it.

How New Flooring Affects Baseboards

Baseboards are one of the most overlooked parts of flooring planning.

There are generally two approaches.

The existing baseboard can remain and an appropriate molding detail can cover the perimeter, or the baseboard can be removed and reinstalled or replaced after the new floor is installed. Removing baseboards can create a cleaner appearance, particularly when homeowners do not want additional quarter round or shoe molding. However, baseboard removal adds labor and may require paint touch-ups or replacement if older trim is damaged during removal.

Floor thickness matters too.

If your old flooring is substantially thicker than your new flooring, removing it may expose paint lines or gaps below existing baseboards. If the new flooring raises the floor significantly, the proportions of the existing baseboard can change visually. Trim planning should therefore happen before demolition starts.

How New Flooring Affects Door Jambs and Door Height

Doorways are another place where floor thickness becomes obvious.

A professional installation should consider how the flooring meets the door casing and jamb—not simply stop the planks nearby and fill the area with caulk.

Where appropriate, casings and jambs may be undercut so flooring can extend underneath them for a cleaner appearance.

The installer also needs to check the door itself.

If the new flooring assembly is thicker than the old one, the bottom of the door may no longer have adequate clearance.

That is especially important when:

Installing flooring over existing flooring, adding thicker underlayment, switching from thin flooring to hardwood or creating transitions between rooms with different flooring heights.

Flooring is not just a two-dimensional surface.

Every flooring project has a finished elevation.

That elevation needs to work with everything already attached to the house.

Think About the Next Flooring Project Before Starting This One

One of the smartest questions you can ask before installing new flooring is:

“What happens when I eventually want to remove this?”

If you are remodeling a starter home, expect to move, or like changing your interiors regularly, a floating system may offer the flexibility you value.

If this is your long-term home and you want a substantial hardwood installation, future demolition may barely matter to you.

If you are installing tile because you expect it to remain for decades, spending more time on substrate preparation and installation makes sense.

There is no wrong personality.

The mistake is choosing a permanent installation when you wanted flexibility—or choosing primarily for speed when you wanted the feel and characteristics of a more permanently attached system.

Floating vs. Glue-Down vs. Nail-Down Flooring

Here is the simplest way to compare the major plank-floor installation methods.

Factor Floating Glue-Down Nail-Down
Attached directly to subfloor? No Yes Yes
Typical installation speed Often faster Moderate Moderate
Future removal Usually easier More difficult More difficult
Commitment level Lower Higher Higher
Substrate preparation important? Yes Yes Yes
Floor height planning important? Yes Yes Yes
Door jamb planning required? Yes Yes Yes
Baseboard/trim planning required? Yes Yes Yes
Common flooring examples LVP, laminate, some engineered hardwood LVP, engineered hardwood Hardwood
Best personality fit Flexible, fast-moving homeowner Long-term homeowner Long-term hardwood homeowner

Remember that these are general comparisons.

Manufacturer requirements should determine the actual installation method used on your floor.

Which Type of Flooring Is Best for Your Home?

Choosing from the many types of flooring becomes easier once you answer a few practical questions.

How long do you expect to keep the floor?

How quickly do you need the project completed?

Are you comfortable with significant demolition the next time you remodel?

Do you want a floating floor or something permanently attached to the structure?

Will the new flooring increase the height of the room?

Should the existing baseboards stay, or would removing and reinstalling them create a better finish?

Will door jambs need to be undercut?

Will doors still open correctly after the finished floor is installed?

These questions can matter just as much as color, plank width and surface texture.

Plan Your Flooring Project With GC Flooring Pros

A good flooring project starts before installation day.

GC Flooring Pros can help you evaluate the flooring material, existing floor, substrate, installation method, transitions, baseboards and doorways together so you understand the complete project before work begins.

Whether you are considering a fast floating-floor installation or a more permanent hardwood, glue-down or tile system, the right choice should fit both your home and the way you plan to use it.

Contact GC Flooring Pros to discuss your flooring project and determine which flooring and installation approach makes the most sense for your space.

fall trends
Blog, Hardwood Flooring, Tips & Tricks

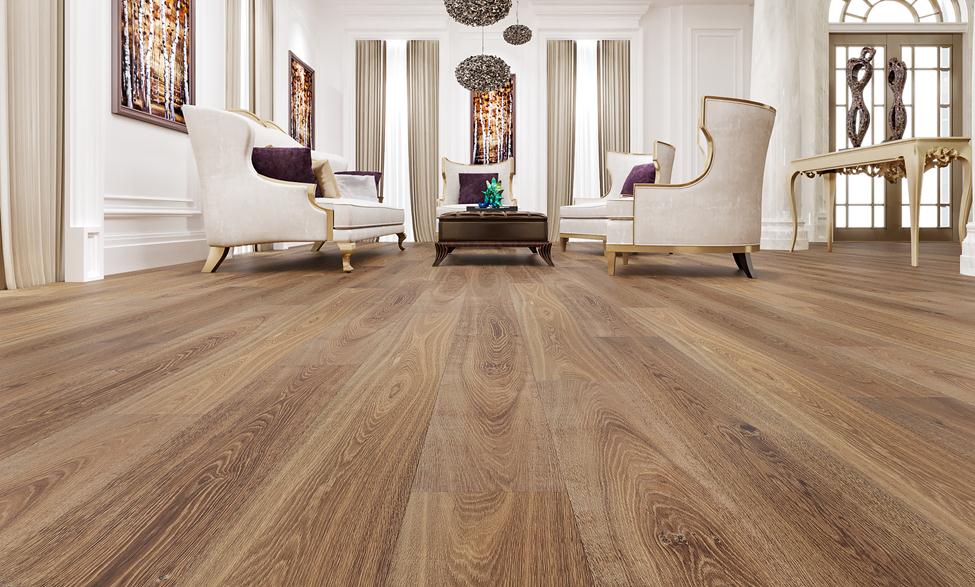
How To Match Wood Floor Colors To Walls (+ 7 Great Color Ideas)

How To Match Your Wood Floor Colors To Walls: Color Theory

Have you ever walked into someone’s home and instantly felt a sense of warmth, coziness, or drama? The way a room is designed and decorated can have a huge impact on how we perceive it. One of the most important elements in any room design is the color scheme. 

In this blog, we will discuss how (and why) to match wood floor colors to walls and provide you with 7 great color ideas that can transform your home into a place that inspires and nurtures your soul.

Let’s discuss the basics of color theory. Color theory is a set of principles used to understand how different colors relate to each other. It involves understanding the color wheel and the relationships between colors. 

The color wheel is a visual representation of the primary, secondary, and tertiary colors. Primary colors are red, yellow, and blue. Secondary colors are created by mixing primary colors. For example, orange, green, and purple are the secondary colors. Tertiary colors are created by combining a primary color with a secondary color.

When it comes to matching wood floor colors to walls, you should consider the mood and atmosphere that you want to create in the room. Warm colors like red, orange, and yellow can create a cozy and inviting atmosphere. Cooler colors like blue and green can create a more calming and soothing atmosphere. Neutral colors like beige, cream, and gray can provide a subtle and sophisticated backdrop for other elements in the room.

Complementary vs Contrasting Color Choices

There are two main approaches to matching wood floor colors to walls: complementary and contrasting. Complementary color schemes involve pairing colors that are opposite each other on the color wheel. 

For example, green is opposite red on the color wheel, so they are complementary colors. Contrasting color schemes involve pairing colors that are adjacent to each other on the color wheel. For example, blue and green are adjacent to each other on the color wheel, so they are contrasting colors.

Now that we have a basic understanding of color theory, it’s also important to know and understand the undertones of your hardwood floors in order to properly select a coordinating wall color.

How To Determine Wood Floor Color Undertones

To determine the undertones of your hardwood floors, you can use the following steps:

  • Clean your hardwood floors: Before you can determine the undertones of your hardwood floors, you need to clean them thoroughly. Use a hardwood floor cleaner and a mop to remove any dirt, grime, or debris that may be on the surface of your floors.
  • Examine your hardwood floors in natural light: Once your floors are clean, examine them in natural light. Stand in the room and observe the color of your hardwood floors in natural light. This will help you see the true color of your floors without any artificial lighting.
  • Look for warm or cool tones: Look for warm or cool tones in your hardwood floors. Warm tones will have a yellow, red, or orange tint, while cool tones will have a blue or gray tint.
  • Consider the species of wood: The species of wood used for your hardwood floors can also affect the undertones. For example, red oak has warm undertones, while white oak has cool undertones.
  • Use a color chart: You can also use a color chart to determine the undertones of your hardwood floors. Hold the color chart next to your floors and compare the colors to see which ones match.

By using these steps, you can determine the undertones of your hardwood floors and select paint colors that complement them.

Let’s dive into some great color options!

7 Great Wood Floor Colors For Your Wood Floors And Walls

  1. Neutral on neutral

If you’re looking for a sophisticated and timeless look, consider pairing neutral wood floors with neutral walls. For example, you could pair light wood floors with cream or beige walls. This creates a subtle and understated backdrop for other design elements in the room, like furniture, artwork, and accessories.

  1. Cream and gray

If you want to add some subtle color to your neutral palette, consider pairing cream wood floors with gray walls. This creates a monochromatic look that is soothing and calming. You can add pops of color with furniture, pillows, and accessories.

  1. Bold and beautiful

If you want to make a statement, consider pairing dark wood floors with bold and bright walls. For example, you could pair dark wood floors with red or navy walls. This creates a dramatic and unforgettable look that is perfect for a statement room like a home office or dining room.

  1. Blue and beige

If you want to create a soothing and calming atmosphere, consider pairing light wood floors with blue walls. For example, you could pair light wood floors with a soft blue-gray or a robin’s egg blue. This creates a beachy and relaxed vibe that is perfect for a bedroom or living room.

  1. White and wood

If you want a clean and modern look, consider pairing white walls with light wood floors. This creates a fresh and airy atmosphere that is perfect for a small space or apartment. You can add pops of color with artwork, furniture, and accessories.

  1. Green and brown

If you want to create a natural and earthy vibe, consider pairing green walls with brown wood floors. This creates a forest-inspired palette that is perfect for a home office or reading nook. You can add plants, natural materials, and other organic elements to complete the look.

  1. Gray and gold

If you want to create a luxurious and sophisticated vibe, consider pairing gray walls with gold wood floors. This creates a chic and glamorous look that is perfect for a formal living room or dining room. You can add metallic accents, like gold or silver, to enhance the effect.

Matching wood floor colors to walls is an important aspect of designing any room. Whether you want a cozy and inviting atmosphere or a sophisticated and luxurious vibe, there is a color scheme that can help you achieve your design goals. Consider the mood and atmosphere that you want to create in each room, and use color theory principles to guide your choices. 

If you’re not sure which colors to choose or how to pair them together, don’t be afraid to experiment and try out different combinations. You can use online tools, like Pinterest or Canva, to create mood boards and visualize the different color schemes in a room before you begin. You can also consult with a flooring expert for professional advice and guidance.

With the right color scheme and proper maintenance, you can transform your home into a place that inspires and nurtures your soul for years to come!

hardwood flooring in a bathroom
About Floors, Bathroom Flooring, Blog, Hardwood Flooring, House Renovation, Interior Design, Tips & Tricks

Can You Use Hardwood Flooring in A Bathroom?

The hardwood flooring in a bathroom can make a huge impact on the appearance and feel of your space. But you may be wondering if hardwood is right for your situation.

If you’re considering hardwood floors for a bathroom, keep these things in mind:

  • hardwoods are more susceptible to water damage
  • hardwoods may require more time and money spent on waterproofing and sealing than other types of flooring
  • hardwoods may need periodic refinishing to maintain their beauty.

But they offer a great deal of visual appeal and beautiful flooring for years on end if they’re done right.

Overall, we recommend not using hardwood flooring in bathrooms that have a shower or tub and using them with caution and preparation in powder rooms. Read on to learn more.

Hardwood Flooring In A Bathroom Can Add Elegance And Class

The appeal of hardwood floors is hard to argue with. They add a touch of elegance and class to any room. And if you’re looking for that spa-like feeling in your bathroom, hardwood floors may be just what you need.

In fact, hardwood floors are so desirable in a home that they have been shown to increase property values by up to 10%. Another interesting study by the National Association of Realtors has shown that homes with hardwood floors can sell for an average of $5,000 more than homes without. So if you are looking at the installation of hardwood floors from an investment standpoint, it would be hard to go wrong.

However, before making your decision, it’s important to consider the pros and cons of this type of flooring, especially in an area notorious for moisture.

Hardwoods Are Susceptible To Water Damage

One of the main drawbacks to hardwood flooring in a bathroom is that it is more susceptible to water damage than other types of flooring. If your bathroom is not properly sealed with polyurethane, you may find yourself with buckled and warped floors before too long.

In addition, if water does get on your hardwoods, it can cause them to swell and even rot. This is why we do not recommend hardwood floors in a bathroom that contains a shower or bath.

A hardwood floor can be damaged by water from a number of sources, including:

  • splashing or spilling on the hardwood surface itself
  • flooding caused by clogging in pipes and drains
  • condensation that forms under tiles or slabs

However, the most common problem in a bathroom setting is when water is left to stand on the hardwood surface for a long period of time from tub and shower use.

This can lead to stains and warped boards, which will eventually cause other problems for your home. 

While we don’t recommend using hardwood in a full bathroom, if you are choosing to do so, there are many different types of hardwoods available now that resist moisture a little better than traditional hardwoods like oak or maple wood. More on that below.

Hardwoods Require Proper Waterproofing 

The costs of waterproofing hardwood flooring are also something to consider.

In general, hardwood floors are naturally water-resistant. However, if your bathroom has a hardwood floor, it’s likely that the room will become wet from time to time as a result of splashing or spills on the hardwood surface. We suggest cleaning up spills immediately when they happen and not leaving puddles on the hardwood.

Polyurethane seals the wood and helps make it waterproof. It also serves as a protective coating that hardwood floors need to maintain their beauty and durability over time.

These sealers can be applied by professional hardwood flooring companies or you could choose one of the many water-based polyurethane products available at your local home improvement store and do it yourself.

Hardwoods May Need Periodic Refinishing To Maintain Their Beauty

A hardwood floor that is properly maintained and has a high-quality finish can last for up to 20 years or more before it needs to be refinished. However, if you care for your floors correctly, they will last much longer.

Refinishing hardwood floors is a big job, but it can be worth it to keep your floor looking beautiful for years to come. The basic steps to hardwood floor refinishing are:

  • sand hardwood floors with a special sander
  • apply hardwood flooring stain, if desired
  • finish by applying hardwood floor protective coating

If done correctly, this process can take anywhere from four to eight hours per room depending on the size of your space and how many coats are needed to get an even coat.

What Are The Best Wood Options for Waterproof Hardwood Floors?

Hardwoods that are the least susceptible to water damage are often hardwoods that are naturally more water-resistant. These hardwood floors may include:

  • Maple (hard, durable).
  • Hickory (very hard and dense). 
  • Red Oak Wood Flooring (moderately hard but still more resistant to water than most other types of wood flooring)

What About Engineered Hardwoods For Water Resistance?

Engineered hardwoods are great for water resistance because they are constructed from hardwood planks with a veneer of hardwood on top. The hardwood veneer provides the durability that is necessary for high-moisture areas like bathrooms, while engineered hardwoods can help you save money because they require less finishing and sealing than solid wood floors do.


Getting Help With Your Hardwood Floor Purchase

Hardwood flooring is a popular and beautiful choice for many homeowners, but it can also be difficult to choose the right style. There are so many different types of hardwood floors with so many different looks! You have to consider cost, durability, color, and finish when making your selection.

That’s why it can be helpful to get expert advice when choosing hardwood flooring for your home. A professional hardwood flooring company can help you select the right type of wood and the right finish for your specific needs and preferences. They can also give you a quote on how much the installation will cost.

GC Flooring Pros is here to help you make the best decision possible by providing you with professional advice, guidance, and recommendations based on your unique needs. We’re happy to answer any questions about our products or services at any time during your purchase process. Our experts are always available via phone call or email whenever you need them!

If you are in the Dallas, TX area and you would like hardwood flooring installed in your home, we can help with any hardwood style or finish that appeals to you. Request an in-house estimate today!

Blog, Floor Care, Laminate Flooring, Recommended Blog, Tips & Tricks, Water Damaged Floors

How to Fix Laminate Flooring That is Lifting [And Why It Happens]

The quick answer

Most laminate floor repair starts with one question: what caused it? Lifting and buckling usually come from moisture, missing expansion gaps or an uneven subfloor. Gaps come from dry air or joints that never fully locked. Scratches and small chips can be filled with a color-matched repair kit.

Peeling, swollen or water-damaged planks can’t be dried back to normal. Replace those boards, one at a time if the damage is small, after the moisture source is fixed.

Laminate is one of the toughest, most budget-friendly floors you can put in a home, and when something goes wrong, the fix is often smaller than it looks. Whether a few boards are lifting, gaps are opening between planks, the dog left a chip by the back door, or a leak got under the floor, this guide shows you how to repair laminate flooring the right way, problem by problem.

Fixing laminate flooring is mostly about matching the repair to the cause. We start with the most common issue, lifting, then cover gaps, chips and scratches, replacing a single plank, and water damage. If you’d rather hand it off, our team at GC Flooring Pros can inspect, diagnose, and repair or replace damaged sections for a long-lasting, seamless finish.

What’s Wrong With My Laminate Floor? Find Your Fix

Find the card that matches what you’re seeing, then jump to that section below.

Boards rising, bouncing or peakingLifting / buckling

Usually moisture, a floor pinned too tight to the walls, or an uneven subfloor. See the lifting fixes below.

Lines opening between planksGaps between planks

Often dry winter air or joints that didn’t fully lock. Many gaps can be tapped closed.

Fine lines or scuffs on the surfaceScratch repair

Light scratches blend out with a laminate repair kit or touch-up marker.

A dent or missing chunkChipped laminate

Small chips fill with color-matched putty or wax. Big or edge chips mean one new plank.

Top layer flaking or bubblingPeeling laminate floor

The wear layer is separating, usually from moisture in the core. Replace the plank.

Swollen seams after a leak or spillWater damage

Swelling is permanent. Fix the source, dry the subfloor, then replace what’s damaged.

Laminate Floor Repair at a Glance

ProblemMost likely causeDIY-friendly?The fixRelative cost
Lifting or bucklingMoisture, no expansion gap, uneven subfloorSometimesFix the cause, then relay or replace boards$–$$$
Gaps between planksLow humidity, unlocked joints, pinned floorYes, for a few gapsTap joints closed; relay rows if widespread$
ScratchesGrit, pet nails, furnitureYesRepair kit, wax pencil or touch-up marker$
ChipsDropped items, impact at edgesYes, if smallColor-matched putty or hard wax; replace plank if large$
Peeling surfaceMoisture in the core, heat, wearReplace onlyReplace the affected planks$–$$
Water damageLeaks, spills left standing, slab moistureSmall areas onlyStop the source, dry out, replace damaged planks or the room$$–$$$

Why Is My Laminate Floor Lifting?

“Lifting” isn’t a single problem, it’s a symptom. Pinpoint the cause first, then choose the matching fix below.

1) Underlying Moisture Problem

Excess moisture in the subfloor or slab causes planks to swell and rise. If substrate moisture is above about 6–9% per NALFA guidance, acclimation alone won’t save the install. Dehumidify, correct leaks, and use proper vapor barriers/underlayments before re-laying.

To reduce future risk, select an appropriate underlayment and verify moisture levels with a reliable moisture test prior to installation. You can also review general indoor moisture control tips from the EPA’s moisture guidance.

2) Not Properly Installed

Laminate relies on precise joints and “floating” clearances. If click-lock seams aren’t fully engaged, you’ll see gaps and peaks. If planks are jammed tight to walls, seasonal expansion has nowhere to go—leading to buckling. And if material wasn’t acclimated to site conditions, post-install movement is likely.

When in doubt, have a pro evaluate the locking profile, acclimation timeline, and edge clearances. Our crew at GC Flooring Pros can quickly spot and correct these issues.

3) Uneven Subfloor

Waves, dips, or humps telegraph through floating floors, creating bounce or lift. Minor highs can be ground; lows can be filled. If the slab or wood subfloor is significantly out of spec, a self-leveling compound or structural remediation may be required. Here’s a helpful primer on identifying issues with uneven substrates: how to address a wavy subfloor.

4) No Expansion Gaps

Floating floors need room to move—typically ~1/4″ around all fixed verticals (walls, cabinets, pipes, hearths). Without proper gaps and transitions, the floor will push against restraints and peak. This often appears at doorways or long runs.

Laminate flooring repair in a North Texas home

How to Fix Laminate Flooring That’s Lifting

Match your repair to the underlying cause. Here are the proven approaches our technicians use in the field.

Fix 1: Level an Uneven Subfloor

  1. Remove affected planks.Take them up carefully and set them aside.
  2. Find the highs and lows.Grind down peaks; fill dips with an appropriate patch or self-leveler per manufacturer instructions.
  3. Clean and check.Vacuum thoroughly; confirm smoothness with a straightedge.
  4. Add the right underlayment.It absorbs micro-variations and reduces sound transmission.
  5. Reinstall the planks.Tap joints with a block and mallet to fully lock the profile.

If the surface is severely out of tolerance, schedule a professional inspection through our Contact page. We’ll advise the most efficient, code-compliant fix.

Fix 2: Resolve Moisture Intrusion

  1. Track down the source.Plumbing leaks, slab moisture, or ambient humidity. Reference the EPA’s moisture control basics to stabilize indoor conditions.
  2. Remove and dry.Take up swollen or damaged planks and let the area dry thoroughly (fans and dehumidifiers as needed).
  3. Test before you relay.Check the slab or subfloor with a moisture meter or calcium chloride/RH test to verify acceptable levels.
  4. Barrier, then boards.Install a vapor barrier or appropriate underlayment before relaying planks. Replace any damaged boards with matching stock.

Need help sourcing like-for-like replacements or confirming moisture thresholds? Our laminate specialists can assist: Laminate Flooring Supply.

Fix 3: Add or Restore Expansion Gaps

  1. Pull the trim.Remove baseboards or quarter-round to inspect perimeter clearances.
  2. Trim to a full gap.Undercut or trim planks to achieve a continuous ~1/4″ gap at all walls and fixed obstructions.
  3. Break up long runs.Add T-moldings or reducers at long runs, room transitions, and thresholds.
  4. Reinstall the trim.Nail base or quarter-round to the wall, never down into the floating floor.

Fix 4: Reseat Mislocked Joints

  1. Lift the row with gaps.Inspect the click profile for damage or debris.
  2. Clean and replace.Clean tongues and grooves; replace any crushed or chipped boards.
  3. Reassemble carefully.Use a pull bar at end joints and a tapping block along long joints to fully engage.

Pro tip: Always follow the manufacturer’s installation pattern and expansion rules. If the original product line is discontinued, we can recommend visually compatible replacements through our laminate flooring team.

How to Fix Gaps Between Laminate Planks

Small gaps along the ends or long edges of planks are one of the most common laminate complaints, and one of the easiest to fix. They usually show up for one of three reasons: the air got dry and the boards shrank slightly, a joint was never fully clicked together, or something is pinning the floor (a kitchen island, heavy furniture or trim nailed into the floor) so it can’t move back into place.

  1. Start with humidity.If gaps appeared in winter, run a humidifier to bring the home back into the 35–55% range. Some seasonal gaps close on their own.
  2. Tap the joints closed.Use a floor gap fixer (a rubber-gripped block) or a tapping block and mallet. Press it onto the plank next to the gap and tap toward the gap. Work along the row so you’re not just moving the gap one board over.
  3. Unpin the floor.Check for trim, cabinets or furniture locking the floor in place. Free it so the floor can float again.
  4. Relay if it keeps coming back.Widespread or recurring gaps usually mean damaged locking edges or an uneven subfloor. Lift the affected rows, check the subfloor, and reinstall with fresh boards where joints are worn.
🛠️
Crew tip: don’t fill laminate gaps with wood filler

Filler cracks and pops out as a floating floor moves with the seasons. Close the gap mechanically instead. For a hairline end-joint gap that won’t close, a color-matched laminate putty is the cleaner fix.

How to Repair Chipped or Scratched Laminate Planks

Laminate can’t be sanded and refinished like hardwood, because its look is a printed layer under a clear wear coat. The good news: most surface damage is small enough to hide with a laminate floor scratch repair kit, which you can find at most flooring and hardware stores in your floor’s color family.

Light scratches and scuffs

Clean the area first, then try a laminate floor cleaner and a soft cloth. Many scuffs are just residue sitting on top. For true scratches, rub a color-matched wax pencil or touch-up marker into the line, wipe off the excess, and buff with a dry microfiber cloth. Blend two shades if your floor has a lot of grain variation.

Chipped laminate floor

  1. Clean the chip.Remove loose flakes and dust so the filler can bond.
  2. Fill it.Press color-matched laminate putty into the chip with a plastic putty knife, or melt a hard-wax repair stick into it with the kit’s heating tool.
  3. Level it.Scrape the filler flush with the surface while it’s still soft. Overfill slightly, then trim.
  4. Draw the grain back in.Use a fine-tip touch-up marker to continue the wood-grain lines across the repair.

If a chip is larger than a coin, sits right on a joint, or exposes the core, replacing that one plank will look better and last longer (see the next section).

Peeling laminate floor

When the top layer starts to flake, bubble or peel, the core underneath has usually taken on moisture, or the board has simply worn through. Glue doesn’t hold a peeling surface down for long, so the fix is to replace the affected planks. Before you do, check what caused it: a slow leak at a dishwasher, fridge line or exterior door is the usual suspect, and new boards will peel too if the moisture keeps coming.

How to Replace a Single Laminate Plank

One damaged board doesn’t mean a whole new floor. There are two ways to swap it out, and the right one depends on where the plank sits. Either way, you’ll need a matching replacement board, which is why we always recommend keeping a spare box from your original install.

Option A: Unclick the rows (best near a wall)

  1. Remove the trim.Take off the baseboard or quarter-round on the wall closest to the damaged plank.
  2. Unclick row by row.Lift each row at an angle to release the locks, numbering the boards on painter’s tape so they go back in the same order.
  3. Swap the damaged plank.Click the new board into place in its row.
  4. Reassemble.Click the rows back in, in reverse order, and reinstall the trim with your expansion gap intact.

Option B: Cut it out (for planks in the middle of the room)

  1. Mark and cut.Mark a rectangle about 1.5″ inside the plank’s edges. Set a circular or track saw to the plank’s thickness only, so you don’t cut the underlayment, and cut along the lines. Add diagonal relief cuts from the rectangle to each corner.
  2. Remove the pieces.Lift out the center, then work the edge strips loose carefully so you don’t damage the neighboring boards’ locking edges.
  3. Prep the new plank.Trim off the bottom lip of the groove on the long side and the locking tab on the short end so the new board can drop straight in.
  4. Glue and set.Run laminate or wood glue along the edges of the new board (not underneath it, since the floor still floats), press it in, wipe off squeeze-out, and weigh it down for about 24 hours.
🛠️
Crew tip: keep your leftover boxes

Laminate collections change fast, and a close-but-not-exact match stands out in a sunny room. If you don’t have spares, pull a plank from inside a closet to use for the visible repair, and put the near-match in the closet.

Laminate Floor Water Damage: Repair or Replace?

Most laminate has a high-density fiberboard core. When water gets into the seams, that core swells, and once it swells, it doesn’t shrink back, even after it dries. That’s why laminate floor water damage usually means replacing boards rather than repairing them. The real question is how many.

What you seeVerdictWhat to do
Spill wiped up quickly, edges flat a day laterKeep itNo repair needed. Keep an eye on the seams for a week.
A few planks with raised or swollen edgesReplace those planksFix the source, let the area dry, then swap the damaged boards.
Peaking, peeling or soft spots across a roomReplace the roomPull the floor and underlayment, confirm the subfloor is dry, then reinstall.
Standing water, a burst pipe, or musty smellDry-out first, then rebuildCall a water mitigation company to extract and dry the space. Then the floor gets rebuilt.
  1. Stop the water.Shut off the supply or fix the leak. Repairs won’t last until the source is solved.
  2. Get it dry.For anything more than a spill, a mitigation company should extract water and dry the subfloor and walls. Laminate traps moisture underneath, which can lead to mold.
  3. Document everything.Take photos and videos before anything is removed. If you’re filing an insurance claim, your carrier will want them.
  4. Rebuild with fresh material.Once the slab or subfloor tests dry, replace damaged planks and underlayment, or install a new floor. This is the step we handle.

After the drying is done, GC Flooring Pros handles the water damage repair and rebuild: new flooring, baseboards and the finish work that makes the room feel like home again. We can work from your insurance-approved scope. If you’re choosing a new floor for a kitchen, laundry room or bath, it’s worth looking at water-resistant laminate or LVP.

Laminate Repair Myths, Busted

MythSwollen laminate goes back to normal once it dries.
FactThe fiberboard core stays swollen. Drying stops the damage from spreading, but the raised edges need new boards.
MythYou can sand out deep scratches.
FactSanding goes right through the printed wood look. Fill and color the scratch instead, or replace the plank.
MythOne bad board means a whole new floor.
FactSingle planks can be replaced, even in the middle of a room, with a matching board.
MythNailing or gluing down a lifting board fixes it.
FactPinning a floating floor makes buckling worse. Find the cause: moisture, a missing gap or an uneven subfloor.

Prevention: Keep Your Laminate Flat and Beautiful

Homes across Frisco, Plano and Prosper sit on concrete slabs over clay soil, and North Texas swings from humid summers to dry, heated winters. That combination is why slab moisture testing, a proper vapor barrier and steady indoor humidity matter so much here.

Before installAcclimate properly

Store unopened cartons in the space for 48–72 hours per manufacturer guidance.

All yearControl humidity

Keep indoor RH within the recommended range (often ~35–55%).

On slabsTest substrates

Verify moisture before install (see NALFA installation guidelines).

At the edgesHonor expansion

Maintain perimeter gaps and use transitions on long runs.

UnderneathChoose the right underlayment

Moisture barriers for slabs; sound and minor-deflection control for upper floors.

Day to dayWipe spills fast

Use a barely damp mop, never a steam mop, and add mats at sinks and exterior doors.

When to Call a Professional

If lifting involves widespread moisture intrusion, significant leveling, or you can’t identify the root cause, bringing in a specialist will save time, material, and headaches. The same goes for water damage, peeling across several boards, or a repair you can’t match. Most laminate flooring repair jobs we see take less than a day. We’ll assess the floor, measure moisture, check flatness, and provide a clear plan: repair where possible, replace where necessary.

Let our crew take it from here

From single-plank swaps to new laminate flooring and water damage rebuilds, we serve Frisco, Plano, Prosper and across North Texas. In-home estimates are always free.

Book my free in-home estimate

Frequently Asked Questions

Can laminate flooring be repaired?

Yes, in most cases. Scratches and small chips can be filled with a color-matched repair kit, gaps can often be tapped closed, and damaged boards can be replaced one at a time. Swollen or peeling boards can’t be restored, so those get replaced.

How do you fix a peeling laminate floor?

Replace the peeling planks. Peeling usually means moisture got into the core or the surface wore through, and glue won’t hold it down for long. Find and fix any moisture source first so the new boards don’t peel too.

Can water-damaged laminate be fixed?

Not once it swells. The fiberboard core stays swollen after it dries. Stop the leak, dry the subfloor, then replace the damaged planks. If water spread across a room or sat under the floor, replacing the room’s flooring and underlayment is usually the better fix.

How do you fix scratches on laminate flooring?

Clean the area, then rub a color-matched wax pencil or touch-up marker into the scratch, wipe off the excess and buff. Deep scratches can be filled with laminate putty. Don’t sand laminate, because sanding removes the printed wood look.

Can you replace just one laminate plank?

Yes. Near a wall, unclick the rows back to the damaged board and swap it. In the middle of a room, cut the board out, trim the new plank’s locking lip, and glue it in by its edges. You’ll need a matching board, so keep spares from your install.

Why are gaps appearing between my laminate planks?

The most common causes are dry winter air shrinking the boards, joints that never fully locked, or something pinning the floor so it can’t move. Raise indoor humidity, free any pinned edges, and tap the planks back together with a floor gap tool.

GC Flooring Pros, White Oak Hardwood Flooring being professionally installed with precision
About Floors, Blog, Floor Care, Hand Scraped Wood Flooring, Hardwood Flooring, How-to, Interior Design, Tips & Tricks

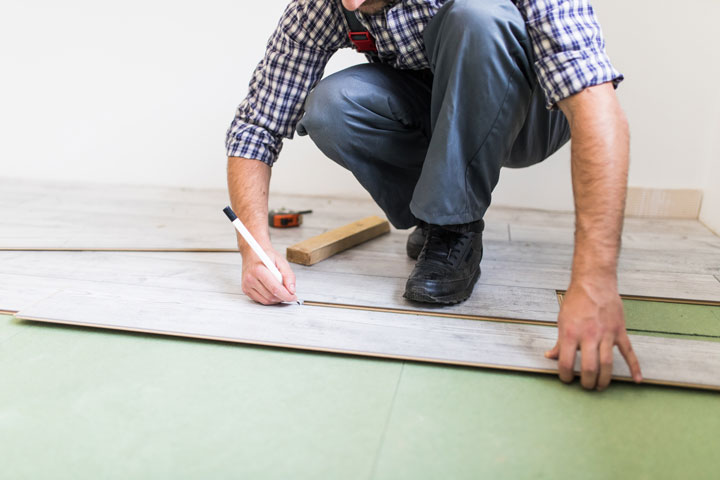
Four steps to expect during the Hardwood Floor Installation process

Hardwood Floor Installation Process White Oak Flooring

Hardwood Floor Installation Process: 4 Clear Steps

Thinking about upgrading to hardwood flooring but unsure where to begin? This guide breaks down the hardwood floor installation process we follow at GC Flooring Pros so you’ll know exactly what to expect. From the first consultation to the final finish, our goal is to make the hardwood floor installation process smooth, efficient, and beautifully executed.

Step 1 of the Hardwood Floor Installation: Free In-Home Consultation

We start with a complimentary in-home consultation to discuss your goals, preferences, and style. We’ll assess your space, take accurate measurements, and show samples of wood species, plank widths, and finishes. This stage ensures the hardwood floor installation process begins with clear communication and aligned expectations.

Step 2 of the Hardwood Floor Installation: Room Preparation

Before installation day, we’ll confirm your schedule and provide instructions for room preparation. You’ll remove furniture, rugs, and wall art from the area. If you’d rather not, our team offers optional furniture handling services. This step ensures a clean, dust-minimized workspace and helps the hardwood floor installation process stay on track. Maintaining a stable indoor climate (60–80°F, 30–50% humidity) allows your new flooring to acclimate properly.

Step 3 of the Hardwood Floor Installation: Professional Installation

Once prep is complete, our installers transform your space. We inspect subfloors, correct uneven spots, and test for moisture. Then we begin installation using the method best suited for your home—nail-down, glue-down, or floating. For example, see how the National Wood Flooring Association sets industry standards for installation best practices. We’ll ensure smooth transitions, tight seams, and professional detailing that defines our quality craftsmanship.

Step 4 of the Hardwood Floor Installation: Sanding, Staining & Finishing

If you’ve selected unfinished hardwood, the hardwood floor installation process continues with sanding and finishing. We’ll sample stain colors directly on your floor to match your design vision. After you approve, we apply multiple coats of high-quality polyurethane for long-term protection and shine. Once cured, we’ll guide you on when it’s safe to walk and move furniture back—typically within 48 hours.

Why Understanding the Hardwood Floor Installation Matters

  • Clarity: Knowing the hardwood floor installation helps you plan ahead and reduce stress.
  • Durability: Proper subfloor prep and moisture control increase your floor’s lifespan.
  • Design Confidence: Understanding your finish and maintenance options ensures a long-lasting look.

FAQs About the Hardwood Floor Installation Process

How long does it take? Smaller rooms can be completed in two to three days, while larger spaces or custom patterns take longer. Your project manager will provide a detailed timeline during the consultation.

Do I need to leave home? Not always. Prefinished floors let you stay home comfortably. For unfinished floors, you may want to vacate during sanding and finishing due to odor and drying time.

Can you match existing wood? Absolutely—we can custom stain or blend the new installation with your current flooring for a cohesive look.

Care Tips After the Hardwood Floor Installation Process

  • Use felt pads under furniture legs.
  • Clean using wood-safe cleaners—avoid water or steam.
  • Maintain consistent humidity to prevent seasonal gaps.
  • Place rugs near doors to capture debris and prevent scratches.

Ready to Begin Your Hardwood Floor Installation?

By now, you understand the full hardwood floor installation process—from the first visit to the final finish. Our experts at GC Flooring Pros can guide you through wood selection, layout design, and maintenance tips to make your investment last a lifetime. Explore our hardwood flooring options or book your free in-home consultation today to bring your dream floors to life.

Call (214) 814-1170 or click to schedule your complimentary estimate. Let GC Flooring Pros make your hardwood floor installation process effortless and rewarding.

GC Flooring Pros
About Floors, Blog, Floor Care, Hand Scraped Wood Flooring, Hardwood Flooring, House Renovation, Recommended Blog, Tips & Tricks

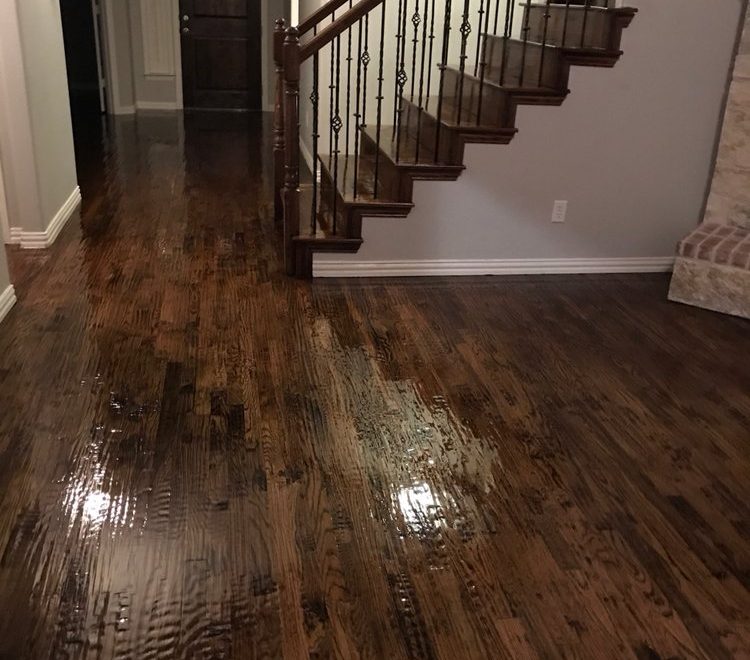
Hand Scraped Hardwood Flooring

Hand Scraped Hardwood Flooring

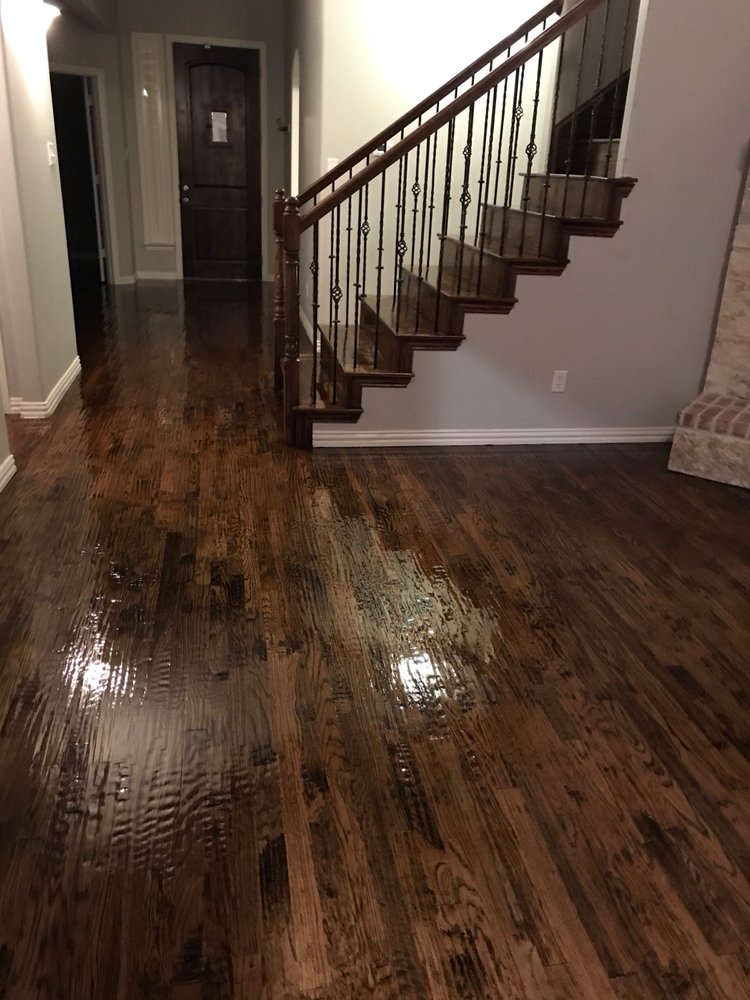
Hand scraped hardwood flooring has become one of the most in-demand flooring choices for homeowners who want depth, character, and a rich, timeless atmosphere in their space. This style highlights the natural beauty of wood, bringing out organic grooves, texture, and warmth that machine-finished floors simply can’t imitate.

Whether you’re renovating a living room, bedroom, or entire home, hand scraped hardwood is an excellent way to add charm, craftsmanship, and visual interest. To learn more about how hand-scraped textures developed in the industry, you can also explore resources from the National Wood Flooring Association.

What Is Hand Scraped Hardwood Flooring?

Hand scraped hardwood flooring refers to wood planks that are textured by hand—traditionally using sanding tools or heavy-duty sandpaper—to create natural, uneven patterns. Today, the technique is inspired by old-world craftsmanship, where woodworkers shaped floors by hand rather than machines.

This process results in a floor with:

  • Soft ridges and subtle waves
  • Natural grooves and surface variation
  • Warmth and old-world charm
  • A uniquely distressed, handcrafted look

These textures make hand scraped hardwood flooring ideal for both modern and traditional homes. It pairs well with casual farmhouse décor, rustic cabins, and even elegant, classic interiors.

Why Homeowners Love Hand Scraped Hardwood Flooring

Beyond its beauty, the hand scraped finish offers practical benefits that make it extremely homeowner-friendly.

✔ Timeless, Authentic Character

The handcrafted look gives every plank a story. Each board shows unique markings, making the entire floor feel warm, inviting, and full of personality.

✔ Excellent at Hiding Wear & Tear

The textured surface helps disguise everyday scratches, dents, pet marks, and general traffic—making it perfect for active households with pets and kids.

✔ Highly Versatile Design Style

Hand scraped floors blend effortlessly with:

  • Contemporary homes
  • Farmhouse and rustic interiors
  • Traditional or formal spaces
  • Shabby chic and cottage-style décor

✔ Adds Warmth & Value to Your Home

This finish resembles antique craftsmanship and often increases the overall aesthetic appeal and resale value. Many buyers specifically seek out hardwood options with natural texture and depth.

Hand Scraped Hardwood vs. Other Hardwood Textures

While smooth hardwood has a sleek, polished look, hand scraped wood adds dimension and depth. Unlike wire-brushed flooring—which creates subtle linear texture—hand scraped planks feature irregular, handcrafted patterns for a historic feel.

An Artistic Finish With Natural Beauty

The hand scraped texture highlights the true beauty of wood grain. With varying lines, grooves, and patterns from plank to plank, your floor becomes a one-of-a-kind piece of art. The result is a cozy, welcoming environment that feels both historic and modern at the same time.

Professional Help for Choosing & Installing Hand Scraped Hardwood

At GC Flooring Pros, we guide you through every step—from selecting your preferred hardwood species and stain colors to installation and long-term care. With dozens of hand scraped options available, we help you choose the perfect look based on your style, lifestyle, and budget.

Our team also provides expert tips to help your floors maintain their beauty for years to come.

Contact us today for your free in-home consultation. Let’s start designing a stunning new look for your home with premium hand scraped hardwood flooring.