
About Floors

What floor to install if you have a dog
About Floors, Blog, Carpet Flooring, Tips & Tricks

What floor to install if you have a dog

Dog Flooring: Best Pet-Friendly Flooring Options for Your Home

Choosing the right dog flooring can make life easier for both you and your four-legged friend. The ideal surface should support your pet’s comfort while resisting scratches, accidents, and daily wear. Whether you have a playful puppy or a senior dog with mobility needs, selecting the right flooring is essential for a clean, safe, and happy home.

Before exploring specific materials, here are the core factors every dog owner should consider.

Flooring Advice for Pet Owners

Pet Nails Are a Real Threat

Dog nails can scratch, snag, or dull the surface of many flooring types. Even trimmed nails can cause long, shallow dents in soft materials or sealers. Since floor runners won’t fully protect your home, it’s smarter to choose dog flooring that naturally resists scratching rather than trying to modify your pet’s behavior.

Accidents Happen—Especially With Puppies

Young dogs may struggle with bladder control, and even trained dogs can have the occasional accident. Pet urine can stain certain floors, cause odors, and damage finishes. Some flooring options handle moisture far better than others, making the right choice critical.

Muddy Paws Are Inevitable

From rainy-day puddles to backyard adventures, dogs track dirt—no matter how well-trained they are. Effective dog flooring should be easy to clean with minimal effort. Mud, pawprints, and water spots shouldn’t ruin your day (or your floors).

Dogs Have Allergies Too

Dog allergies are often overlooked during flooring selection. Certain materials, adhesives, or finishes can irritate sensitive pets. Additionally, most dog allergy reactions come from cleaning chemicals, not the flooring itself. Always use pet-safe cleaning products approved by veterinarians or trusted organizations like the American Kennel Club.

Best Dog Flooring Options

Now that you know what to look for, let’s explore the best pet-friendly flooring materials and how they perform for both humans and dogs.

Vinyl

Vinyl is one of the top-performing dog flooring options today. It offers a soft, cushioned feel underfoot while remaining resistant to scratches and water. Vinyl does not trap dust or allergens, making it a healthier choice for sensitive pets. Cleaning is as simple as warm water and a mop. It is also one of the quieter flooring types—an advantage for dog owners who dislike the sound of clicking paws.

Vinyl comes in sheets, tiles, and luxury vinyl planks (LVP), including designs that mimic hardwood and stone.

Pros for humans: Easy to clean, highly durable, available in many styles.
Pros for dogs: Soft, warm, quiet, and non-allergenic.

Ceramic or Natural Stone Tiles

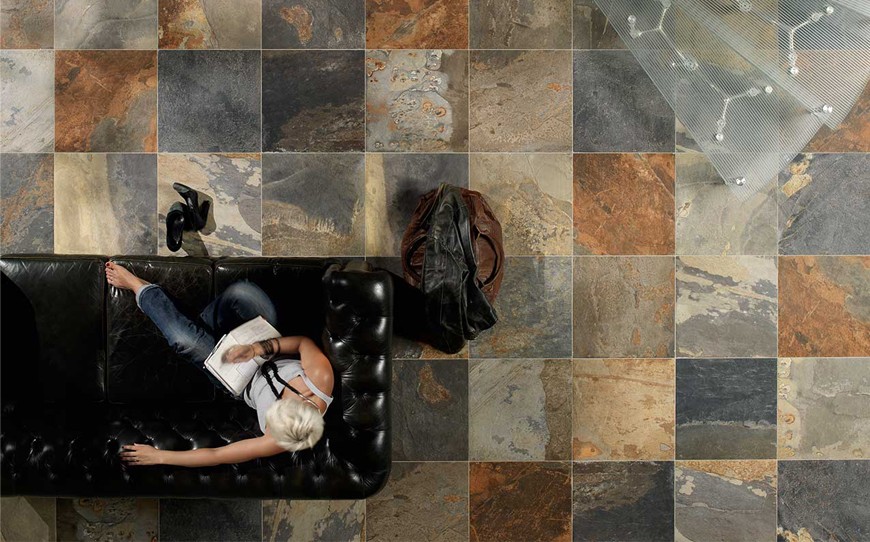
Ceramic and stone tiles are extremely durable and scratch-resistant—ideal for energetic dogs with strong nails. These materials also resist liquid, stains, and odors when sealed properly. However, tile can be cold or slippery for dogs unless paired with rugs or underfloor heating.

Pros for humans: Waterproof, scratch-proof, hygienic.
Pros for dogs: Cool in warm months, hypoallergenic, durable.

Laminate

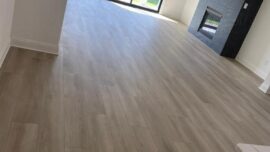
Laminate flooring is built to resist scratches thanks to its tough wear layer. It can mimic wood or stone at a lower cost. However, laminate is louder underfoot and offers poor traction, which can make it uncomfortable or unsafe for older dogs.

Pros for humans: Affordable, easy to clean, scratch-resistant.
Pros for dogs: Warm and somewhat comfortable, but low traction can cause slipping.

Hardwood

Hardwood floors remain a beautiful choice, but they are not ideal as dog flooring unless selected carefully. Wood is prone to scratches, dents, and moisture damage. If you must have hardwood, consider the following strategies:

  • Choose super-hard species: Brazilian Walnut, Hard Maple, Oak, and Hickory handle claws better due to higher Janka hardness ratings.
  • Opt for distressed or hand-scraped finishes: Scratches blend into the natural texture and are less noticeable.
  • Try nail caps such as SoftPaws: These reduce nail damage by covering sharp tips.

For more hardwood insights, visit GC Flooring Pros for expert advice and product comparisons.

Final Thoughts: Picking the Best Dog Flooring

Choosing the right dog flooring comes down to durability, comfort, water resistance, and ease of cleaning. Vinyl is the best all-around choice for most homes. Tile is unbeatable for durability and water protection. Laminate works for low-mess dogs but may be slippery. Hardwood is beautiful but requires careful species and finish selection.

Whichever option you choose, make sure it supports both your lifestyle and your dog’s comfort. With the right flooring, your home will stay cleaner, safer, and more welcoming for your furry companion.
Vinyl tile installation: How it's done
About Floors, Blog, How-to, Vinyl Flooring

Vinyl Tile Installation: A comprehensive guide

Vinyl Tile Installation: Complete DIY Guide for a Smooth, Durable Finish

Thinking about tackling a vinyl tile installation yourself? Great choice. Modern vinyl tiles (LVT/LVP and peel-and-stick) are water-resistant, comfortable underfoot, and forgiving for first-time installers. With the right prep, layout, and tools, you can achieve a clean, long-lasting floor that looks professionally installed—while saving serious labor costs.

Below you’ll find a step-by-step walkthrough—from measuring and layout to subfloor prep, cutting, rolling, and curing—plus pro tips and pitfalls to avoid. For product selection, comparison help, or pro installation, see our in-depth pages on vinyl flooring and vinyl flooring supply.

Why Choose Vinyl Tile?

  • Moisture resistance: Ideal for kitchens, baths, mudrooms, basements.
  • Easy maintenance: Resists stains and cleans with routine sweeping + damp mopping.
  • Design range: Realistic stone and wood visuals, various sizes and wear layers.
  • DIY-friendly: Click-lock and peel-and-stick formats simplify installation.

Indoor air quality tip: When shopping, look for low-emission certifications (e.g., FloorScore®) for healthier interiors. Learn more about the program here.

1) Calculate Materials Accurately

Measure the room’s length × width to get square footage. For irregular rooms, break the space into rectangles, measure each area, and add them together.

  • Order extra: Add 10–15% overage for cuts, pattern matching, and future repairs.
  • Tiles vs. cartons: Divide total square feet by coverage per carton to determine how many boxes you’ll need (round up).

2) Plan Your Layout (Centered & Balanced)

A thoughtful layout is the difference between a “fine” install and a fantastic one:

  • Center your layout: Snap perpendicular chalk lines at the room’s center (find midpoints of opposite walls and intersect).
  • Dry-fit test: Lay a row of tiles (without removing backing) along both chalk lines to preview cut sizes at walls and doorways.
  • Optimize cuts: Aim to keep border pieces at least 1/2 tile width whenever possible; shift your centerlines slightly to improve edge cuts.
  • Doorways & focal points: Align patterns so narrow cuts don’t land in high-visibility areas.

3) Gather Your Tools

  • Carpenter’s square & pencil
  • Measuring tape
  • Chalk line
  • Utility knife (fresh blades) & straightedge
  • Heat gun or hair dryer (to ease tricky cuts)
  • J-roller or 75–100 lb floor roller (recommended)
  • Trowel (for glue-down formats)
  • Safety glasses, work gloves, and a dust mask/respirator as needed

4) Acclimate & Prep the Room

  • Acclimation: Place unopened cartons in the install area for 24–48 hours per manufacturer guidance (temperature and humidity stable).
  • Remove base & shoe: Pry carefully; label for reinstallation.
  • Clear and clean: Sweep/vacuum thoroughly; remove grease, adhesives, wax, and debris.

Moisture matters, especially over slabs. For best practices on moisture control in buildings, see the U.S. EPA’s guidance on moisture prevention.

5) Subfloor Preparation (The Make-or-Break Step)

A smooth, flat, clean, and dry substrate is critical to a successful vinyl tile installation. Follow your product’s instructions and these general tips:

Concrete or Existing Ceramic Tile

  • Flatness: Grind down high spots; fill low areas/cracks with cementitious patch/leveler.
  • Clean & dry: Remove dust and residues; confirm moisture levels meet the manufacturer’s limits.
  • Glossy tile: De-gloss or prime per adhesive specs for proper bond.

Existing Vinyl

  • Condition check: If firmly bonded and smooth, you can float or glue over it.
  • Embossing leveler: Skim coat to hide textures/dents so new tile doesn’t telegraph patterns.
  • Failing vinyl: Remove it, or install an approved underlayment over top.

Damaged or Uneven Floors

  • Plywood underlayment: Overlay with smooth, approved panels; fasten per pattern (e.g., staples every 4″ field / 2″ seams).
  • Expansion gaps: Leave ~1/32″ between underlayment panels; ~1/8″ at walls.
  • Seams: Fill and sand flush; vacuum thoroughly.

6) Fit Door Jambs & Transitions

To slide tiles neatly under casing, undercut the jambs: place a scrap tile (face down) and a saw on top to mark height, then cut and clean out waste. Dry-fit threshold transitions and note final heights to ensure smooth passage between rooms.

7) Install the Tiles

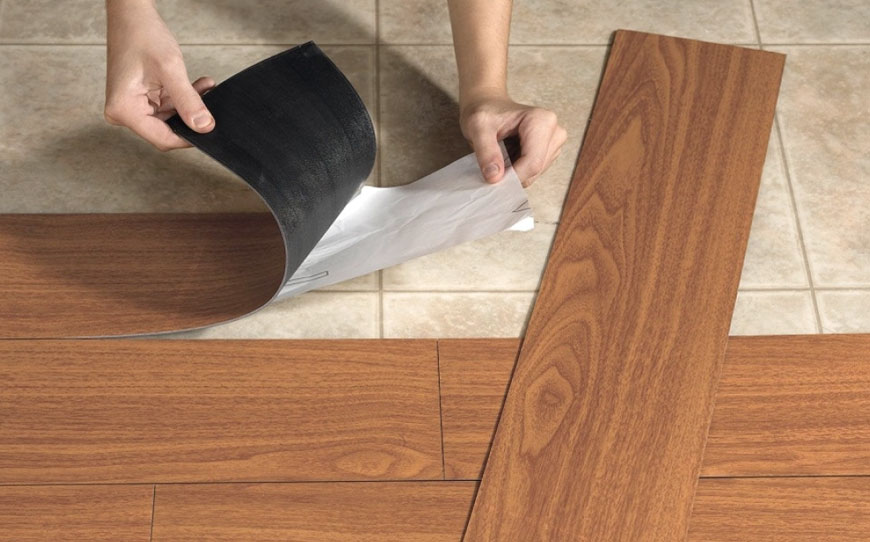
Peel-and-Stick / Pressure-Sensitive Tiles

  1. Start at the chalk-line intersection and work in a stair-step pattern to keep courses square.
  2. Peel backing and set the tile lightly first—this gives you a moment to nudge alignment.
  3. Once aligned, apply firm pressure, then roll with a J-roller. Roll again every few rows.

Glue-Down Tiles

  1. Trowel adhesive using the notch profile specified by the manufacturer.
  2. Observe open time/flash time to achieve the right tack.
  3. Place tiles along layout lines; roll thoroughly with a 75–100 lb roller in multiple directions.

Cutting Border & Irregular Pieces

  • Score & snap: Use a straightedge and sharp blade; multiple light passes beat one heavy cut.
  • Heat aid: Warm the tile gently to improve flexibility for tight curves.
  • Template trick: Use cardboard to trace complex shapes (around toilet flanges, door trims), then transfer to the tile.
  • Consistent borders: Keep perimeter cuts as even as possible for a clean, intentional look.

8) Roll, Cure & Protect

  • Roll again: When the entire floor is down, roll the surface in both directions to maximize bond.
  • Cure time: Follow product guidance; as a rule of thumb, avoid traffic for several hours, heavy furniture for 24–48 hours, and wet cleaning for 5–7 days.
  • Reinstall trim: Reattach base and shoe molding; caulk/touch-up as needed.

Maintenance for Long-Term Beauty

  • Entry mats & felt pads: Reduce grit and furniture scratches.
  • Routine clean: Sweep/vacuum regularly; damp mop with manufacturer-approved cleaner.
  • Avoid: Steam mops, harsh solvents, and abrasive pads.

Troubleshooting & Pro Tips

  • Tiles won’t stick: Substrate may be dusty or oily; clean and re-roll. For glue-down, verify open time and temperature.
  • Gaps appearing: Check that acclimation and temperature specs were met; reset misaligned tiles before rolling.
  • Telegraphing: If old patterns show through, you need embossing leveler or new underlayment.
  • Moisture alerts: Over concrete, always verify moisture limits. Persistent moisture can compromise bond.

FAQs About Vinyl Tile Installation

Q: Can I install vinyl tile over radiant heat?
A: Many products are compatible—confirm your exact tile’s max temperature and installation method with the manufacturer.

Q: Which is better—peel-and-stick or glue-down?
A: Peel-and-stick is fast and DIY-friendly; glue-down offers the strongest bond for high-traffic or commercial-like use.

Q: Do I need underlayment?
A: Not always. Use an approved underlayment to correct damaged substrates or when specified by the tile manufacturer for performance.

Get Pro-Level Results—With or Without the DIY

Whether you need help choosing between click, peel-and-stick, or glue-down tiles—or want a pro to handle subfloor repairs and rolling—our team can help you get the best result for your space and budget. Explore our vinyl flooring options and see why homeowners trust us for durable, great-looking installs.

Ready to start your vinyl tile installation—or want expert help to do it right the first time? Schedule your Free In-Home Estimate with GC Flooring Pros today.

why install carpet floor in the bedroom
About Floors, Blog, Carpet Flooring, Interior Design

Why install carpet flooring in the bedroom

Carpet Flooring: Why It’s the Best Choice for a Restful Bedroom

Sleep impacts everything—your stress levels, productivity, mood, and overall health. While most people focus on pillows, bedding, and mattresses, many overlook one major factor: the floor beneath your feet. Choosing the right bedroom flooring can dramatically influence comfort, warmth, quietness, and even air quality. That’s why carpet flooring remains one of the most popular and effective choices for creating the perfect sleep environment.

Carpet has been used in sleeping spaces for centuries across many cultures. Today, wall-to-wall carpet is still a favorite worldwide because it delivers benefits that hard surfaces simply can’t match. Below, we explore how carpet flooring supports better sleep, enhances comfort, and transforms your bedroom into a safe, soothing retreat.

Why Carpet Flooring Is Ideal for Bedrooms

1. Carpet Flooring Is Exceptionally Comfortable

Nobody wants to step onto a cold floor during a 3 a.m. bathroom trip—or first thing in the morning. With carpet flooring, every step is soft, cozy, and warm. Because carpet is made from natural or synthetic fibers, it provides a cushioned surface that’s gentle on your feet and joints.

Carpet also adds visual warmth. Whether you prefer calming neutrals or bold patterns, carpet flooring can instantly make your bedroom feel more inviting. For an extra plush feel, you can pair it with a thick, premium carpet pad to maximize softness and sound absorption.

2. Carpet Flooring Creates a Quieter, More Peaceful Room

Noise is one of the biggest disruptors of quality sleep. Hard surfaces echo footsteps, furniture movement, and general activity. Carpet flooring, however, absorbs sound—up to ten times more effectively than wood or tile surfaces.

This is especially beneficial if you:

  • Share a home with children or pets
  • Live above another floor or apartment
  • Have family members who keep different schedules

The soft fibers in the carpet reduce noise transfer, footsteps, and vibrations. The result? A quieter, more restful environment—one that can even help couples avoid waking each other when someone gets out of bed early.

3. Carpet Flooring Can Support Better Air Quality

Many people assume that carpet flooring is bad for allergies, but research tells a different story. Studies—including those referenced by the National Institutes of Health—show that carpets can actually trap allergens, preventing them from circulating through the air.

Hard floors allow dust, pollen, and particles to stay mobile and become airborne more easily. Carpet flooring captures these particles in the fiber until they’re removed by vacuuming, resulting in:

  • Cleaner air
  • Less irritation for individuals with allergies
  • Better respiratory sleep quality

Just vacuum regularly using a machine with a HEPA filter, and you’re good to go.

4. Carpet Flooring Is Safer—Especially at Night

Everyone slips now and then—but nighttime falls are especially common. Carpet reduces that risk dramatically. Its non-slip surface and slight cushioning make it ideal for bedrooms, giving you more stability when you’re tired, groggy, or carrying kids early in the morning.

For children, seniors, and adults alike, carpet flooring provides a softer landing in case of trips or bumps, making the bedroom safer overall.

5. Carpet Flooring Enhances Bedroom Design

Hardwood is beautiful, but it can make furnishing a bedroom tricky. Wood types and tones vary widely, and matching furniture to floors often becomes a stressful puzzle. Too much wood can also make a space feel visually heavy.

Carpet flooring removes that challenge. It complements furniture rather than competing with it. Carpet also offers endless color, pattern, and texture options—giving you the freedom to create a cozy, cohesive space that reflects your personality.

Whether your bedroom style is modern, minimalist, traditional, or bold, carpet offers unmatched versatility.

Best Types of Carpet for a Bedroom

Cut Pile Carpet

Soft and plush, cut pile carpet is ideal for bedrooms. It’s warm, luxurious, and extremely comfortable underfoot.

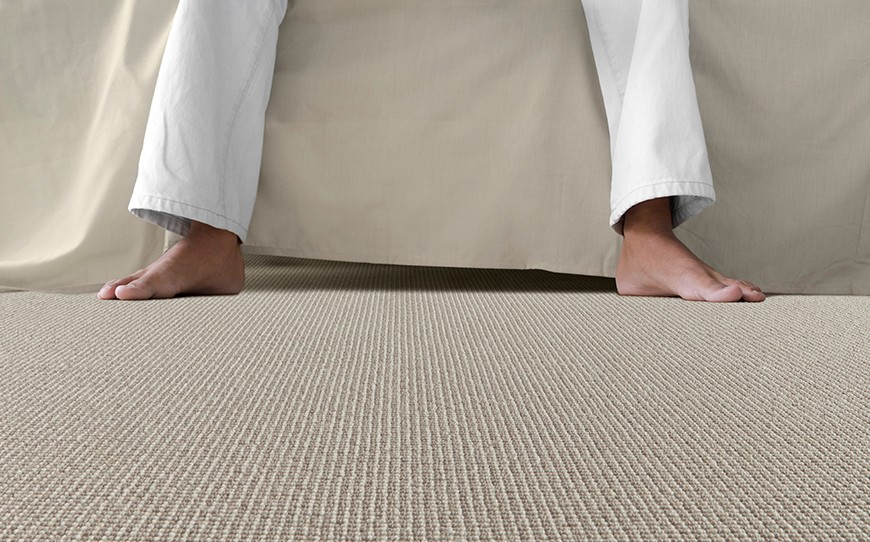
Berber Carpet

Durable and great for high-traffic rooms, Berber carpet is stylish and easy to maintain. Its looped fibers add texture while offering great stain resistance.

Patterned Carpet

If you want a more decorative look, patterned carpet adds style and visual depth. It’s perfect for creating a polished, designer-like bedroom.

Carpet With High-Quality Padding

Regardless of the carpet type, always invest in good padding. It boosts comfort, reduces noise, and extends the life of your flooring.

Carpet Flooring vs. Other Bedroom Flooring Options

Here’s how carpet compares to other popular flooring materials:

  • Hardwood: Stylish but cold and noisy
  • Laminate: Warm but not as soft or sound-absorbent
  • Vinyl: Quiet but can feel synthetic underfoot
  • Tile: Durable but too hard and cold for a bedroom

When comfort, quiet, and warmth matter the most, carpet flooring wins every time.

Final Thoughts

Carpet flooring offers a unique blend of comfort, warmth, safety, and noise reduction—making it one of the best choices for a restful bedroom. If you want a cozy, quiet, and healthy sleep environment, carpet is a smart investment that enhances both daily comfort and long-term well-being.

When you’re ready to explore carpet options for your bedroom, our team can help you compare materials, understand pricing, and choose the perfect style.

Ready to transform your bedroom with the perfect carpet flooring? Explore options at GC Flooring Pros or schedule your Free In-Home Estimate today.

GC FLooring Pros
About Floors, Blog, Tile Flooring

Natural Stone Floor vs. Ceramic Flooring: Which one to install?

Natural Stone Floor vs. Ceramic Flooring: Pros, Cons & Best Uses

Natural stone floors and ceramic flooring are both durable, long-lasting hard-surface options. While they share similarities in installation and care, their performance varies by material and location. Use this guide to decide which floor is right for your home.

Types of Natural Stone Flooring

Natural stone floor options differ in hardness, porosity, and maintenance needs based on how the stone formed (igneous, metamorphic, or sedimentary). Below are the most common choices for residential projects.

Ceramic flooring is made from clay and minerals fired in a kiln. Manufacturing determines performance: unglazed tiles showcase the natural body of the tile, while glazed ceramic tile gets an added glass layer for enhanced protection and design versatility. Many homeowners also pair ceramic floors with coordinating wall tiles to create a cohesive look in bathrooms and kitchens.

Granite Floors

Granite is among the hardest stones used for flooring. Its density makes it inherently water resistant and less prone to staining. We still recommend sealing the tile surface and grout lines after installation for added protection. Finishes include polished, honed, and natural/gauged.

Slate Floors

Slate is a layered, metamorphic stone known for strength and slip-friendly texture. It can resist cracks in everyday use, though edges may chip without proper sealing. Apply a high-quality sealer annually for best results.

Limestone Floors

Limestone offers a soft, classic look but is more porous than granite or slate. Expect more frequent sealing and gentle cleaning. With age, limestone develops a warm patina that many homeowners love.

Sandstone Floors

Sandstone is attractive but very porous. It’s not ideal for wet areas and requires routine inspections and sealing to keep moisture out.

Explore more stone options here: Types of Natural Stone Flooring.

Types of Ceramic Flooring

Ceramic is made from clay and minerals fired in a kiln. Manufacturing determines performance: unglazed tiles showcase the natural body of the tile, while glazed ceramic tile gets an added glass layer for enhanced protection and design versatility.

Unglazed Ceramic Flooring

Unglazed tiles offer a rugged, natural look and better traction, making them a smart pick for high-traffic areas. Because the body is porous, sealing after installation (and periodic re-sealing) helps prevent staining and moisture intrusion.

Glazed Ceramic Tile Flooring

Glazed tiles add a glassy protective layer that blocks spills and stains and often eliminates the need for a topical sealer on the tile surface. The printed glaze can mimic materials like wood or natural stone tile and comes in a wide range of colors and designs, including highly durable porcelain tiles.

Learn more: Types of Tile Flooring.

Stone Floor vs. Tile Floor: Key Differences

Durability & Scratch Resistance

Tile durability is influenced by firing temperature and composition. High-fired porcelain tiles are dense and resistant to scratches. Among stones, granite and slate generally outperform limestone in hardness. All stones can contain natural fissures; proper selection and installation help minimize chipping.For additional guidance on long-term tile performance and care practices, refer to the Tile Council of North America’s official maintenance recommendations.

Water Resistance

Glazed ceramic flooring and porcelain provide excellent moisture protection. Most natural stone floors benefit from sealing to improve water resistance—particularly limestone and sandstone.

Style & Variety

Glazed ceramic tile offers the widest color and pattern range, including stone looks. Natural stone delivers unmatched authenticity and variation from tile to tile.

At-a-Glance Comparison: Natural Stone Floor vs. Ceramic Flooring
Feature Natural Stone Floor Ceramic/Porcelain Tile
Water Resistance Good with sealing; varies by stone Excellent (especially glazed & porcelain)
Scratch Resistance High for granite/slate; moderate for limestone High for porcelain; moderate for standard ceramic
Maintenance Periodic sealing; pH-neutral cleaners Easy cleaning; grout sealing recommended
Style/Color Range Natural variation; authentic look Very wide range; can mimic stone or wood
Slip Resistance Honed/cleft finishes improve traction Unglazed & textured finishes improve traction

Best Uses by Room

  • Bathrooms & Laundry: Glazed ceramic flooring or porcelain tile for maximum water resistance. Adding matching wall tiles can enhance moisture protection and elevate the overall design.
  • Kitchens: Porcelain tile or sealed granite/slate; choose textured finishes for traction.
  • Living Areas: Any stone or tile depending on style; limestone offers a warm, classic feel.
  • Entryways & Mudrooms: Porcelain or slate for durability and slip resistance.
  • Outdoor Covered Areas: Slate or textured porcelain rated for exterior use.

Care & Maintenance

Sealing

For most mid-range stones and unglazed ceramic, apply a penetrating sealer after installation and re-seal as recommended by the manufacturer. Granite and slate may only need initial sealing and periodic checks. Always seal grout lines for both stone and tile.

Cleaning

Use a pH-neutral cleaner for natural stone to avoid etching and stains. Glazed tile is easy to clean with standard household cleaners; avoid harsh chemicals directly on grout unless it’s properly sealed. These same gentle-cleaning principles apply to ceramic wall tiles, especially in showers and backsplashes.

Repairs

Individual stone or tile pieces can be replaced if damaged. Keep a few spare tiles from your original batch for the best color match.

Frequently Asked Questions

Is a natural stone floor more durable than porcelain tile?

It depends on the stone and the tile. Granite and slate are very durable; high-fired porcelain tiles often match or exceed their scratch and water resistance.

Do I have to seal ceramic flooring?

Glazed ceramic and porcelain usually don’t need a topical sealer on the tile surface, but the grout should be sealed. Unglazed ceramic benefits from sealing to resist stains.

Which option is best for wet areas?

Glazed porcelain tiles are the most moisture-resistant choice for showers, baths, and laundry rooms. Some stones can work with proper sealing and finish selection.

Ready to Compare Samples?

GC Flooring Pros can help you choose between natural stone floor options and tile flooring that fit your space and budget. Schedule a free in-home estimate or visit our showroom to see materials in person.