Vinyl Flooring

LVT vs LVP
Blog, Vinyl Flooring

Vinyl Flooring Showdown: LVT vs LVP Flooring

It’s time to make a decision.  You have been eyeing your options and researching the different kinds, but now you are faced with making the choice. Which one is for you?

Luxury Vinyl Tile (LVT) and Luxury Vinyl Plank (LVP) are two different kinds of luxury vinyl flooring. To help you decide which is right for you, we’ll go over the features and qualities of each, including:

  • Appearance
  • Waterproofing
  • Installation
  • Care and Cleaning
  • Durability and Maintenance
  • Lifespan

And we’ll also give you a recap of the pros and cons of luxury vinyl flooring! To start, let’s get into what each one is.

LVT vs LVP: What Is The Difference?

While they may sound similar, they actually do have some differences.

Luxury Vinyl Tile

LVT is made up of tiles that are cut to size and fit together like a puzzle. The tile is then adhered to the floor using an adhesive. LVT can be made to look like stone, ceramic, or wood.
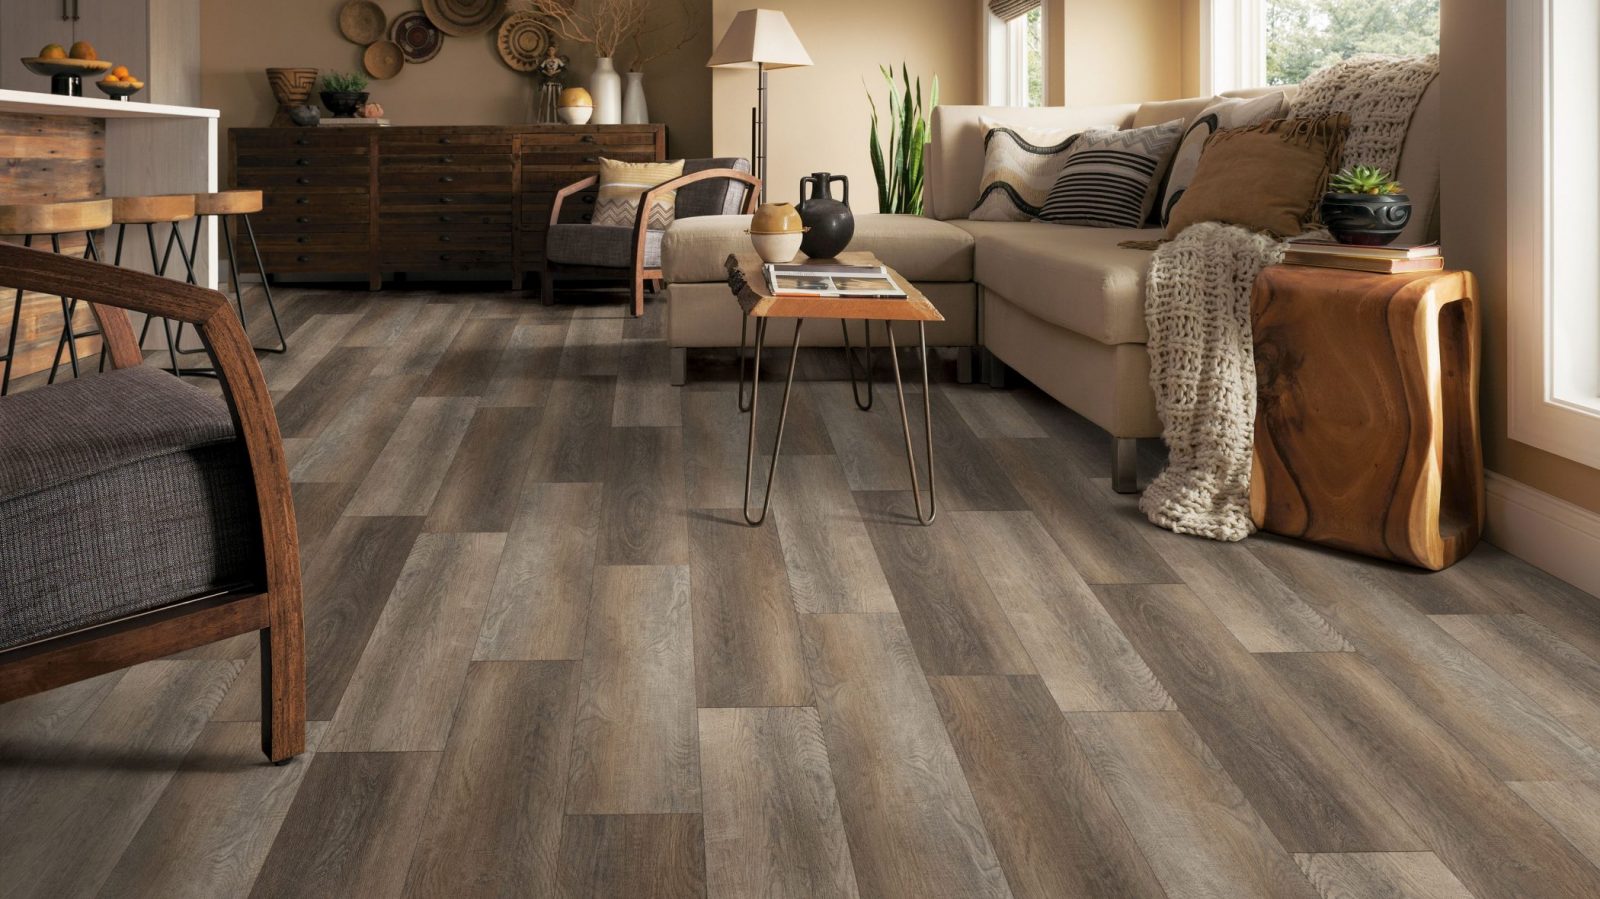
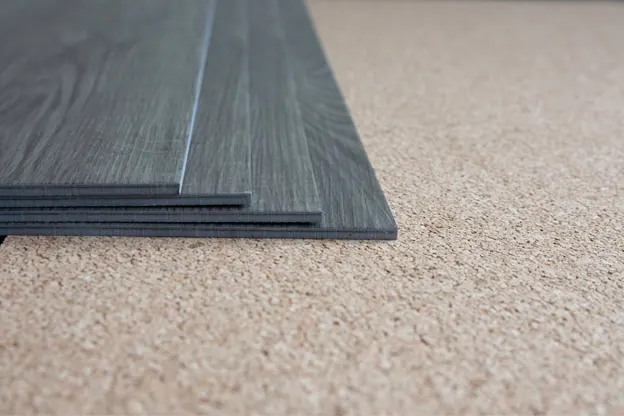
Luxury Vinyl Plank

Luxury vinyl plank (LVP) is made up of long, thin strips of vinyl that mimic the look of hardwood floors. The planks are cut to size and fit together using a tongue-and-groove system.

Now that we know what each one is, let’s take a closer look at their features!

LVT vs LVP

LVT vs LVP: The Appearances

As we mentioned before, LVT and LVP can both be made to look like stone, ceramic, or wood.

Luxury Vinyl Tile

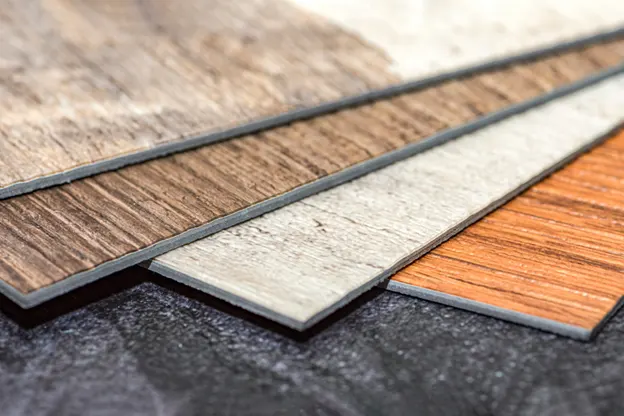
LVT is available in a wide variety of colors and patterns. You can find LVT that looks like marble, granite, limestone, slate, and more. It is also available in a variety of wood looks, including oak, walnut, cherry, and more. The most popular colors include shades of brown, gray, and white.

Luxury Vinyl Plank

LVP is also available in a wide variety of colors and patterns. You can find LVP that looks like hardwood floors, bamboo floors, and more. The most popular colors also include shades of brown, gray, and white.

So, what’s the difference in appearance?

When it comes to appearances, LVT and LVP are very similar. Both can be made to look like a variety of different flooring materials. They both can achieve the same general look you’re going for. The only difference is in the shape, and therefore the installation process (which we will get into later).

LVT vs LVP: Waterproofing

One of the main reasons people choose luxury vinyl tile or plank is because it is very water-resistant.

Both LVT and LVP are 100% waterproof, as they are constructed of sturdy layers of plastic. They’re especially ideal for kitchens and bathrooms that have a tendency to be exposed to moisture. 

The level of waterproofing to your flooring is an important factor to consider if you live in an area that is prone to excess moisture or flooding, or if you have young children or pets who may have accidents.

LVT vs LVP

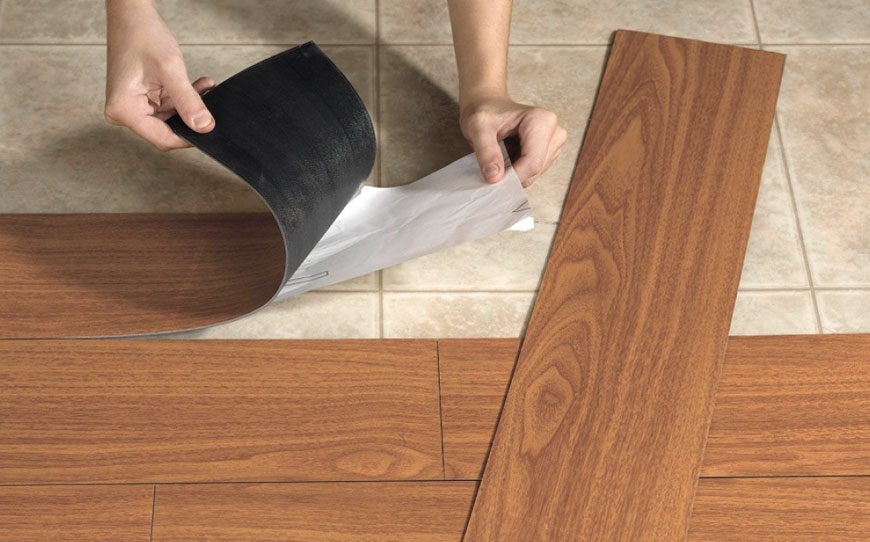
LVT vs LVP: Installation

Luxury vinyl tile and plank are both very easy to install. Both can be “floated” over existing hard flooring, making the process easier than having to remove the flooring and start from scratch (though in some cases with different levels of flooring, adjustments may be needed).  However, we do suggest consulting with a professional about floating over old floors, this could void product warranties if the old floors are not secured properly, and prepping them might cost more than demoing the old floors.  

Luxury Vinyl Tile

LVT is a flooring option that can be installed by a homeowner, however, floor prep is essential and this might be a little difficult for the average person. The tiles are cut to size and fit together like a puzzle, then adhered to the floor using an adhesive making it an easy installation that can be handled by any vinyl flooring contractor.

Luxury Vinyl Plank

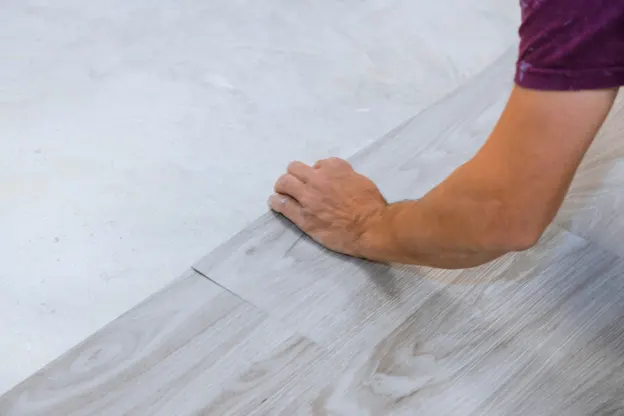
LVP is also a DIY-friendly flooring option that can be installed by homeowners. The planks are cut to size and fit together using a tongue-and-groove system.

While both can be done by a DIYer, for the utmost perfection when it comes to vinyl flooring installation, a professional is always the best route. 

LVT vs LVP: Care and Cleaning

Luxury vinyl tile and plank are both very easy to care for and clean.

To clean LVT or LVP, simply sweep the floor with a soft broom or vacuum it with a soft attachment. For tougher dirt and stains, you can mop the floor with a mild soap and water solution.

Be sure to avoid using harsh chemicals or cleaners, as they can damage the vinyl.  Steam cleaners are also not to be used.  

LVT vs LVP: Durability and Maintenance

Luxury vinyl tile and plank are both very durable and require little maintenance.

Luxury Vinyl Tile

LVT is a very durable flooring option that can withstand a lot of foot traffic. It is also resistant to scratches, dents, and stains.

Luxury Vinyl Plank

LVP is also a very durable flooring option that can withstand a lot of foot traffic. It is also resistant to scratches, dents, and stains.

Both LVT and LVP are low-maintenance floors that are easy to care for.

LVT vs LVP: Lifespan

Luxury vinyl tile and plank will both last for 10-20 years with proper care and maintenance.

Proper maintenance includes cleaning them regularly and avoiding the use of harsh chemicals or cleaners.

The Pros And Cons Of Luxury Vinyl Flooring

The answer to this question depends on your personal needs and preferences. The pros and cons of any luxury vinyl flooring are roughly the same. The main difference between the two is just the shape and pattern you’re going for.

Here are the pros and cons of these types of flooring in general.

Luxury Vinyl Flooring

Pros:

  • Flexibility with the look of stone, ceramic, or wood
  • Less expensive than the real materials
  • Water-resistant
  • Easy to install and care for
  • Very durable

Cons:

  • Not as realistic as the real thing
  • Can be damaged by sharp objects

Luxury vinyl flooring is a great choice for both homes and businesses!

Takeaway

Luxury vinyl tile and plank are both great flooring options that come with a variety of benefits. The main difference between the two is just the shape and pattern you’re going for. If you’re looking for a durable, low-maintenance flooring option that is easy to install and comes in a variety of different styles, luxury vinyl tile or plank may be the right choice for you.

Need more help deciding?  Schedule a free in-home consultation and one of our flooring experts will bring samples right to your door. We have a huge supply of vinyl flooring and we can help you compare the different options and find the perfect floor for your home or business! Schedule now.

Read our other flooring showdowns:
Tile Flooring Showdown: Porcelain vs Ceramic Tile Flooring
Hardwood Flooring Showdown: White Oak vs Red Oak Flooring


FAQs About Vinyl Flooring Showdown: LVT vs LVP Flooring

What is the main difference between Luxury Vinyl Tile (LVT) and Luxury Vinyl Plank (LVP) flooring?
The main difference lies in their shapes and installation processes. LVT consists of tiles cut to size and adhered like a puzzle, mimicking stone, ceramic, or wood. LVP, on the other hand, comprises long, thin strips with a tongue-and-groove system, resembling hardwood floors.

How do the appearances of Luxury Vinyl Tile (LVT) and Luxury Vinyl Plank (LVP) differ?
Both LVT and LVP offer a wide variety of colors and patterns, mimicking materials such as wood, stone, and ceramic. The primary distinction is in the shape, affecting the installation process, while achieving similar aesthetic results.

Are Luxury Vinyl Tile (LVT) and Luxury Vinyl Plank (LVP) waterproof?
Yes, both LVT and LVP are 100% waterproof, constructed with sturdy layers of plastic. This feature makes them ideal for areas prone to moisture, such as kitchens and bathrooms.

How easy are Luxury Vinyl Tile (LVT) and Luxury Vinyl Plank (LVP) to install?
Both LVT and LVP are relatively easy to install. They can be “floated” over existing hard flooring, simplifying the process. While both options are DIY-friendly, professional installation is recommended for optimal results.

What is the lifespan of Luxury Vinyl Tile (LVT) and Luxury Vinyl Plank (LVP)?
With proper care and maintenance, both LVT and LVP can last between 10-20 years. Regular cleaning and avoiding the use of harsh chemicals contribute to their longevity.

Vinyl Flooring…What’s the Draw?

landscape widescreen large.2100.1180

Vinyl flooring is a highly popular option and a great choice, due to advanced technology that has helped vinyl manufacturers to create realistic, stunning floors that look like hardwood, tile, or stone. It’s durable, cost-effective, and low maintenance, which makes it advantageous for those who want comfort, beauty, and longevity in every day, high-traffic areas of their home. We hope the following reasons will help you make an informed decision for your next flooring project in your home:

ECONOMICAL

Luxury vinyl flooring is a smart choice, as it can be maintained easily, is economical, and is long-lasting. The beautiful look of wood grain from an exotic tree species is printed onto the vinyl, so you have the look without the high costs of hardwood flooring. It comes in an array of hues, patterns, and grain sizes, to give the appearance of hardwood floors. Whether you go for traditional, exotic, or rustic wood looks, there are many design ideas for you to choose from that will fit your personal style!

COMFORTABLE

Vinyl floors have a foam layer that creates a comfortable and soft feel, while still being durable and stain-resistant. So if you’re standing for extended periods of time, this is the perfect choice for you. Some vinyl floor products also come with a sound barrier layer to muffle footsteps.

DURABLE

Vinyl floors are used in commercial and residential spaces as it’s tolerant of high traffic, resistant to spills and abrasions. Its waterproof and low maintenance capabilities make it a highly sought-after option at restaurants and commercial offices.

STYLE

The trends, designs, grains, and hues that are available in vinyl floor options on the market, are extensive. In 2019 vinyl manufacturers will be producing even more looks that will mimic the latest texture trends and the most sought-after hardwood flooring style.

CONTACT US

GC Flooring Pros is proud to offer the latest trends in vinyl flooring as well as hardwood flooring. To book your free in-home consultation, please contact us at:214-814-1177 or fill out the estimate request form by clicking here.

Vinyl tile installation: How it's done
About Floors, Blog, How-to, Vinyl Flooring

Vinyl Tile Installation: A comprehensive guide

Vinyl tile is the perfect flooring option for those of us who prefer to do things on our own.
Even though it’s floor installation we are talking about here, the simplicity of it all twined with the ready-to-use adhesive backing of vinyl makes it seem more like a game of Tetris or Lego, something DIY buffs can definitely get behind. In addition to upgrading your home, these tiles guarantee that you will have a lot of fun doing it.
Vinyl tile floor has all the same qualities sheet vinyl is praised for. It’s water and dirt-resistant doesn’t stain and offers pleasantly soft support for your feet.
If vinyl tile is a floor you want in your home, here’s a comprehensive guide to help you get it there.

Do the calculating

The first thing on the list is to determine how much vinyl you’ll be needing. To do so, you’ll have to measure your floor. Don’t worry if the room has a complex shape, you can always measure individual areas and add them up.

Once the measuring is over there are two ways to find out how much vinyl you’ll need to cover the entire surface. Either divide the area of your floor by the area of a single vinyl tile to get the needed number of tiles or by the square footage contained in a carton for the number of cartons. Since it’s highly unlikely you’ll be buying the tiles one by one, the second method is more effective and time-saving.

Before you place your order, don’t forget to get some extra. Slip-ups do happen, you might cut some of the tiles too small to fit the borders or lay them down at the wrong angle. It’s always preferable to have some extra vinyl at hand. 10-15% of your estimated amount is usually enough to cover all possible accidents.

Figure out the layout

For a better visual appearance floor tiles are usually centered at a doorway.
When making a layout you want to cover to fit them in the areas where the tiles meet the walls but try to maximize their size and minimize the number. The goal is to end up with at least half a tile width at those edges. Try to place badly sized tiles as far out of the sight as possible, the trick is to hide them under trims or furniture later. To avoid any surprises and miscalculations on the way, draw a scale plan of your floor on a piece of paper and a scaled grid on tracing paper to correspond to the tiles. This way you can place the grid on the plan and move it around to choose the best layout for your room. While you are at it, you might also want to experiment with different patterns by using colored pencils to color into the boxes.

Arm yourself

It’s always smarter to have all the tools you may require at hand. Vinyl installation is a pretty simple process so chances you already own all the needed tools. To be sure, here’s a list:

  • Carpenter’s square
  • Tape measure
  • Utility knife
  • Safety glasses
  • Respirator
  • Chalk line
  • vinyl roller
  • trowel

Prepare your floor

Before you go ahead with actually laying down your vinyl tiles there are certain things to take into account.
Vinyl expands and contracts to depend on the environment it’s in. Before you install it, let the open boxes sit in the room for at least 48 hours for the tiles to get acclimated. Also, make sure you follow any product-specific instructions your vinyl manufacturer might have provided.

Clear your floor from all the trim on the edges. If you plan to reinstall them later, make sure to be extra careful with removing nails so there is as little splitting as possible. The safest bet is to pull the nails out through the trim from the backside.

The surface you are lying down the vinyl tiles on should be as flat and smooth as possible. Any unevenness or bumps will cause it to develop blemishes over time. Clean your floor properly, get rid of any debris, grease, or wax beforehand.

Subfloor

Vinyl tiles can be installed on pretty much any floor but there are some differences in the process you should be aware of in advance.

Installing vinyl tiles on concrete or ceramic tile

To install vinyl tiles on concrete or ceramic tiles, the surface should be clean, flat, and dry. If there are any cracks or imperfections they should be fixed using a sealer.
High spots can be flattened out using a coarse-grit abrasive on a belt or disc sander.
A cold chisel and a baby hammer can be used to remove any minor bumps from the surface.

Installing vinyl on the vinyl subfloor

It is possible to install vinyl tiles over an old vinyl flooring as long as the old floor isn’t in too bad of a shape. Any minor imperfections like small dents and dings can be fixed by applying a coat of embossing leveler. This will smooth the surface and prevent the new vinyl from following the shape of the floor underneath.
However, if there is more damage to your old vinyl floor than just some rough patches you should get rid of it altogether.

Installing vinyl on damaged floor

f the floor is far too damaged for any embossing leveler or sealer to do the trick and get rid of it is too difficult or expensive you can cover it with a layer of plywood.
Needless to say that the plywood itself should be smooth and cleared of any imperfections before the vinyl tile is laid down.

Underlayment

Underlayment can also be used for extra thickness or better grip. Plywood surface as well as glass, hardboard, lacquer, painted enamel, steel, aluminum, and many kinds of plastic offer the best adhesion. When laying down the underlayment make sure to leave a 32-inch gap between the panels and a 1/8-inch gap along the walls to allow the sheets to expand. It can be stapled onto the old floor with 7/8-in. narrow crown staples. For the best stability place staples 4 inches apart in the center of the sheet and 2 inches apart along the seams. Try to use as many full sheets as possible and trim the edges only when necessary.

Fit the doors openings

To ensure the smooth functioning of your doors you’ll need to trim down the door opening so the tiles will fit underneath. To do so place a tile upside down in front of the door frame to serve as a height guide. You can use a saw or utility knife and a sharp chisel for cuts that are tight.

Divide your floor

The next step is to transfer your desired layout from paper to the underlayment. Chalk lines are the easiest way to do so. The rule is to starts laying down tiles from the center. To find the center of the room you’ll have to find the centers of both sets of opposite walls. Use these points to snap a chalk line across the floor in both directions. You’ll end up with two lines crossing in the center creating four rectangles. Use a carpenter’s square to make sure the lines are straight.
Trial-fit a row of tiles down both lines following the width and length of the room without removing the peel and exposing the adhesive backing. It will give you a sense of what you are aiming for and show if there are any changes that should be made to your original layout. Use a pencil to darken the lines before you sweep the surface one last time.

Install the tiles

Finally, it is so far. Full tiles are installed first. Start at the intersection, peel off the protective backing, and lay down the vinyl tiles along the layout lines. Continue to work in a stair-step fashion to keep the tiles aligned. Use a floor roller every couple of rows to apply pressure and attach them securely to the underlayment.
Once you have covered the area with as many full tiles as you can you’ll need to cut vinyl to fit the borders. Use a heat gun for about a minute to warm the tile and make it flexible, then cut it with a utility knife. Then cut the tile using a utility knife.
Vinyl tiles that require to simply be trimmed to length, can be cut easily using his method
You can cut vinyl tiles that simply need to be trimmed along the length by placing the tile atop the last full tile close to the wall, then situate another one to overlap the loose tile. Use a knife to cut the overlapping section off the top tile. Use the trimmed section to cut tiles for the same row. Irregularly shaped tiles can be easily trimmed using a cardboard template.

Let it sit

Once the entire floor is covered, do a couple more rounds with a vinyl floor roller, and then let it sit undisturbed for the recommended period of time. This means no walking for at least a few hours, no moving furniture for 2 days, and certainly no cleaning at least for a week. This way the adhesive will have time to settle and develop a stronger bond.