Floor Care

Four steps to expect during the Hardwood Floor installation process

Hardwood Floor Installation: What to Expect From Start to Finish

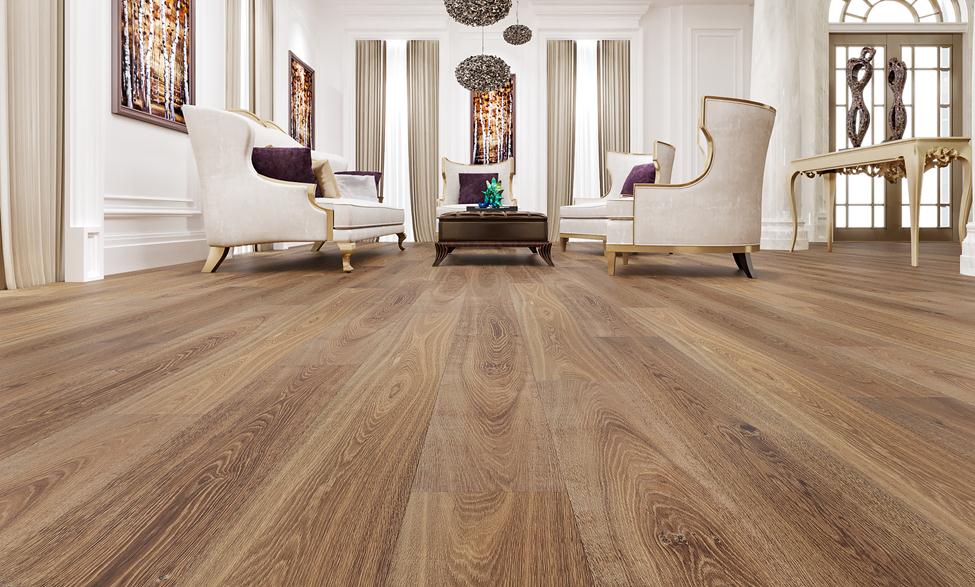
Hardwood floor installation in white oak

Considering a flooring upgrade? Choosing a new wood floor can be overwhelming with so many design, grain, and color options—but the hardwood floor installation process doesn’t have to be stressful. At GC Flooring Pros, we guide you through every step so you know exactly what to expect from your project.

Below is a clear breakdown of our four-step hardwood floor installation process.

STEP 1: Free In-Home Consultation

Every hardwood floor installation begins with a complimentary in-home visit. During your consultation, we review your style preferences, room layout, natural lighting, wall colors, and cabinet tones so we can recommend the best flooring options for your home.

We also take precise measurements and bring popular hardwood flooring samples—including different species, stains, plank widths, and patterns—to help you visualize your options.

STEP 2: Room Preparation

Once your floors are ordered, we’ll schedule your hardwood floor installation date. Before our installers arrive, the room must be cleared of furniture, décor, curtains, rugs, and fragile items.

For your convenience, GC Flooring Pros also offers optional furniture moving services—just ask during your consultation.

STEP 3: Installation

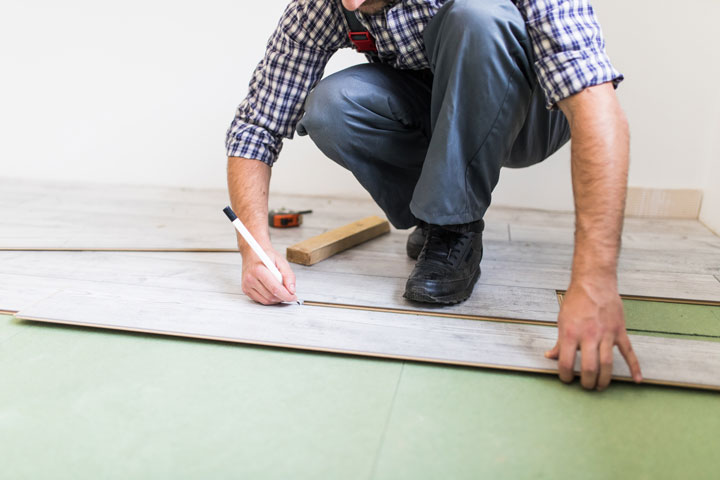
During installation, your home temporarily becomes an active construction zone. Expect noise, traffic, and some dust. We recommend covering furniture in nearby rooms to minimize dust exposure.

If your project involves pre-finished hardwood floors, installation is completed once the planks are laid. At that point, furniture can be moved back, and your new floors are ready to enjoy.

STEP 4: Staining & Finishing (For Unfinished Floors)

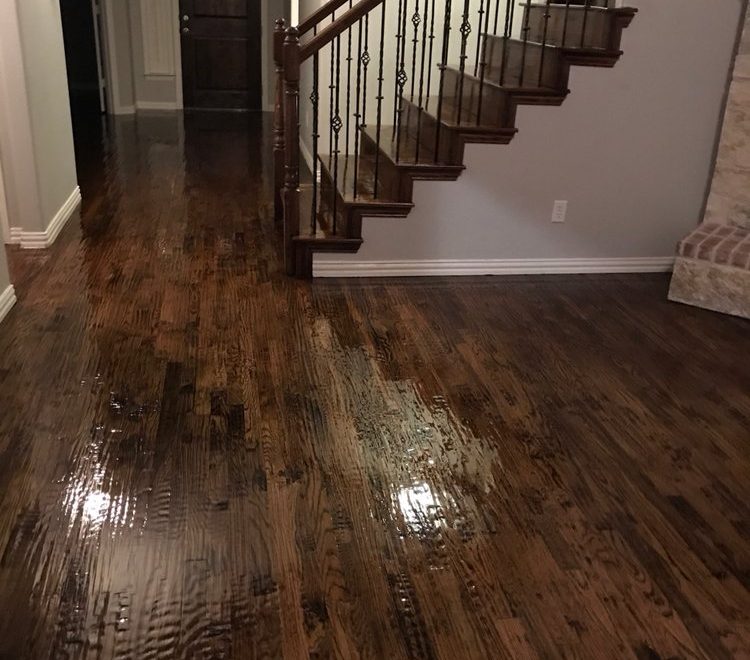
For unfinished hardwood, our team will sand, stain, and apply multiple coats of polyurethane for a smooth, durable finish. After the final coat, your floors typically require a 48-hour cure time before walking on them and moving furniture back.

We recommend applying felt pads to all furniture legs to protect your freshly finished hardwood floors from scratches.

Ready to Transform Your Home With Professional Hardwood Floor Installation?

If you’d like more details, have questions about wood species, or want to see samples in person, schedule your complimentary in-home consultation today. Our team at GC Flooring Pros is here to help bring your dream hardwood floors to life.

Blog, Floor Care, Laminate Flooring, Recommended Blog, Tips & Tricks, Water Damaged Floors

How to Fix Laminate Flooring That is Lifting [And Why It Happens]

The quick answer

Most laminate floor repair starts with one question: what caused it? Lifting and buckling usually come from moisture, missing expansion gaps or an uneven subfloor. Gaps come from dry air or joints that never fully locked. Scratches and small chips can be filled with a color-matched repair kit.

Peeling, swollen or water-damaged planks can’t be dried back to normal. Replace those boards, one at a time if the damage is small, after the moisture source is fixed.

Laminate is one of the toughest, most budget-friendly floors you can put in a home, and when something goes wrong, the fix is often smaller than it looks. Whether a few boards are lifting, gaps are opening between planks, the dog left a chip by the back door, or a leak got under the floor, this guide shows you how to repair laminate flooring the right way, problem by problem.

Fixing laminate flooring is mostly about matching the repair to the cause. We start with the most common issue, lifting, then cover gaps, chips and scratches, replacing a single plank, and water damage. If you’d rather hand it off, our team at GC Flooring Pros can inspect, diagnose, and repair or replace damaged sections for a long-lasting, seamless finish.

What’s Wrong With My Laminate Floor? Find Your Fix

Find the card that matches what you’re seeing, then jump to that section below.

Boards rising, bouncing or peakingLifting / buckling

Usually moisture, a floor pinned too tight to the walls, or an uneven subfloor. See the lifting fixes below.

Lines opening between planksGaps between planks

Often dry winter air or joints that didn’t fully lock. Many gaps can be tapped closed.

Fine lines or scuffs on the surfaceScratch repair

Light scratches blend out with a laminate repair kit or touch-up marker.

A dent or missing chunkChipped laminate

Small chips fill with color-matched putty or wax. Big or edge chips mean one new plank.

Top layer flaking or bubblingPeeling laminate floor

The wear layer is separating, usually from moisture in the core. Replace the plank.

Swollen seams after a leak or spillWater damage

Swelling is permanent. Fix the source, dry the subfloor, then replace what’s damaged.

Laminate Floor Repair at a Glance

Problem Most likely cause DIY-friendly? The fix Relative cost
Lifting or buckling Moisture, no expansion gap, uneven subfloor Sometimes Fix the cause, then relay or replace boards $–$$$
Gaps between planks Low humidity, unlocked joints, pinned floor Yes, for a few gaps Tap joints closed; relay rows if widespread $
Scratches Grit, pet nails, furniture Yes Repair kit, wax pencil or touch-up marker $
Chips Dropped items, impact at edges Yes, if small Color-matched putty or hard wax; replace plank if large $
Peeling surface Moisture in the core, heat, wear Replace only Replace the affected planks $–$$
Water damage Leaks, spills left standing, slab moisture Small areas only Stop the source, dry out, replace damaged planks or the room $$–$$$

Why Is My Laminate Floor Lifting?

“Lifting” isn’t a single problem, it’s a symptom. Pinpoint the cause first, then choose the matching fix below.

1) Underlying Moisture Problem

Excess moisture in the subfloor or slab causes planks to swell and rise. If substrate moisture is above about 6–9% per NALFA guidance, acclimation alone won’t save the install. Dehumidify, correct leaks, and use proper vapor barriers/underlayments before re-laying.

To reduce future risk, select an appropriate underlayment and verify moisture levels with a reliable moisture test prior to installation. You can also review general indoor moisture control tips from the EPA’s moisture guidance.

2) Not Properly Installed

Laminate relies on precise joints and “floating” clearances. If click-lock seams aren’t fully engaged, you’ll see gaps and peaks. If planks are jammed tight to walls, seasonal expansion has nowhere to go—leading to buckling. And if material wasn’t acclimated to site conditions, post-install movement is likely.

When in doubt, have a pro evaluate the locking profile, acclimation timeline, and edge clearances. Our crew at GC Flooring Pros can quickly spot and correct these issues.

3) Uneven Subfloor

Waves, dips, or humps telegraph through floating floors, creating bounce or lift. Minor highs can be ground; lows can be filled. If the slab or wood subfloor is significantly out of spec, a self-leveling compound or structural remediation may be required. Here’s a helpful primer on identifying issues with uneven substrates: how to address a wavy subfloor.

4) No Expansion Gaps

Floating floors need room to move—typically ~1/4″ around all fixed verticals (walls, cabinets, pipes, hearths). Without proper gaps and transitions, the floor will push against restraints and peak. This often appears at doorways or long runs.

Laminate flooring repair in a North Texas home

How to Fix Laminate Flooring That’s Lifting

Match your repair to the underlying cause. Here are the proven approaches our technicians use in the field.

Fix 1: Level an Uneven Subfloor

  1. Remove affected planks.Take them up carefully and set them aside.
  2. Find the highs and lows.Grind down peaks; fill dips with an appropriate patch or self-leveler per manufacturer instructions.
  3. Clean and check.Vacuum thoroughly; confirm smoothness with a straightedge.
  4. Add the right underlayment.It absorbs micro-variations and reduces sound transmission.
  5. Reinstall the planks.Tap joints with a block and mallet to fully lock the profile.

If the surface is severely out of tolerance, schedule a professional inspection through our Contact page. We’ll advise the most efficient, code-compliant fix.

Fix 2: Resolve Moisture Intrusion

  1. Track down the source.Plumbing leaks, slab moisture, or ambient humidity. Reference the EPA’s moisture control basics to stabilize indoor conditions.
  2. Remove and dry.Take up swollen or damaged planks and let the area dry thoroughly (fans and dehumidifiers as needed).
  3. Test before you relay.Check the slab or subfloor with a moisture meter or calcium chloride/RH test to verify acceptable levels.
  4. Barrier, then boards.Install a vapor barrier or appropriate underlayment before relaying planks. Replace any damaged boards with matching stock.

Need help sourcing like-for-like replacements or confirming moisture thresholds? Our laminate specialists can assist: Laminate Flooring Supply.

Fix 3: Add or Restore Expansion Gaps

  1. Pull the trim.Remove baseboards or quarter-round to inspect perimeter clearances.
  2. Trim to a full gap.Undercut or trim planks to achieve a continuous ~1/4″ gap at all walls and fixed obstructions.
  3. Break up long runs.Add T-moldings or reducers at long runs, room transitions, and thresholds.
  4. Reinstall the trim.Nail base or quarter-round to the wall, never down into the floating floor.

Fix 4: Reseat Mislocked Joints

  1. Lift the row with gaps.Inspect the click profile for damage or debris.
  2. Clean and replace.Clean tongues and grooves; replace any crushed or chipped boards.
  3. Reassemble carefully.Use a pull bar at end joints and a tapping block along long joints to fully engage.

Pro tip: Always follow the manufacturer’s installation pattern and expansion rules. If the original product line is discontinued, we can recommend visually compatible replacements through our laminate flooring team.

How to Fix Gaps Between Laminate Planks

Small gaps along the ends or long edges of planks are one of the most common laminate complaints, and one of the easiest to fix. They usually show up for one of three reasons: the air got dry and the boards shrank slightly, a joint was never fully clicked together, or something is pinning the floor (a kitchen island, heavy furniture or trim nailed into the floor) so it can’t move back into place.

  1. Start with humidity.If gaps appeared in winter, run a humidifier to bring the home back into the 35–55% range. Some seasonal gaps close on their own.
  2. Tap the joints closed.Use a floor gap fixer (a rubber-gripped block) or a tapping block and mallet. Press it onto the plank next to the gap and tap toward the gap. Work along the row so you’re not just moving the gap one board over.
  3. Unpin the floor.Check for trim, cabinets or furniture locking the floor in place. Free it so the floor can float again.
  4. Relay if it keeps coming back.Widespread or recurring gaps usually mean damaged locking edges or an uneven subfloor. Lift the affected rows, check the subfloor, and reinstall with fresh boards where joints are worn.
🛠️
Crew tip: don’t fill laminate gaps with wood filler

Filler cracks and pops out as a floating floor moves with the seasons. Close the gap mechanically instead. For a hairline end-joint gap that won’t close, a color-matched laminate putty is the cleaner fix.

How to Repair Chipped or Scratched Laminate Planks

Laminate can’t be sanded and refinished like hardwood, because its look is a printed layer under a clear wear coat. The good news: most surface damage is small enough to hide with a laminate floor scratch repair kit, which you can find at most flooring and hardware stores in your floor’s color family.

Light scratches and scuffs

Clean the area first, then try a laminate floor cleaner and a soft cloth. Many scuffs are just residue sitting on top. For true scratches, rub a color-matched wax pencil or touch-up marker into the line, wipe off the excess, and buff with a dry microfiber cloth. Blend two shades if your floor has a lot of grain variation.

Chipped laminate floor

  1. Clean the chip.Remove loose flakes and dust so the filler can bond.
  2. Fill it.Press color-matched laminate putty into the chip with a plastic putty knife, or melt a hard-wax repair stick into it with the kit’s heating tool.
  3. Level it.Scrape the filler flush with the surface while it’s still soft. Overfill slightly, then trim.
  4. Draw the grain back in.Use a fine-tip touch-up marker to continue the wood-grain lines across the repair.

If a chip is larger than a coin, sits right on a joint, or exposes the core, replacing that one plank will look better and last longer (see the next section).

Peeling laminate floor

When the top layer starts to flake, bubble or peel, the core underneath has usually taken on moisture, or the board has simply worn through. Glue doesn’t hold a peeling surface down for long, so the fix is to replace the affected planks. Before you do, check what caused it: a slow leak at a dishwasher, fridge line or exterior door is the usual suspect, and new boards will peel too if the moisture keeps coming.

How to Replace a Single Laminate Plank

One damaged board doesn’t mean a whole new floor. There are two ways to swap it out, and the right one depends on where the plank sits. Either way, you’ll need a matching replacement board, which is why we always recommend keeping a spare box from your original install.

Option A: Unclick the rows (best near a wall)

  1. Remove the trim.Take off the baseboard or quarter-round on the wall closest to the damaged plank.
  2. Unclick row by row.Lift each row at an angle to release the locks, numbering the boards on painter’s tape so they go back in the same order.
  3. Swap the damaged plank.Click the new board into place in its row.
  4. Reassemble.Click the rows back in, in reverse order, and reinstall the trim with your expansion gap intact.

Option B: Cut it out (for planks in the middle of the room)

  1. Mark and cut.Mark a rectangle about 1.5″ inside the plank’s edges. Set a circular or track saw to the plank’s thickness only, so you don’t cut the underlayment, and cut along the lines. Add diagonal relief cuts from the rectangle to each corner.
  2. Remove the pieces.Lift out the center, then work the edge strips loose carefully so you don’t damage the neighboring boards’ locking edges.
  3. Prep the new plank.Trim off the bottom lip of the groove on the long side and the locking tab on the short end so the new board can drop straight in.
  4. Glue and set.Run laminate or wood glue along the edges of the new board (not underneath it, since the floor still floats), press it in, wipe off squeeze-out, and weigh it down for about 24 hours.
🛠️
Crew tip: keep your leftover boxes

Laminate collections change fast, and a close-but-not-exact match stands out in a sunny room. If you don’t have spares, pull a plank from inside a closet to use for the visible repair, and put the near-match in the closet.

Laminate Floor Water Damage: Repair or Replace?

Most laminate has a high-density fiberboard core. When water gets into the seams, that core swells, and once it swells, it doesn’t shrink back, even after it dries. That’s why laminate floor water damage usually means replacing boards rather than repairing them. The real question is how many.

What you see Verdict What to do
Spill wiped up quickly, edges flat a day later Keep it No repair needed. Keep an eye on the seams for a week.
A few planks with raised or swollen edges Replace those planks Fix the source, let the area dry, then swap the damaged boards.
Peaking, peeling or soft spots across a room Replace the room Pull the floor and underlayment, confirm the subfloor is dry, then reinstall.
Standing water, a burst pipe, or musty smell Dry-out first, then rebuild Call a water mitigation company to extract and dry the space. Then the floor gets rebuilt.
  1. Stop the water.Shut off the supply or fix the leak. Repairs won’t last until the source is solved.
  2. Get it dry.For anything more than a spill, a mitigation company should extract water and dry the subfloor and walls. Laminate traps moisture underneath, which can lead to mold.
  3. Document everything.Take photos and videos before anything is removed. If you’re filing an insurance claim, your carrier will want them.
  4. Rebuild with fresh material.Once the slab or subfloor tests dry, replace damaged planks and underlayment, or install a new floor. This is the step we handle.

After the drying is done, GC Flooring Pros handles the water damage repair and rebuild: new flooring, baseboards and the finish work that makes the room feel like home again. We can work from your insurance-approved scope. If you’re choosing a new floor for a kitchen, laundry room or bath, it’s worth looking at water-resistant laminate or LVP.

Laminate Repair Myths, Busted

MythSwollen laminate goes back to normal once it dries.
FactThe fiberboard core stays swollen. Drying stops the damage from spreading, but the raised edges need new boards.
MythYou can sand out deep scratches.
FactSanding goes right through the printed wood look. Fill and color the scratch instead, or replace the plank.
MythOne bad board means a whole new floor.
FactSingle planks can be replaced, even in the middle of a room, with a matching board.
MythNailing or gluing down a lifting board fixes it.
FactPinning a floating floor makes buckling worse. Find the cause: moisture, a missing gap or an uneven subfloor.

Prevention: Keep Your Laminate Flat and Beautiful

Homes across Frisco, Plano and Prosper sit on concrete slabs over clay soil, and North Texas swings from humid summers to dry, heated winters. That combination is why slab moisture testing, a proper vapor barrier and steady indoor humidity matter so much here.

Before installAcclimate properly

Store unopened cartons in the space for 48–72 hours per manufacturer guidance.

All yearControl humidity

Keep indoor RH within the recommended range (often ~35–55%).

On slabsTest substrates

Verify moisture before install (see NALFA installation guidelines).

At the edgesHonor expansion

Maintain perimeter gaps and use transitions on long runs.

UnderneathChoose the right underlayment

Moisture barriers for slabs; sound and minor-deflection control for upper floors.

Day to dayWipe spills fast

Use a barely damp mop, never a steam mop, and add mats at sinks and exterior doors.

When to Call a Professional

If lifting involves widespread moisture intrusion, significant leveling, or you can’t identify the root cause, bringing in a specialist will save time, material, and headaches. The same goes for water damage, peeling across several boards, or a repair you can’t match. Most laminate flooring repair jobs we see take less than a day. We’ll assess the floor, measure moisture, check flatness, and provide a clear plan: repair where possible, replace where necessary.

Let our crew take it from here

From single-plank swaps to new laminate flooring and water damage rebuilds, we serve Frisco, Plano, Prosper and across North Texas. In-home estimates are always free.

Book my free in-home estimate

Frequently Asked Questions

Can laminate flooring be repaired?

Yes, in most cases. Scratches and small chips can be filled with a color-matched repair kit, gaps can often be tapped closed, and damaged boards can be replaced one at a time. Swollen or peeling boards can’t be restored, so those get replaced.

How do you fix a peeling laminate floor?

Replace the peeling planks. Peeling usually means moisture got into the core or the surface wore through, and glue won’t hold it down for long. Find and fix any moisture source first so the new boards don’t peel too.

Can water-damaged laminate be fixed?

Not once it swells. The fiberboard core stays swollen after it dries. Stop the leak, dry the subfloor, then replace the damaged planks. If water spread across a room or sat under the floor, replacing the room’s flooring and underlayment is usually the better fix.

How do you fix scratches on laminate flooring?

Clean the area, then rub a color-matched wax pencil or touch-up marker into the scratch, wipe off the excess and buff. Deep scratches can be filled with laminate putty. Don’t sand laminate, because sanding removes the printed wood look.

Can you replace just one laminate plank?

Yes. Near a wall, unclick the rows back to the damaged board and swap it. In the middle of a room, cut the board out, trim the new plank’s locking lip, and glue it in by its edges. You’ll need a matching board, so keep spares from your install.

Why are gaps appearing between my laminate planks?

The most common causes are dry winter air shrinking the boards, joints that never fully locked, or something pinning the floor so it can’t move. Raise indoor humidity, free any pinned edges, and tap the planks back together with a floor gap tool.


GC Flooring Pros, White Oak Hardwood Flooring being professionally installed with precision
About Floors, Blog, Floor Care, Hand Scraped Wood Flooring, Hardwood Flooring, How-to, Interior Design, Tips & Tricks

Four steps to expect during the Hardwood Floor Installation process

Hardwood Floor Installation Process White Oak Flooring

Hardwood Floor Installation Process: 4 Clear Steps

Thinking about upgrading to hardwood flooring but unsure where to begin? This guide breaks down the hardwood floor installation process we follow at GC Flooring Pros so you’ll know exactly what to expect. From the first consultation to the final finish, our goal is to make the hardwood floor installation process smooth, efficient, and beautifully executed.

Step 1 of the Hardwood Floor Installation: Free In-Home Consultation

We start with a complimentary in-home consultation to discuss your goals, preferences, and style. We’ll assess your space, take accurate measurements, and show samples of wood species, plank widths, and finishes. This stage ensures the hardwood floor installation process begins with clear communication and aligned expectations.

Step 2 of the Hardwood Floor Installation: Room Preparation

Before installation day, we’ll confirm your schedule and provide instructions for room preparation. You’ll remove furniture, rugs, and wall art from the area. If you’d rather not, our team offers optional furniture handling services. This step ensures a clean, dust-minimized workspace and helps the hardwood floor installation process stay on track. Maintaining a stable indoor climate (60–80°F, 30–50% humidity) allows your new flooring to acclimate properly.

Step 3 of the Hardwood Floor Installation: Professional Installation

Once prep is complete, our installers transform your space. We inspect subfloors, correct uneven spots, and test for moisture. Then we begin installation using the method best suited for your home—nail-down, glue-down, or floating. For example, see how the National Wood Flooring Association sets industry standards for installation best practices. We’ll ensure smooth transitions, tight seams, and professional detailing that defines our quality craftsmanship.

Step 4 of the Hardwood Floor Installation: Sanding, Staining & Finishing

If you’ve selected unfinished hardwood, the hardwood floor installation process continues with sanding and finishing. We’ll sample stain colors directly on your floor to match your design vision. After you approve, we apply multiple coats of high-quality polyurethane for long-term protection and shine. Once cured, we’ll guide you on when it’s safe to walk and move furniture back—typically within 48 hours.

Why Understanding the Hardwood Floor Installation Matters

  • Clarity: Knowing the hardwood floor installation helps you plan ahead and reduce stress.
  • Durability: Proper subfloor prep and moisture control increase your floor’s lifespan.
  • Design Confidence: Understanding your finish and maintenance options ensures a long-lasting look.

FAQs About the Hardwood Floor Installation Process

How long does it take? Smaller rooms can be completed in two to three days, while larger spaces or custom patterns take longer. Your project manager will provide a detailed timeline during the consultation.

Do I need to leave home? Not always. Prefinished floors let you stay home comfortably. For unfinished floors, you may want to vacate during sanding and finishing due to odor and drying time.

Can you match existing wood? Absolutely—we can custom stain or blend the new installation with your current flooring for a cohesive look.

Care Tips After the Hardwood Floor Installation Process

  • Use felt pads under furniture legs.
  • Clean using wood-safe cleaners—avoid water or steam.
  • Maintain consistent humidity to prevent seasonal gaps.
  • Place rugs near doors to capture debris and prevent scratches.

Ready to Begin Your Hardwood Floor Installation?

By now, you understand the full hardwood floor installation process—from the first visit to the final finish. Our experts at GC Flooring Pros can guide you through wood selection, layout design, and maintenance tips to make your investment last a lifetime. Explore our hardwood flooring options or book your free in-home consultation today to bring your dream floors to life.

Call (214) 814-1170 or click to schedule your complimentary estimate. Let GC Flooring Pros make your hardwood floor installation process effortless and rewarding.

GC Flooring Pros
About Floors, Blog, Floor Care, Hand Scraped Wood Flooring, Hardwood Flooring, House Renovation, Recommended Blog, Tips & Tricks

Hand Scraped Hardwood Flooring

Hand Scraped Hardwood Flooring

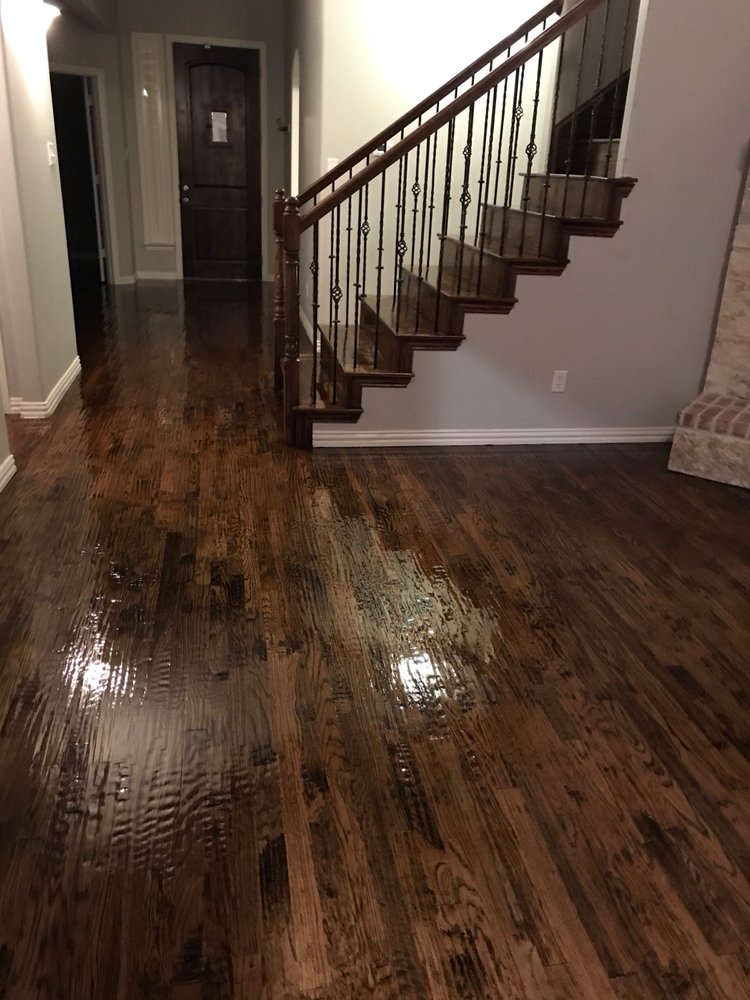
Hand scraped hardwood flooring has become one of the most in-demand flooring choices for homeowners who want depth, character, and a rich, timeless atmosphere in their space. This style highlights the natural beauty of wood, bringing out organic grooves, texture, and warmth that machine-finished floors simply can’t imitate.

Whether you’re renovating a living room, bedroom, or entire home, hand scraped hardwood is an excellent way to add charm, craftsmanship, and visual interest. To learn more about how hand-scraped textures developed in the industry, you can also explore resources from the National Wood Flooring Association.

What Is Hand Scraped Hardwood Flooring?

Hand scraped hardwood flooring refers to wood planks that are textured by hand—traditionally using sanding tools or heavy-duty sandpaper—to create natural, uneven patterns. Today, the technique is inspired by old-world craftsmanship, where woodworkers shaped floors by hand rather than machines.

This process results in a floor with:

  • Soft ridges and subtle waves
  • Natural grooves and surface variation
  • Warmth and old-world charm
  • A uniquely distressed, handcrafted look

These textures make hand scraped hardwood flooring ideal for both modern and traditional homes. It pairs well with casual farmhouse décor, rustic cabins, and even elegant, classic interiors.

Why Homeowners Love Hand Scraped Hardwood Flooring

Beyond its beauty, the hand scraped finish offers practical benefits that make it extremely homeowner-friendly.

✔ Timeless, Authentic Character

The handcrafted look gives every plank a story. Each board shows unique markings, making the entire floor feel warm, inviting, and full of personality.

✔ Excellent at Hiding Wear & Tear

The textured surface helps disguise everyday scratches, dents, pet marks, and general traffic—making it perfect for active households with pets and kids.

✔ Highly Versatile Design Style

Hand scraped floors blend effortlessly with:

  • Contemporary homes
  • Farmhouse and rustic interiors
  • Traditional or formal spaces
  • Shabby chic and cottage-style décor

✔ Adds Warmth & Value to Your Home

This finish resembles antique craftsmanship and often increases the overall aesthetic appeal and resale value. Many buyers specifically seek out hardwood options with natural texture and depth.

Hand Scraped Hardwood vs. Other Hardwood Textures

While smooth hardwood has a sleek, polished look, hand scraped wood adds dimension and depth. Unlike wire-brushed flooring—which creates subtle linear texture—hand scraped planks feature irregular, handcrafted patterns for a historic feel.

An Artistic Finish With Natural Beauty

The hand scraped texture highlights the true beauty of wood grain. With varying lines, grooves, and patterns from plank to plank, your floor becomes a one-of-a-kind piece of art. The result is a cozy, welcoming environment that feels both historic and modern at the same time.

Professional Help for Choosing & Installing Hand Scraped Hardwood

At GC Flooring Pros, we guide you through every step—from selecting your preferred hardwood species and stain colors to installation and long-term care. With dozens of hand scraped options available, we help you choose the perfect look based on your style, lifestyle, and budget.

Our team also provides expert tips to help your floors maintain their beauty for years to come.

Contact us today for your free in-home consultation. Let’s start designing a stunning new look for your home with premium hand scraped hardwood flooring.

tips on how to choose the prfect stain for your hardwood floor
About Floors, Blog, Floor Care, Hardwood Flooring, How-to, Recommended Blog, Tips & Tricks

How to choose the right stain for your hardwood floor

Hardwood Floor Stain Guide: Choose the Right Color, Finish & Sheen for Your Space

A beautifully finished Hardwood Floor can transform any room—from bright lofts to cozy family spaces. Species like white oak, red oak, hickory, and Brazilian walnut all bring their own grain, tone, and hardness to the party. But the species alone doesn’t decide the final look—the stain, finish, and sheen you choose are just as important. This guide explains how different woods take stain, why sample testing matters, and how to pick light, medium, or dark stains that actually work with your room (and lifestyle).

Whether you’re installing new planks or planning a refinish, the goal is the same: a Hardwood Floor that looks incredible today and ages gracefully tomorrow. Below, you’ll find practical tips plus trusted resources to help you make confident choices.

Why Not All Hardwood Floors Stain the Same

Every wood species has unique cell structure, density, and porosity. That means the same stain can look dramatically different on two species—or even two grades of the same species.

  • Dense, tight-grained woods (e.g., maple, many exotics) can resist stain penetration, sometimes leading to blotching or a lighter-than-expected color.
  • Open-pored woods (e.g., red oak, white oak) accept stain more readily, often producing deeper, more uniform color.
  • Grain pattern and cut (rift, quarter-sawn, plain-sawn) also affect how light and stain reflect across the floor.

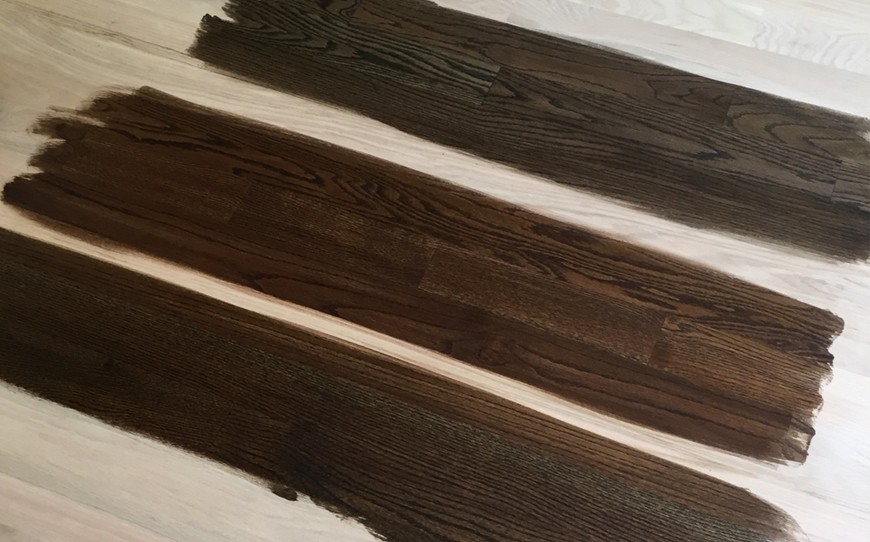
Because of these variables, always test your stain on your actual boards before committing. At GC Flooring Pros, we apply in-room stain samples so you can preview the exact color under your lighting and next to your cabinetry, walls, and furnishings. For color families and product details, browse manufacturer charts like DuraSeal® wood stains (external).

How Finish Systems Influence Your Final Color

Beyond stain color, your finish system can subtly shift tone and impact durability and maintenance:

  • Oil-based polyurethane: Slight ambering that can warm the stain; excellent film strength and abrasion resistance.
  • Water-based polyurethane: Clearer tone that preserves a “true-to-wood” look; fast dry and low odor.
  • Hardwax oils / penetrating oils: Low-build, natural feel that highlights grain; spot-repairable but may need more frequent maintenance coats.

For deeper technical guidance on finishes, installation, and maintenance best practices, see the National Wood Flooring Association (NWFA) (external), the industry’s leading authority.

Choosing Your Sheen: Matte, Satin, Semi-Gloss, or Gloss

Sheen affects both aesthetics and practicality:

  • Matte: On-trend, modern, and great at hiding micro-scratches and dust.
  • Satin: Soft glow that suits most homes; balances elegance and forgiving maintenance.
  • Semi-Gloss: Brighter pop and perceived depth but shows wear sooner.
  • Gloss: High reflection; dramatic but least forgiving of scuffs and dust.

Most homeowners today choose matte or satin to reduce visible wear and keep cleaning simple.

Light vs. Medium vs. Dark: How to Align Stain with Your Room

Light Stain

Best for: Smaller or darker rooms, Scandinavian or coastal styles, homes with kids/pets where dust visibility matters.

Why it works: Light stains bounce light, making spaces feel airier and larger. They pair beautifully with dark furniture for a crisp, high-contrast look.

Watch-outs: Light tones reveal the wood’s natural character (mineral streaks, knots) more readily than very dark stains.

Medium Stain

Best for: Balanced, transitional designs where you want warmth without dramatic contrast.

Why it works: Medium browns harmonize with most cabinetry and trim, so it’s a smart choice if you’re still evolving your décor or plan to change wall colors later.

Dark Stain

Best for: Grounding bright rooms, creating luxury contrast with light walls, highlighting brass/black fixtures.

Why it works: Dark floors feel sophisticated and tend to mask natural wood variation.

Watch-outs: Shows dust, pet hair, and surface scratches more readily. If you have big dogs or heavy traffic, consider a satin/matte sheen and a robust finish to minimize visibility of wear.

Species Matters: Matching Stain to Your Hardwood Floor

Here’s how common species typically behave with stain (results vary—always test):

  • Red Oak: Takes stain evenly with pronounced grain; warmer undertones complement medium to dark browns beautifully.
  • White Oak: Versatile and on-trend; ideal for light, natural, or “weathered” looks; also stunning in rich mid-tones.
  • Maple: Dense and tight-grained; can blotch with dark stains—use pre-conditioners and consider lighter/neutral tones.
  • Hickory: High hardness and lively color variation; wide planks showcase character; stains well but variation remains a feature.
  • Exotics (e.g., Brazilian Walnut/Ipe): Very dense; often look best with minimal staining and clear finishes to celebrate natural depth.

Want help choosing the right species before you pick a stain? Explore options and photos on our Hardwood Flooring page and our Hardwood Flooring Supply page.

The Stain-Sampling Process (What We Do on Site)

  1. Consult & assess: We review your room light, furnishings, and style to shortlist target color families.
  2. Prep test area: Lightly abrade and clean a discrete zone to ensure accurate penetration.
  3. Apply multiple swatches: Typically 3–6 options (e.g., Ebony, Provincial, Dark Walnut, Weathered Oak, Medium Brown).
  4. Evaluate in natural & artificial light: Colors shift from morning to evening; we want you to love it 24/7.
  5. Topcoat preview: We explain how oil- vs water-based finishes and chosen sheen will alter the final look.

Pro tip: View samples vertically (hold sample boards upright) as well as on the floor—your eyes perceive color differently across planes. And don’t forget to compare against cabinet doors and trim.

Durability, Maintenance & Lifestyle Fit

Great color is only half the story. To keep your Hardwood Floor looking its best:

  • Pick the right finish chemistry for your traffic level (busy homes benefit from tougher, higher-build systems).
  • Choose a forgiving sheen (matte/satin) to disguise micro-scratches and daily dust.
  • Use felt pads & entry mats to reduce abrasion; trim pet nails regularly.
  • Clean with manufacturer-approved products—avoid steam mops and harsh chemicals that can dull the finish.

Need deeper technical standards? The NWFA publishes best practices on maintenance, site conditions, and finish systems.

Frequently Asked Questions About Hardwood Floor Stains

Q: Can I change from dark to light (or vice versa) later?
A: Yes—one of the biggest advantages of a Hardwood Floor is that you can sand and refinish to a new color. Solid hardwoods can often be refinished up to five times; many engineered floors can be refinished at least once if the wear layer is 2mm+.

Q: Which stain hides dust best?
A: Mid-tone browns with a satin or matte sheen are the most forgiving.

Q: How long does the process take?
A: Typical sand-stain-finish projects take 2–4 days depending on square footage, number of coats, and product cure times.

Ready to See Your Color Options on Your Actual Hardwood Floor?

If you’re unsure between light, medium, or dark—or you want to compare oil- vs water-based finishes—we’ll bring curated stains to your home and apply real samples on your wood so you can choose with confidence.

Book your on-site stain sampling and get expert guidance from GC Flooring Pros—schedule your Free In-Home Estimate now.

GC Flooring Pros
Blog, Floor Care, Laminate Flooring, Tips & Tricks

Floor care tips for laminate flooring

Floor Care Tips: The Ultimate Guide to Cleaning & Protecting Laminate Floors

Laminate flooring is known for its durability, beauty, and cost-effectiveness—but only when it’s cared for properly. Many homeowners assume laminate is difficult to clean, but with the right floor care tips, you can keep your floors looking brand new for years. The key is understanding what cleaning methods work, what tools to avoid, and how to prevent long-term damage.

If you’ve struggled with streaks, residue, or dulling floors, don’t worry—you’re not alone. Below is the complete guide to caring for your laminate flooring, extending its life and preserving its shine.

Why Laminate Flooring Requires Specific Care

Unlike hardwood, laminate is a layered synthetic floor that contains a photographic surface layer. This means:

  • It cannot be refinished like hardwood.
  • Moisture must be carefully controlled.
  • Abrasive tools can permanently damage the top layer.

With that reality in mind, it’s essential to follow proper cleaning methods—especially the ones recommended below by flooring experts.

Floor Care Tip #1: Don’t Sweep Your Laminate Floor

It seems natural to grab a traditional broom, but when it comes to laminate, a broom is one of the worst tools you can use.

Here’s why:

  • Brooms leave behind fine particles that smear under a wet mop.
  • Loose grit can scratch your laminate’s surface.
  • Stiff broom bristles can create swirl marks.

Instead, flooring experts recommend using a dry dust mop or a microfiber mop. These tools trap dust rather than pushing it around, preventing scratches and streaks.

If you prefer using a vacuum, be sure to:

  • Use the “hard floor” or “bare floor” setting
  • Turn OFF the beater bar
  • Avoid metal wheels that can scuff the surface

Vacuum rollers are notorious for causing tiny scratches. Over time, those scratches can dull your laminate’s protective coating.

Floor Care Tip #2: Use Less Cleaner—Not More

One of the most important floor care tips is understanding the amount of cleaning product you should actually use. Many homeowners believe that more cleaner equals a cleaner floor, but with laminate, the opposite is true.

Using too much cleaner leads to:

  • Product buildup
  • Dull, streaky floors
  • Sticky or hazy residue
  • Premature wear of the top layer

A light misting or a small amount of cleaner is usually more than enough. In fact, for most weekly cleanings, warm water is all you need to remove dust and fresh dirt.

It’s also crucial to choose the right type of cleaner. Some standard household cleaners contain chemicals that damage laminate—particularly ammonia-based products.

Safe Laminate Cleaner Options

  • Cleaners labeled specifically for laminate floors
  • Mild dilutions of white vinegar (only occasionally)
  • Warm water with a microfiber mop

For more details on proper cleaning chemistry, the EPA offers a helpful primer on safe household cleaning ingredients:
EPA Safer Choice Certified Cleaners

Floor Care Tip #3: Avoid Excess Water

Laminate floors are vulnerable to moisture, which can seep into the seams and cause swelling or lifting. Never use:

  • Wet mops
  • Steam mops
  • Bucket-style string mops

Steam and standing water will cause irreparable damage by weakening the core layers of laminate. Always use a lightly damp microfiber pad and dry any visible moisture immediately.

Floor Care Tip #4: Protect Your Laminate From Scratches

Scratches are one of the most common reasons laminate floors age prematurely. Luckily, preventing them is simple:

  • Add felt pads under all furniture legs.
  • Use rugs in high-traffic areas like hallways and entryways.
  • Trim your pets’ nails regularly.
  • Lift furniture—don’t slide it.

For enhanced protection, especially in mudrooms or kitchens, consider using water-resistant laminates from our Laminate Flooring Supply Collection.

Floor Care Tip #5: Clean Spills Immediately

Even though laminate has a protective surface, spills should never be left sitting. Liquids that seep into seams can cause bubbling or lifting.

Wipe up immediately:

  • Water spots
  • Pet accidents
  • Beverage spills
  • Cleaning solutions

For sticky spills, a damp microfiber cloth works best. Avoid abrasive scrub pads or scouring tools.

Floor Care Tip #6: Avoid Harsh Chemicals

Harsh cleaners may cause the laminate coating to break down or discolor. Do NOT use:

  • Ammonia-based cleaners
  • Pine oil
  • Abrasive powders
  • Bleach
  • Dish soap mixtures

Dish soap can leave streaks; bleach and ammonia can erode the finish. Stick to laminate-safe solutions only.

Floor Care Tip #7: Use the Right Tools

Here are the tools you should always have on hand:

  • Microfiber mop
  • Dry dust mop
  • Spray bottle with laminate-safe cleaner
  • Soft microfiber cloths
  • Laminated-floor-safe vacuum

These tools prevent damage and ensure your cleaning routine is fast and efficient.

Floor Care Tip #8: Perform Routine Deep Cleaning

Weekly cleaning keeps your laminate in great shape, but deep cleaning every 1–2 months helps remove unseen buildup. A deep clean includes:

  • Vacuuming corners and baseboards
  • Spot-cleaning small stains
  • Mopping with warm water and minimal cleaner

If your laminate looks hazy even after cleaning, you may have residue buildup. Using a laminate-safe residue remover can restore shine.

Floor Care Tip #9: Prevent Long-Term Wear

Most long-term laminate damage comes from daily habits, not single events. To protect your flooring:

  • Rotate area rugs every few months.
  • Use mats at each exterior door.
  • Install furniture glides under frequently moved chairs.
  • Place protective mats under rolling office chairs.

These steps drastically slow the wear-and-tear process.

Floor Care Tip #10: Know When It’s Time to Replace

Even well-maintained laminate eventually reaches the end of its life cycle—usually after 15–25 years. If you notice warping, lifting, or deep scratches, it may be time to consider a new installation.

Conclusion

Proper laminate floor maintenance isn’t complicated—it just requires the right knowledge. With these expert floor care tips, you can protect your flooring, avoid costly repairs, and keep your home looking beautiful.

If you’re considering replacing damaged flooring or upgrading your home, our experts can help. From laminate to vinyl, tile, and hardwood, we offer top-quality materials and precision installation.

Ready for cleaner, longer-lasting floors? Schedule your Free In-Home Estimate and get personalized guidance from our flooring specialists today.