How-to

Vinyl tile installation: How it's done
About Floors, Blog, How-to, Vinyl Flooring

Vinyl Tile Installation: A comprehensive guide

Vinyl Tile Installation: Complete DIY Guide for a Smooth, Durable Finish

Thinking about tackling a vinyl tile installation yourself? Great choice. Modern vinyl tiles (LVT/LVP and peel-and-stick) are water-resistant, comfortable underfoot, and forgiving for first-time installers. With the right prep, layout, and tools, you can achieve a clean, long-lasting floor that looks professionally installed—while saving serious labor costs.

Below you’ll find a step-by-step walkthrough—from measuring and layout to subfloor prep, cutting, rolling, and curing—plus pro tips and pitfalls to avoid. For product selection, comparison help, or pro installation, see our in-depth pages on vinyl flooring and vinyl flooring supply.

Why Choose Vinyl Tile?

  • Moisture resistance: Ideal for kitchens, baths, mudrooms, basements.
  • Easy maintenance: Resists stains and cleans with routine sweeping + damp mopping.
  • Design range: Realistic stone and wood visuals, various sizes and wear layers.
  • DIY-friendly: Click-lock and peel-and-stick formats simplify installation.

Indoor air quality tip: When shopping, look for low-emission certifications (e.g., FloorScore®) for healthier interiors. Learn more about the program here.

1) Calculate Materials Accurately

Measure the room’s length × width to get square footage. For irregular rooms, break the space into rectangles, measure each area, and add them together.

  • Order extra: Add 10–15% overage for cuts, pattern matching, and future repairs.
  • Tiles vs. cartons: Divide total square feet by coverage per carton to determine how many boxes you’ll need (round up).

2) Plan Your Layout (Centered & Balanced)

A thoughtful layout is the difference between a “fine” install and a fantastic one:

  • Center your layout: Snap perpendicular chalk lines at the room’s center (find midpoints of opposite walls and intersect).
  • Dry-fit test: Lay a row of tiles (without removing backing) along both chalk lines to preview cut sizes at walls and doorways.
  • Optimize cuts: Aim to keep border pieces at least 1/2 tile width whenever possible; shift your centerlines slightly to improve edge cuts.
  • Doorways & focal points: Align patterns so narrow cuts don’t land in high-visibility areas.

3) Gather Your Tools

  • Carpenter’s square & pencil
  • Measuring tape
  • Chalk line
  • Utility knife (fresh blades) & straightedge
  • Heat gun or hair dryer (to ease tricky cuts)
  • J-roller or 75–100 lb floor roller (recommended)
  • Trowel (for glue-down formats)
  • Safety glasses, work gloves, and a dust mask/respirator as needed

4) Acclimate & Prep the Room

  • Acclimation: Place unopened cartons in the install area for 24–48 hours per manufacturer guidance (temperature and humidity stable).
  • Remove base & shoe: Pry carefully; label for reinstallation.
  • Clear and clean: Sweep/vacuum thoroughly; remove grease, adhesives, wax, and debris.

Moisture matters, especially over slabs. For best practices on moisture control in buildings, see the U.S. EPA’s guidance on moisture prevention.

5) Subfloor Preparation (The Make-or-Break Step)

A smooth, flat, clean, and dry substrate is critical to a successful vinyl tile installation. Follow your product’s instructions and these general tips:

Concrete or Existing Ceramic Tile

  • Flatness: Grind down high spots; fill low areas/cracks with cementitious patch/leveler.
  • Clean & dry: Remove dust and residues; confirm moisture levels meet the manufacturer’s limits.
  • Glossy tile: De-gloss or prime per adhesive specs for proper bond.

Existing Vinyl

  • Condition check: If firmly bonded and smooth, you can float or glue over it.
  • Embossing leveler: Skim coat to hide textures/dents so new tile doesn’t telegraph patterns.
  • Failing vinyl: Remove it, or install an approved underlayment over top.

Damaged or Uneven Floors

  • Plywood underlayment: Overlay with smooth, approved panels; fasten per pattern (e.g., staples every 4″ field / 2″ seams).
  • Expansion gaps: Leave ~1/32″ between underlayment panels; ~1/8″ at walls.
  • Seams: Fill and sand flush; vacuum thoroughly.

6) Fit Door Jambs & Transitions

To slide tiles neatly under casing, undercut the jambs: place a scrap tile (face down) and a saw on top to mark height, then cut and clean out waste. Dry-fit threshold transitions and note final heights to ensure smooth passage between rooms.

7) Install the Tiles

Peel-and-Stick / Pressure-Sensitive Tiles

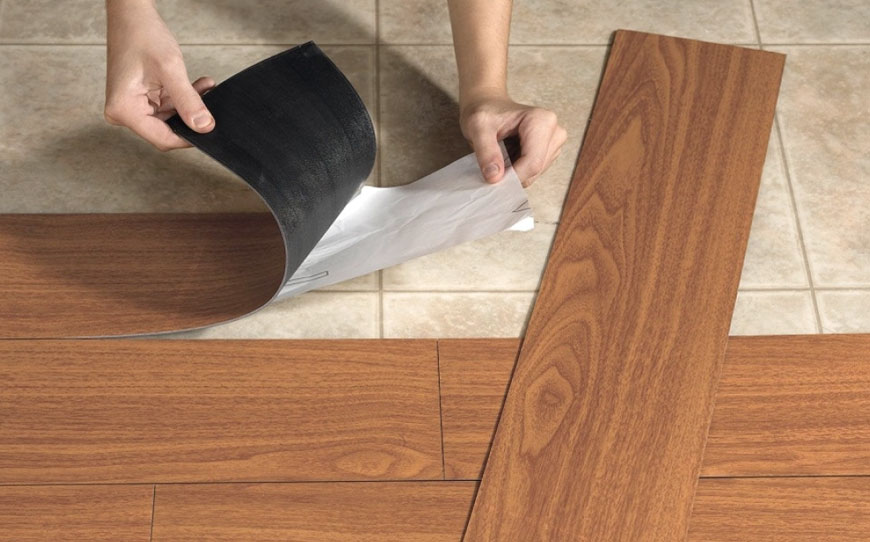
  1. Start at the chalk-line intersection and work in a stair-step pattern to keep courses square.
  2. Peel backing and set the tile lightly first—this gives you a moment to nudge alignment.
  3. Once aligned, apply firm pressure, then roll with a J-roller. Roll again every few rows.

Glue-Down Tiles

  1. Trowel adhesive using the notch profile specified by the manufacturer.
  2. Observe open time/flash time to achieve the right tack.
  3. Place tiles along layout lines; roll thoroughly with a 75–100 lb roller in multiple directions.

Cutting Border & Irregular Pieces

  • Score & snap: Use a straightedge and sharp blade; multiple light passes beat one heavy cut.
  • Heat aid: Warm the tile gently to improve flexibility for tight curves.
  • Template trick: Use cardboard to trace complex shapes (around toilet flanges, door trims), then transfer to the tile.
  • Consistent borders: Keep perimeter cuts as even as possible for a clean, intentional look.

8) Roll, Cure & Protect

  • Roll again: When the entire floor is down, roll the surface in both directions to maximize bond.
  • Cure time: Follow product guidance; as a rule of thumb, avoid traffic for several hours, heavy furniture for 24–48 hours, and wet cleaning for 5–7 days.
  • Reinstall trim: Reattach base and shoe molding; caulk/touch-up as needed.

Maintenance for Long-Term Beauty

  • Entry mats & felt pads: Reduce grit and furniture scratches.
  • Routine clean: Sweep/vacuum regularly; damp mop with manufacturer-approved cleaner.
  • Avoid: Steam mops, harsh solvents, and abrasive pads.

Troubleshooting & Pro Tips

  • Tiles won’t stick: Substrate may be dusty or oily; clean and re-roll. For glue-down, verify open time and temperature.
  • Gaps appearing: Check that acclimation and temperature specs were met; reset misaligned tiles before rolling.
  • Telegraphing: If old patterns show through, you need embossing leveler or new underlayment.
  • Moisture alerts: Over concrete, always verify moisture limits. Persistent moisture can compromise bond.

FAQs About Vinyl Tile Installation

Q: Can I install vinyl tile over radiant heat?
A: Many products are compatible—confirm your exact tile’s max temperature and installation method with the manufacturer.

Q: Which is better—peel-and-stick or glue-down?
A: Peel-and-stick is fast and DIY-friendly; glue-down offers the strongest bond for high-traffic or commercial-like use.

Q: Do I need underlayment?
A: Not always. Use an approved underlayment to correct damaged substrates or when specified by the tile manufacturer for performance.

Get Pro-Level Results—With or Without the DIY

Whether you need help choosing between click, peel-and-stick, or glue-down tiles—or want a pro to handle subfloor repairs and rolling—our team can help you get the best result for your space and budget. Explore our vinyl flooring options and see why homeowners trust us for durable, great-looking installs.

Ready to start your vinyl tile installation—or want expert help to do it right the first time? Schedule your Free In-Home Estimate with GC Flooring Pros today.

GC FLooring Pros
Blog, Carpet Flooring, How-to, Interior Design, Tips & Tricks

Choosing the right floor for your child’s bedroom

How to Choose the Right Floor for Your Child’s Bedroom

Designing or remodeling your child’s bedroom is an exciting project filled with decisions—wall colors, furniture, décor, and toys. But one element many parents overlook is the flooring. Choosing the right floor for a child’s room doesn’t just influence style; it affects safety, comfort, maintenance, and long-term durability. The right flooring choice can support your child’s development, simplify your cleaning routine, and give you peace of mind as they grow.

While the aesthetic matters, the real priority is how the flooring performs under real-life conditions—running, spills, crawling, toys, and endless play. Here is everything you need to know to choose the right floor for your child’s space.

What Every Child’s Bedroom Floor Should Provide

Before choosing a material, it’s important to understand the basic requirements any kid-friendly floor should meet. These features help create a room that is safe, comfortable, and easy to maintain.

Easy Maintenance

Messes happen—food crumbs, spilled juice, markers, dirt, paint, or the occasional science experiment gone wrong. Since you’ll be doing most of the cleaning, selecting a low-maintenance floor is a practical way to save time and protect your investment.

You don’t necessarily need the highest-end material for a child’s room. Kids are unpredictable, and choosing a cost-effective flooring option means accidental damage won’t feel devastating. You can always upgrade to a premium material as they grow older.

High Comfort Level

While kids seem unaffected by cold surfaces, parents feel the difference—especially during playtime on the floor. Cushioning matters for comfort, warmth, and joint protection. A floor that stays warm underfoot and provides a bit of softness helps create a welcoming and functional play environment.

Adequate Safety

Children learn by moving—crawling, wobbling, walking, running, jumping, and yes, falling. The right floor should minimize injury risk while being durable enough to handle toys, spills, and rough play. A floor with some cushioning helps soften falls, while antimicrobial or hypoallergenic materials help maintain cleaner air quality.

Multi-Functionality

Children’s rooms evolve quickly. The flooring should be durable and adaptable enough to last through different childhood stages. A floor that works for toddlers, big kids, and teens is a smart long-term investment.

Now that you understand what performance features matter, let’s explore the best flooring materials for kids’ rooms and how they compare.

Best Flooring Options for a Child’s Room

Hardwood Floors

Hardwood is a timeless, natural choice that brings warmth and beauty to any room. Both solid and engineered hardwood floors offer durability and long-term value. Hardwood is also hypoallergenic, making it an excellent choice for families concerned about allergies.

Although hardwood floors aren’t naturally soft or cushioned, pairing them with area rugs can solve the comfort challenge. Rugs also act as a removable, washable layer that protects the wood from spills, paint, and scratches. As your child grows, you can easily change the rug style to match changing tastes—while the hardwood itself remains timeless.

Highlight: A durable, hypoallergenic flooring that pairs well with area rugs for added comfort.

Laminate Floors

If you love the look of hardwood but want something more budget-friendly, laminate is an excellent alternative. High-quality laminate floors can mimic nearly any wood style with impressive realism. Many laminate floors include built-in underlayment that adds softness and helps absorb the impact of active play.

Modern laminate is extremely scratch-resistant, making it ideal for toy cars, doll strollers, wooden blocks, and curious pets. Many laminate products are also water-resistant or even waterproof, protecting against spills and accidents.

Highlight: Achieves a natural wood look with added cushioning and superior scratch resistance.

Vinyl Floors

Vinyl is one of the most versatile and kid-friendly options available. Often called “resilient flooring,” vinyl offers softness, durability, and water resistance. Luxury vinyl plank (LVP) floors are especially popular because they look incredibly realistic—mimicking wood, tile, or stone—with the added benefit of warmth and quietness.

Parents love vinyl because it’s waterproof, easy to clean, and highly resilient under heavy foot traffic and active play. Many vinyl floors include special antibacterial coatings that help reduce bacteria and fungi by up to 99.9%, making the room safer and easier to maintain.

Highlight: A soft, waterproof, antibacterial flooring option ideal for high-energy kids.

How to Determine the Right Floor for Your Kid’s Space

With so many great options available, how do you choose the right floor? Consider these factors:

  • Your child’s age: Younger children benefit from softer, more cushioned flooring.
  • Your budget: Laminate and vinyl offer great affordability without sacrificing durability.
  • Allergy concerns: Hardwood and high-quality vinyl are excellent hypoallergenic options.
  • Maintenance level: Vinyl is the easiest to clean, followed by laminate.
  • Longevity: Hardwood lasts the longest and can be refinished over time.

If you want deeper insight into choosing the safest materials for children, the EPA offers helpful guidance on indoor air quality in homes: EPA Indoor Air Quality Guidelines.

Final Thoughts

The right floor for your child’s bedroom depends on your priorities—comfort, durability, maintenance, safety, or aesthetic. Hardwood provides timeless beauty, laminate offers scratch resistance with a wood-look finish, and vinyl brings the best combination of softness, durability, and waterproof performance.

No matter which material you choose, selecting the right flooring ensures your child has a safe, comfortable, and inspiring space to grow and play. And when you’re ready to explore flooring options in person, our specialists can help you evaluate samples, compare materials, and select the perfect fit for your family’s needs.

Ready to choose the right floor for your child’s room? Schedule your Free In-Home Estimate today and let GC Flooring Pros help you create a safe, beautiful space your child will love.

how to choose best floors for your basement
Blog, Carpet Flooring, House Renovation, How-to, Tips & Tricks

How to choose the right floor for your basement

Basement Floor: Best Materials, Moisture Tips & Installation Advice

Choosing the right basement floor can feel overwhelming, especially when you consider how different basements are from the rest of your home. Because they sit fully or partially below ground, basements face unique challenges: moisture, temperature swings, lack of natural light, and the presence of concrete slabs. All these factors influence which materials will perform well and which ones won’t stand the test of time.

The good news? With modern flooring technology, you’re no longer limited to a handful of synthetic materials. Homeowners today can choose from stylish, highly durable options that work beautifully in basements while still protecting against moisture and long-term wear. This guide breaks down the best basement flooring options, how to evaluate your space, and what to know before installation.

Start With the Purpose of Your Basement

Before deciding on a basement floor, think about how you will use the space. A storage room doesn’t require the same level of comfort as a basement bedroom or home theater. A fitness room needs durability and shock absorption, while a home office might call for warmth and sound insulation. Determining the purpose and traffic level of the room helps you choose the correct material from the start—and saves you on unnecessary costs later.

Understand Basement Moisture Before Choosing a Floor

Moisture is the number-one issue affecting any basement floor. Because concrete is porous, it can absorb water from the soil and release it into your basement over time. Small leaks, poor drainage, high humidity, or even seasonal changes may influence floor performance.

To better understand basement moisture and prevention, refer to the U.S. EPA Moisture Control Guidelines. Their research-backed recommendations help homeowners safeguard their spaces before installation.

Moisture Tips Before Installing Flooring

  • Perform a moisture test: Tape a sheet of plastic to the slab for 48 hours. If condensation forms underneath, you’ll need a vapor barrier.
  • Evaluate humidity levels: Basements should ideally stay between 30–50% relative humidity year-round.
  • Inspect for leaks: Check corners, cracks, and around windows or exterior access points.
  • Fix the source: Before any new floor goes in, address gutter issues, grading problems, or foundation cracks.

Once your moisture situation is under control, you’re ready to compare your basement flooring options.

Top Basement Floor Options

1) Concrete (Refinished)

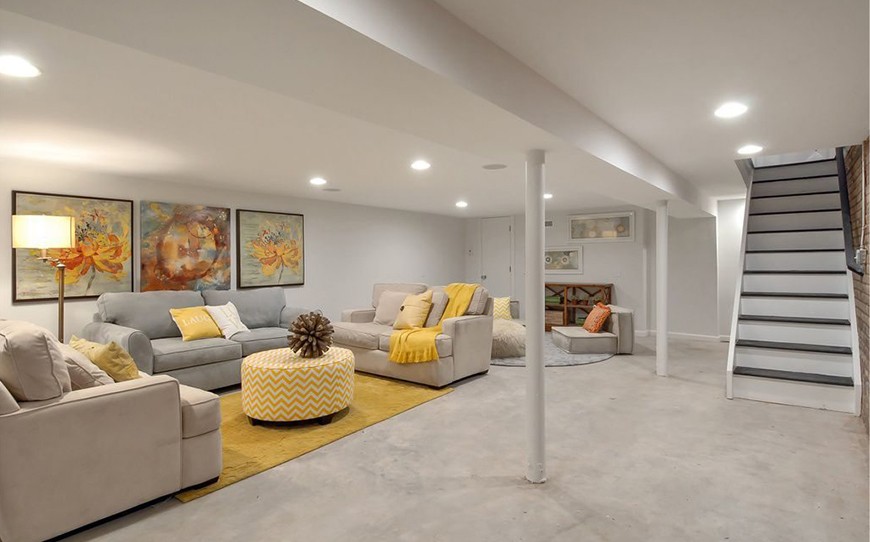
Many homeowners overlook concrete as a finished basement floor, but improvements in surface treatments have made it one of the most versatile—and stylish—choices available. Instead of covering the slab, you can transform it. A thorough cleaning, light grinding, or patch repair can prepare the surface for stain, polish, and sealers.

Why concrete works: It’s cost-effective, naturally moisture-resistant, and incredibly durable. Acid staining gives it rich, marbled color variations, while polishing provides a sleek, reflective finish. Pair it with rugs, soft lighting, and comfortable furniture for a modern, elevated basement look.

  • Pros: Lowest cost, extremely durable, minimal maintenance.
  • Considerations: Can feel cold; area rugs or radiant heat help with comfort.

2) Vinyl (LVP & LVT)

Vinyl flooring is one of the top choices for any basement floor. From wood-look luxury vinyl planks (LVP) to stone-look tiles (LVT), vinyl offers unmatched moisture resistance while delivering the aesthetics of higher-end materials. Many vinyl systems are designed specifically for concrete slabs, either as glue-down installations or floating floors with integrated pads.

Floating systems also allow you to install a vapor barrier underneath—an extra layer of protection against moisture. Vinyl’s soft backing and thickness make it comfortable underfoot, quieter than tile, and warmer than plain concrete.

  • Pros: Waterproof, budget-friendly, easy to clean, highly realistic designs.
  • Considerations: Must use proper underlayment for best moisture protection.

3) Tile (Ceramic, Porcelain, Natural Stone)

Tile flooring is a classic solution for basements due to its unmatched water resistance and long-term durability. Glazed ceramic is an affordable choice, while porcelain offers superior strength and density for high-traffic spaces. Natural stone tiles such as slate or travertine add elegance but may require sealing depending on the material.

Tile can withstand spills, moisture, and even minor flooding without damage when properly installed. The only drawback is temperature—tile tends to feel cold unless paired with radiant heat or strategic rug placement.

  • Pros: Waterproof, scratch-resistant, excellent for long-term performance.
  • Considerations: Cold and hard; rugs and heating systems can increase comfort.

4) Engineered Wood

If you love the beauty of hardwood, engineered wood is the only wood-based product suitable for a basement floor. Engineered wood consists of multiple cross-layered plies topped with a real hardwood veneer. This structure makes it far more stable in humid environments than solid hardwood.

Unlike traditional solid hardwood flooring, which cannot be installed directly onto concrete, engineered wood can often be glued directly to the slab or floated over a moisture barrier. It offers the warmth and luxury of hardwood without the risks associated with below-grade moisture.

  • Pros: Authentic wood look, stable, higher resale value.
  • Considerations: Not waterproof; requires professional moisture testing.

5) Waterproof Laminate

Standard laminate is not suitable for basements, but waterproof laminate is engineered for high-moisture environments. When floated over a proper vapor barrier, waterproof laminate can be a stylish and affordable solution for homeowners wanting the look of wood without the cost of engineered hardwood.

For very humid basements, melamine-infused laminate cores offer an even higher level of moisture protection.

Explore more options at laminate installation services and laminate supply.

  • Pros: Affordable, wood-look finishes, durable.
  • Considerations: Must control humidity; avoid if flooding is a concern.

Floating vs. Glue-Down Installations

Both installation methods work in basements, but each has advantages depending on your chosen material:

  • Floating floors: Ideal for vinyl and laminate; allow the use of vapor barriers; easy to replace boards.
  • Glue-down floors: Great for engineered wood and some vinyl; provide a solid feel underfoot.

Improving Comfort & Warmth

Basements naturally feel cooler, but the right flooring upgrades can make a dramatic difference:

  • Area rugs add texture, warmth, and sound absorption.
  • Radiant heating pairs exceptionally well with tile and some vinyl systems.
  • Insulating underlayments reduce chill and improve acoustics.

Maintenance Tips for Every Basement Floor

Proper care extends the life of any basement floor:

  • Use a dehumidifier to maintain 30–50% humidity year-round.
  • Inspect for new cracks, moisture spots, or leaks each season.
  • Use manufacturer-approved cleaning products to avoid damage.
  • Check sump pumps, gutters, and drainage systems regularly.

Your Perfect Basement Floor Starts Here

With the right material and proper moisture preparation, your basement can become one of the most functional and beautiful spaces in your home. Whether you prefer the warmth of engineered wood, the practicality of vinyl, the durability of tile, or the simplicity of polished concrete, today’s options make it easier than ever to create a basement that’s comfortable, safe, and long-lasting.

Ready to install the perfect basement floor? Explore expert guidance and product options at GC Flooring Pros, we welcome you to inquire further in your Free In Home Estimate.

GC Flooring Pros
Blog, Carpet Flooring, How-to, Tips & Tricks

How to bring your old carpet flooring back to life

Carpet Flooring Care: How to Restore, Clean, and Maintain Your Carpet

Few flooring materials offer the warmth, softness, and comfort of carpet flooring. Whether you’re decorating a cozy bedroom, a family-friendly playroom, or a relaxing living space, carpet brings an inviting feel that hard surfaces simply cannot reproduce. It’s loved by kids and adults alike because it creates a soft, cushioned surface that doubles as extra lounging space while enhancing the room’s aesthetic.

However, even the best carpet flooring must withstand everyday life—foot traffic, spills, dust, pets, heavy furniture, and more. Over time, this can lead to flattening, stains, snags, dull fibers, and trapped odors. But don’t worry: with the right care, many signs of wear can be reversed. In this guide, we’ll walk through simple, effective ways to restore the life, softness, and visual appeal of your carpet flooring.

Why Carpet Flooring Needs Regular Care

Unlike harder surfaces, carpet absorbs dirt and debris more easily. Fibers can compress, lose fluff, or even snag. Regular cleaning is essential for:

  • Maintaining softness and texture
  • Improving air quality by reducing allergens
  • Removing stains before they set
  • Eliminating odors caused by pets, spills, and humidity
  • Increasing the longevity of your carpet flooring

Below are expert tips on how to revive and maintain carpet so it stays beautiful for years.

Trimming: Fix Snags and Loose Threads

Snags happen—usually from moving furniture, Velcro on clothing, or a curious pet’s claws. Many people make the mistake of pulling on loose threads, but this only worsens the problem by creating long runs in the carpet.

The correct solution: trimming.

Using a pair of sharp scissors, carefully cut the loose thread flush with the carpet surface. This prevents unraveling and restores a clean, smooth appearance. Avoid pulling or tugging on any loops—especially in looped carpets such as Berber.

Grooming: Restore Plushness and Lift Flattened Fibers

You’ll be surprised at how transformative grooming can be. High-traffic areas—hallways, stairs, living rooms, and entryways—often show noticeable flattening. A carpet rake, which resembles a small rake with plastic or metal teeth, can lift crushed fibers and redistribute pile for a freshly-installed appearance.

How to groom correctly:

  • Use a carpet rake or brush designed specifically for carpet flooring.
  • Apply slight pressure and rake in the opposite direction of the pile.
  • Repeat monthly or weekly depending on traffic levels.

You’ll immediately notice your carpet looking fluffier, cleaner, and more vibrant.

Fluffing: Revive Sagging Carpet Fibers

Over time, carpet fibers start to sag, especially in areas where furniture used to sit or where people frequently stand. Thankfully, fluffing is easy and highly effective.

How to fluff your carpet flooring:

  1. Spritz the flattened area lightly with warm water.
  2. Use your fingers or a hairpin/comb to lift carpet fibers upward.
  3. Use a hairdryer on low heat while fluffing the fibers.
  4. Let the area dry fully before walking on it.

This simple method helps restore texture and reduces noticeable dents left behind by furniture.

Cleaning: Keep Your Carpet Fresh and Odor-Free

Cleaning is one of the most important aspects of long-term carpet flooring care. Stains, dust, and oils all accumulate deep within fibers, and improper cleaning techniques can sometimes make things worse.

Use Manufacturer-Approved Products

Always check what your carpet’s manufacturer recommends, especially for high-end carpets. Harsh chemicals can bleach, discolor, or damage fibers. Before applying any cleaner, test it on an inconspicuous spot to ensure it won’t cause discoloration.

How to Remove Stubborn Stains

When dealing with stains, one of the biggest mistakes people make is scrubbing aggressively. Scrubbing pushes the stain deeper into the carpet and frays the fibers, creating a dull spot.

Instead, follow this proven technique:

  • Blot from the outside of the stain inward.
  • Use mild cleaners first, avoiding bleach-based products.
  • Rinse lightly with warm water if needed and continue blotting.

Use Baking Soda for Odors and Deep Cleaning

Baking soda is one of the best natural cleaning solutions for carpet flooring. It helps:

  • Absorb oil-based stains
  • Neutralize odors caused by pets or spills
  • Kill bacteria hiding deep within fibers

How to use baking soda effectively:

  1. Generously sprinkle baking soda over the carpet.
  2. Use a brush to work it into the fibers.
  3. Let it sit overnight.
  4. Vacuum thoroughly the next morning.

This method leaves your carpet looking revived and smelling fresh.

Shaving Foam for Extra Tough Stains

This is a surprisingly effective carpet-cleaning hack. Shaving foam works well on stains such as grease, wine, lipstick, and dirt.

How to use:

  • Apply shaving foam generously to the stain.
  • Let it sit for 30 minutes.
  • Blot with a dry cloth.

You’ll be amazed at how many stains shaving foam can lift with minimal effort.

When Carpet Needs Professional Cleaning

Even with great home care routines, carpets benefit from professional deep cleaning once or twice a year. Professional equipment removes buildup that household vacuums can’t reach.

The Carpet and Rug Institute explains the benefits of certified deep-cleaning systems here:
Carpet & Rug Institute Cleaning Standards

Preventative Tips to Extend the Life of Your Carpet Flooring

Prevention is just as important as cleaning. To extend the life of your carpet:

  • Use mats at entryways to trap dirt.
  • Vacuum weekly with a rotating-brush vacuum.
  • Move furniture occasionally to avoid permanent dents.
  • Keep pet nails trimmed to prevent snagging.
  • Address stains immediately before they set.

These habits dramatically improve the longevity and appearance of your carpet flooring.

Conclusion

Carpet flooring remains one of the most comfortable and inviting choices for any home, but like all flooring types, it needs proper care to remain soft, clean, and attractive. With simple techniques like trimming, grooming, fluffing, and proper stain removal, you can restore its beauty and extend its lifespan.

If your carpet is worn beyond repair or you’re ready to upgrade to a fresh new look, the experts at GC Flooring Pros can help. From premium carpet options to expert installation, we guide you through every step.

Ready to refresh your home with new carpet flooring or need help choosing the perfect style? Schedule your Free In-Home Estimate today and let our team help transform your space.