News

Best Stone Countertops
Blog, House Renovation

Best Stone for Countertops: Your Buying Guide for 2025

Best Stone for Countertops: How to Choose the Right Material for Your Home

When it’s time to update your kitchen or bath, the number of options can feel overwhelming. This guide breaks down the best stone for countertops—including granite, quartzite, marble, soapstone, and engineered quartz—so you can match the material to your lifestyle, look, and budget.

Topics we’ll cover:

  • Getting Started: What to know before shopping
  • The Best Stone Countertops (granite, quartzite, marble, soapstone, engineered quartz)
  • FAQs

Getting Started: The Information You Need Before Shopping

Before you compare the best stone for countertops, narrow your options by considering these factors:

  • Countertop material: Natural stone (granite, quartzite, marble, soapstone) vs. engineered stone (quartz). Each offers a distinct look and maintenance profile.
  • Style: Sleek/modern vs. classic/traditional. Movement and veining vary widely by stone.
  • Usage: Heavy cooking, frequent entertaining, or family wear-and-tear may favor tougher, lower-maintenance options.
  • Maintenance: Some stones need periodic sealing; others don’t. Decide your tolerance for upkeep.
  • Budget: Installed prices typically range from ~$40 to $150+ per sq. ft. depending on stone, color group, edges, and layout.

*All prices are estimates and can vary by market, color, thickness, edges, and project complexity.

How to Measure

Measure the length and width of each section (including overhangs). For L- or U-shapes, measure each run separately and total the square footage (length × width ÷ 144 for sq. ft.). Measure twice for accuracy.

The Best Stone Countertops (Pros, Cons & Typical Starting Prices)

Here are the most popular materials when choosing the best stone for countertops:

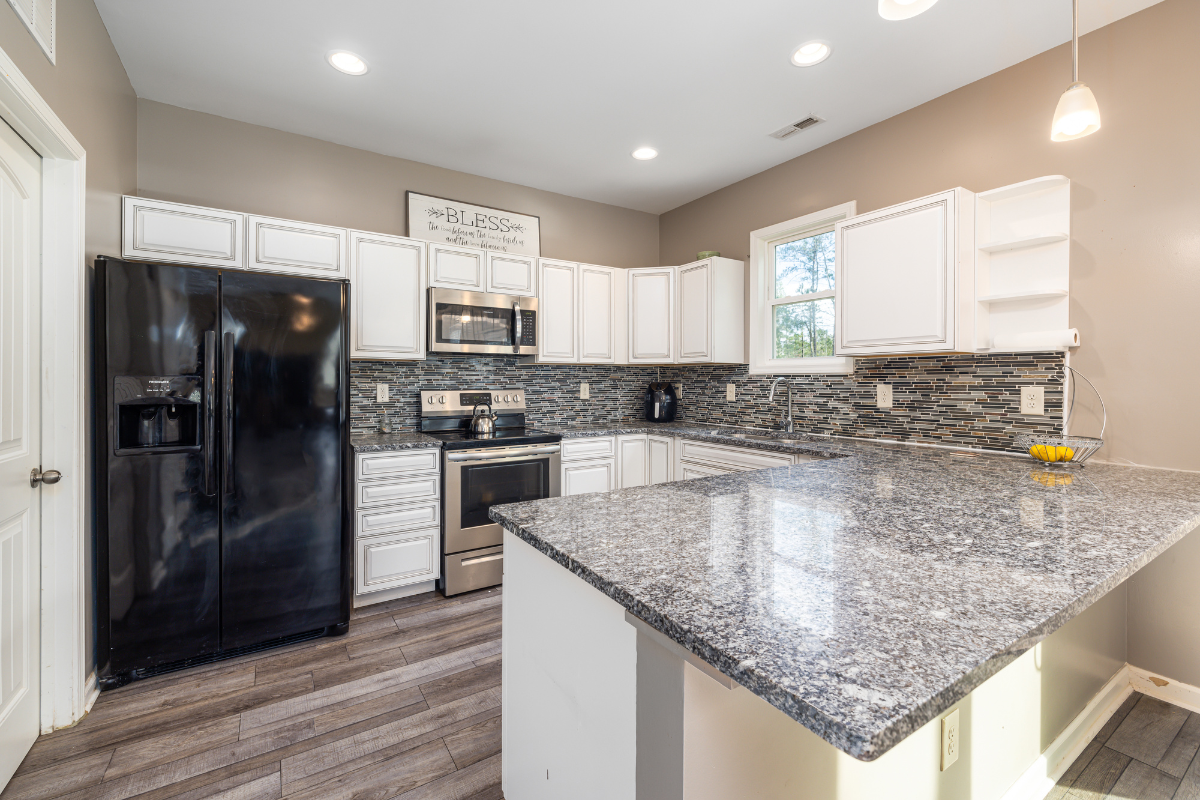
Granite

Granite kitchen countertop with natural movement and veining
Granite: natural beauty, unique movement, and high heat tolerance.

Pros:

  • Durable, heat- and scratch-resistant; each slab is unique.
  • Natural stone adds long-term value and character.

Cons:

  • Porous—typically needs periodic sealing; some colors are more absorbent than others.

Typical starting price: $40 per sq. ft.* installed.

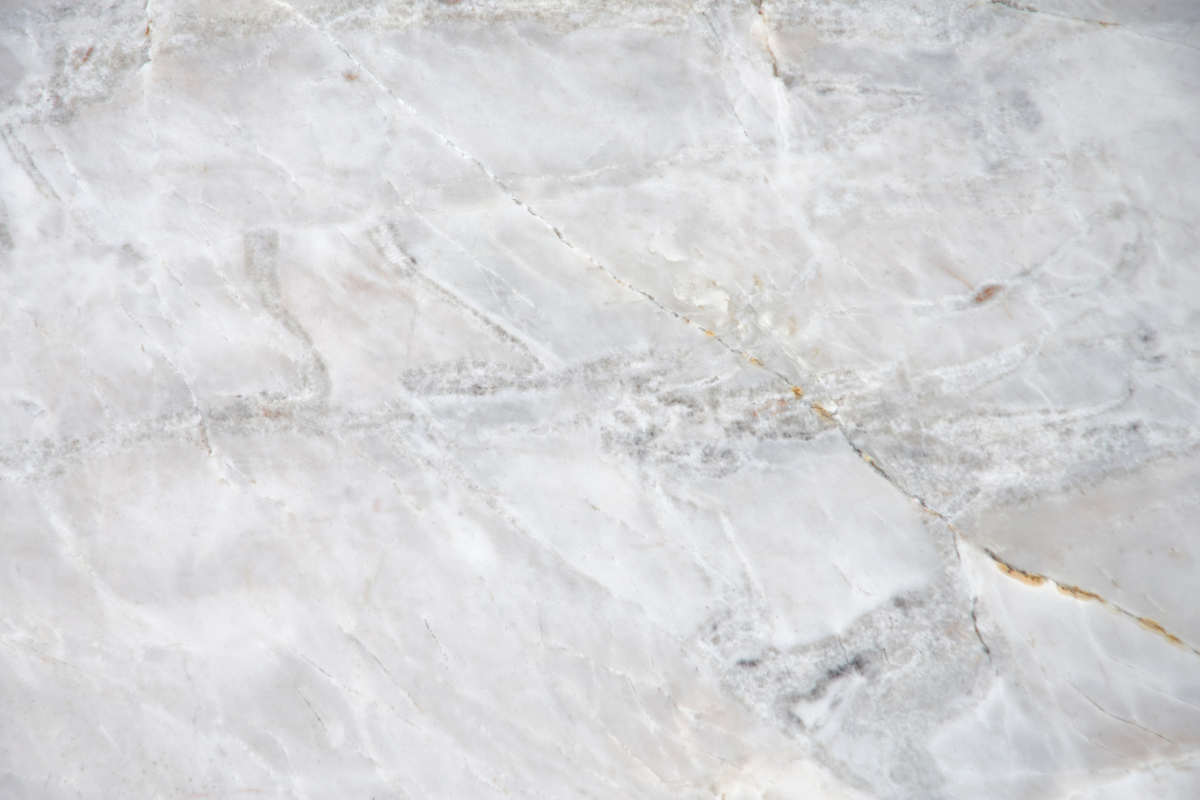
Quartzite

Quartzite countertop with marble-like veining

Pros:

  • Very hard, heat- and scratch-resistant; great for busy kitchens.
  • Often captures marble’s elegant look with better durability.

Cons:

  • Usually requires sealing; fabrication and colors can be premium-priced.

Typical starting price: $50 per sq. ft.* installed.

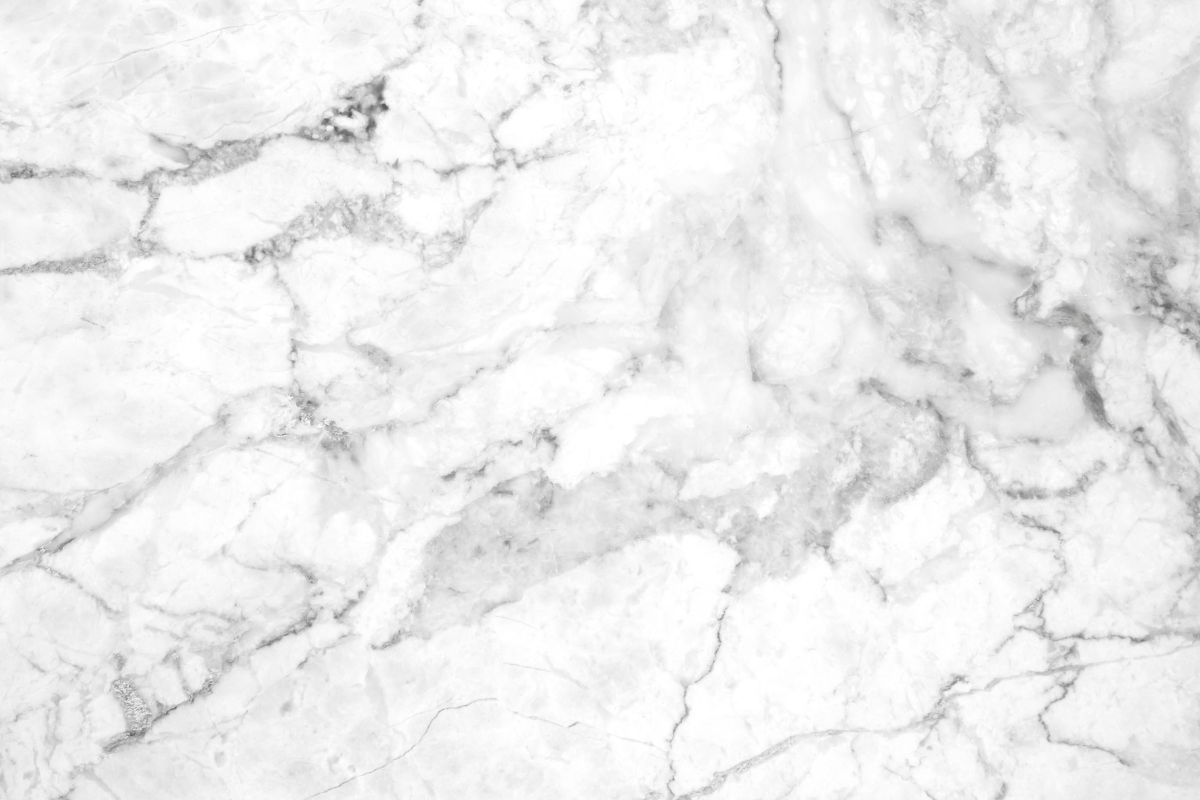
Marble

Marble countertop with classic soft veining

Pros:

  • Iconic, elegant veining; naturally stays cool—great for baking.

Cons:

  • Softer and more porous—prone to etching and staining; needs regular sealing and care.

Typical starting price: $40 per sq. ft.* installed.

Soapstone

Pros:

  • Non-porous (no sealing), highly heat-resistant, and naturally matte.

Cons:

  • Softer surface can scratch; patinas/darkens over time (some love this character).

Typical starting price: $55 per sq. ft.* installed.

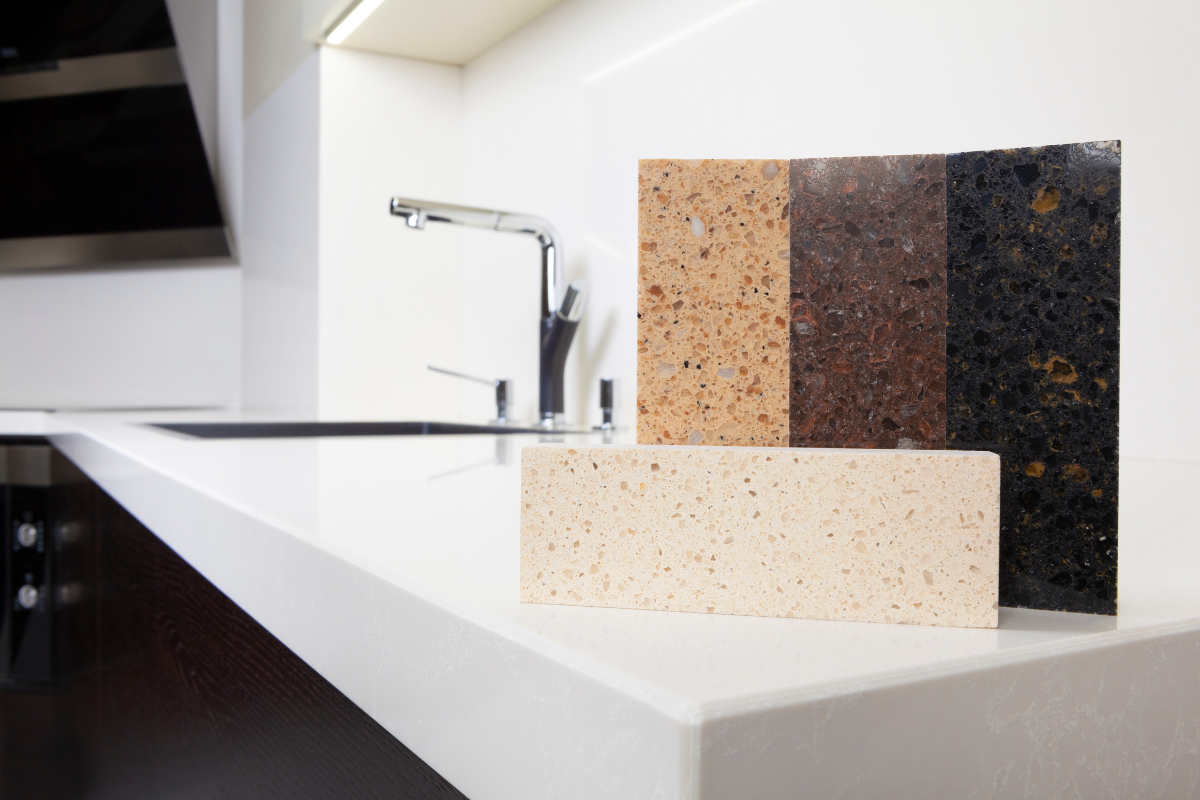
Engineered Stone (Quartz)

Engineered quartz countertop in a modern kitchen
Engineered quartz: consistent patterns, low maintenance, and broad color range.

Pros:

  • Non-porous (no sealing), stain-resistant, and widely available in consistent colors/patterns.

Cons:

  • Lower tolerance for direct high heat; not ideal for outdoor UV exposure.

Typical starting price: $55 per sq. ft.* installed.

How Do I Choose the Best Stone Countertop?

Choosing the best stone for countertops comes down to priorities:

  • Lowest maintenance: Engineered quartz
  • Most heat tolerance: Granite, soapstone
  • Marble look with more durability: Quartzite or select quartz designs
  • Most unique natural movement: Granite, marble, quartzite (varies by slab)
  • Soft, lived-in patina over time: Soapstone

Still undecided? Contact us—we’ll match materials to your space, usage, and budget, and provide samples and a precise quote.

Stone Countertops FAQs

How do you seal a stone countertop?

Use a sealer formulated for your stone type (granite/marble/quartzite). Clean and dry the surface, apply per manufacturer directions, let it dwell, then wipe/buff dry. Frequency varies from 6–24 months depending on stone and use.

How do you clean a stone countertop?

Daily: a soft cloth with warm water and a pH-neutral stone cleaner or mild dish soap. Avoid acidic or abrasive cleaners (vinegar, bleach, scouring powders) that can etch or dull natural stone.

What’s the difference between granite and quartz?

Granite is natural and unique slab-to-slab; it usually requires periodic sealing. Engineered quartz is man-made, non-porous (no sealing), and offers consistent colors/patterns with excellent stain resistance.

Which is better: marble or granite?

For low-maintenance durability, granite typically wins. For timeless luxury and classic veining, marble is unmatched—just expect more care (sealing and gentle cleaners).

What is the most expensive countertop material?

Premium natural stones (select marbles, quartzites, and some soapstones) and rare colors can be among the most expensive. Cost ultimately depends on color rarity, thickness, edges, and project complexity.


Pricing references:
Granite •
Quartzite •
Marble •
Soapstone •
Engineered Quartz

Four steps to expect during the Hardwood Floor installation process

Hardwood Floor Installation: What to Expect From Start to Finish

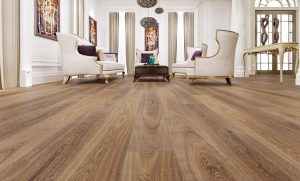
Hardwood floor installation in white oak

Considering a flooring upgrade? Choosing a new wood floor can be overwhelming with so many design, grain, and color options—but the hardwood floor installation process doesn’t have to be stressful. At GC Flooring Pros, we guide you through every step so you know exactly what to expect from your project.

Below is a clear breakdown of our four-step hardwood floor installation process.

STEP 1: Free In-Home Consultation

Every hardwood floor installation begins with a complimentary in-home visit. During your consultation, we review your style preferences, room layout, natural lighting, wall colors, and cabinet tones so we can recommend the best flooring options for your home.

We also take precise measurements and bring popular hardwood flooring samples—including different species, stains, plank widths, and patterns—to help you visualize your options.

STEP 2: Room Preparation

Once your floors are ordered, we’ll schedule your hardwood floor installation date. Before our installers arrive, the room must be cleared of furniture, décor, curtains, rugs, and fragile items.

For your convenience, GC Flooring Pros also offers optional furniture moving services—just ask during your consultation.

STEP 3: Installation

During installation, your home temporarily becomes an active construction zone. Expect noise, traffic, and some dust. We recommend covering furniture in nearby rooms to minimize dust exposure.

If your project involves pre-finished hardwood floors, installation is completed once the planks are laid. At that point, furniture can be moved back, and your new floors are ready to enjoy.

STEP 4: Staining & Finishing (For Unfinished Floors)

For unfinished hardwood, our team will sand, stain, and apply multiple coats of polyurethane for a smooth, durable finish. After the final coat, your floors typically require a 48-hour cure time before walking on them and moving furniture back.

We recommend applying felt pads to all furniture legs to protect your freshly finished hardwood floors from scratches.

Ready to Transform Your Home With Professional Hardwood Floor Installation?

If you’d like more details, have questions about wood species, or want to see samples in person, schedule your complimentary in-home consultation today. Our team at GC Flooring Pros is here to help bring your dream hardwood floors to life.

Porcelain vs ceramic tile
Blog, Tile Flooring

Tile Flooring Showdown: Porcelain vs Ceramic Tile Flooring

Porcelain vs Ceramic Tile: Which Flooring Option Is Best for Your Home?

Deciding between porcelain vs ceramic tile is one of the most common questions homeowners face when choosing new flooring. Both tile types offer long-lasting durability, attractive designs, and excellent overall performance—but the right choice depends on how you plan to use the space, the level of wear and tear, and your long-term expectations.

In this comprehensive guide, we compare ceramic vs porcelain tile across all the categories that matter most: manufacturing process, water absorption, appearance, durability, heat resistance, upkeep, cost, and lifespan. By the end, you’ll have a clear understanding of which tile is the most excellent choice for your kitchen, bathroom floors, living areas, or commercial space.

Porcelain vs Ceramic Tile: Key Differences Explained

The differences between ceramic and porcelain tiles begin with how they’re produced. These manufacturing differences impact density, hardness, stain resistance, and long-term performance—making it important to understand what sets these materials apart.

1. Composition & Manufacturing Process

Ceramic tile is made from natural clay that is kiln-fired at moderate temperatures. This traditional manufacturing process results in a more porous tile, slightly softer texture, and lighter weight. Ceramic has been used for centuries and remains extremely popular due to its versatility and affordable pricing.

Porcelain tile, on the other hand, is created using finer, denser clay and fired at significantly higher temperatures. This enhanced manufacturing process produces a harder, less porous tile with a noticeably lower water absorption rate. For this reason, porcelain is often the best type of tile for moisture-prone areas.

Because porcelain is less absorbent and more refined, it’s often recommended for areas where spills, moisture, or heavy foot traffic are expected.

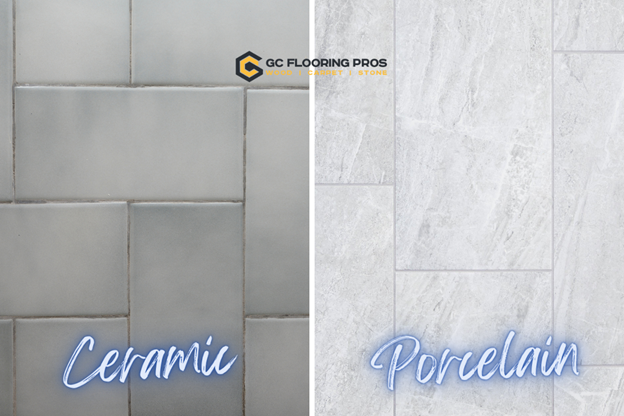
porcelain vs ceramic tile comparison

2. Appearance, Styles & Design Options

Both ceramic and porcelain tiles come in a huge range of colors, shapes, patterns, finishes, and sizes. Whether you prefer rustic stone-look tile, glossy modern finishes, marble replicas, or wood-look planks, both materials offer outstanding design flexibility.

Ceramic tile tends to feature more traditional or muted color palettes. While still beautiful, ceramic patterns may show slightly less detail due to the lighter clay composition.

Porcelain tile often produces richer colors and more realistic textures. Wood-look porcelain floors, for example, can closely mimic real hardwood due to advances in digital printing technology.

  • Glazed porcelain: smooth, stain-resistant, and easy to clean
  • Unglazed porcelain: natural matte look, highly slip-resistant
  • Glazed ceramic: glossy, colorful finishes ideal for backsplashes
  • Unglazed ceramic: earthy tones and a handcrafted look

Your choice ultimately depends on style preferences, room design, and how realistic you want your tile’s texture and pattern to appear.

3. Water Resistance & Moisture Performance

Water absorption is one of the most important distinctions in the porcelain vs ceramic tile comparison. If you’re installing tile in bathrooms, kitchens, laundry rooms, or basements, understanding moisture performance is crucial.

  • Porcelain tile: extremely low water absorption rate, making it ideal for wet environments, showers, and outdoor areas.
  • Ceramic tile: moderately water-resistant but more porous; sealing may be required for high-moisture areas.

Because of its density, porcelain is often the better choice for homeowners looking for long-term stability around water. This makes it an excellent material for bathroom floors, kitchen backsplashes, mudrooms, and outdoor patios.

4. Heat Resistance & Outdoor Performance

Porcelain’s density also gives it superior heat resistance. It holds up better on fireplace surrounds, sunrooms, and exterior applications where temperatures can fluctuate dramatically.

Ceramic can still perform well in warm environments, but it is not recommended for areas with extreme temperature exposure or consistent direct heat.

5. Which is more durable Porcelain or Ceramic Tile? (Durability, Wear & Tear)

When comparing ceramic vs porcelain tile durability, porcelain leads in several categories:

  • More resistant to scratches and surface wear
  • Better protection against chips and cracks
  • Handles heavy foot traffic exceptionally well
  • Less likely to be damaged by falling objects or sharp edges

Ceramic tile is still very durable, but because it is more porous, it may show signs of wear and tear sooner—especially in high-traffic or commercial environments.

6. Care, Cleaning & Maintenance

Both porcelain and ceramic tile are exceptionally easy to maintain—one of the reasons they remain among the most popular flooring options today. Basic care includes sweeping, vacuuming, and mopping with mild detergents.

Here’s how maintenance compares:

  • Porcelain: very low maintenance; rarely needs sealing; highly stain-resistant.
  • Ceramic: may require sealing depending on glaze; slightly more susceptible to long-term staining.

Homeowners with large pets or children may appreciate the higher durability of a porcelain floor, especially in busy common areas.

7. Lifespan & Long-Term Value

With proper care, both materials can last several decades. Porcelain’s hardness and moisture resistance give it a slight advantage in long-term performance, making it a smart investment for homes looking for lasting value.

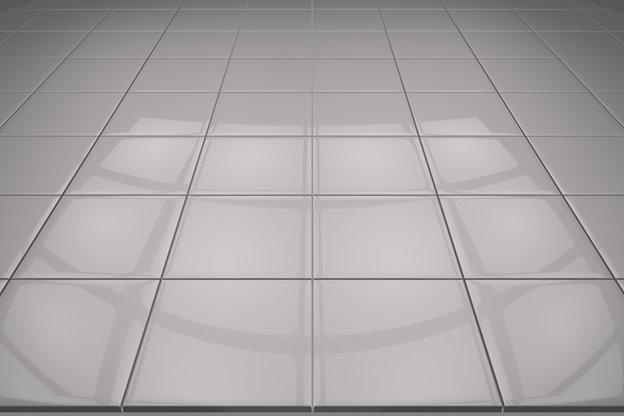
porcelain vs ceramic tile durability

8. Porcelain vs Ceramic Tile Cost

Ceramic tile generally comes at a lower price point, making it budget-friendly and ideal for large spaces or decorative wall applications.

A porcelain floor costs more due to the higher-quality materials and intense manufacturing process, but the added durability may result in lower long-term maintenance or replacement costs.

Which Tile Is Better—Porcelain or Ceramic?

The answer depends on your needs, space, and expectations.

Porcelain Tile Pros

  • Outstanding water resistance
  • Superior durability
  • More heat-resistant
  • Often lasts longer

Disadvantages of Porcelain Tiles

  • Higher cost

Ceramic Tile Pros

  • Budget-friendly
  • Lightweight and easy to install
  • Wide variety of colors and patterns

Disadvantages of Ceramic Tiles

  • More porous
  • Less durable in heavy-traffic areas
  • May require sealing

Both can be an excellent choice, and ceramic is often far more durable than alternative materials such as vinyl or laminate in kitchens and bathrooms.

Learn More About Tile Standards

For technical guidelines, certifications, and manufacturing quality standards, visit the Tile Council of North America:
Tile Council of North America

Need Help Choosing the Right Tile?

At GC Flooring Pros, our experts help homeowners choose the best tile material for their home. From selecting the perfect type of tile to professional installation, we ensure your floors look beautiful and last for years.

Call (214) 814-1177 today for a free in-home consultation!

hardwood flooring in a bathroom
About Floors, Bathroom Flooring, Blog, Hardwood Flooring, House Renovation, Interior Design, Tips & Tricks

Can You Use Hardwood Flooring in A Bathroom?

The hardwood flooring in a bathroom can make a huge impact on the appearance and feel of your space. But you may be wondering if hardwood is right for your situation.

If you’re considering hardwood floors for a bathroom, keep these things in mind:

  • hardwoods are more susceptible to water damage
  • hardwoods may require more time and money spent on waterproofing and sealing than other types of flooring
  • hardwoods may need periodic refinishing to maintain their beauty.

But they offer a great deal of visual appeal and beautiful flooring for years on end if they’re done right.

Overall, we recommend not using hardwood flooring in bathrooms that have a shower or tub and using them with caution and preparation in powder rooms. Read on to learn more.

Hardwood Flooring In A Bathroom Can Add Elegance And Class

The appeal of hardwood floors is hard to argue with. They add a touch of elegance and class to any room. And if you’re looking for that spa-like feeling in your bathroom, hardwood floors may be just what you need.

In fact, hardwood floors are so desirable in a home that they have been shown to increase property values by up to 10%. Another interesting study by the National Association of Realtors has shown that homes with hardwood floors can sell for an average of $5,000 more than homes without. So if you are looking at the installation of hardwood floors from an investment standpoint, it would be hard to go wrong.

However, before making your decision, it’s important to consider the pros and cons of this type of flooring, especially in an area notorious for moisture.

Hardwoods Are Susceptible To Water Damage

One of the main drawbacks to hardwood flooring in a bathroom is that it is more susceptible to water damage than other types of flooring. If your bathroom is not properly sealed with polyurethane, you may find yourself with buckled and warped floors before too long.

In addition, if water does get on your hardwoods, it can cause them to swell and even rot. This is why we do not recommend hardwood floors in a bathroom that contains a shower or bath.

A hardwood floor can be damaged by water from a number of sources, including:

  • splashing or spilling on the hardwood surface itself
  • flooding caused by clogging in pipes and drains
  • condensation that forms under tiles or slabs

However, the most common problem in a bathroom setting is when water is left to stand on the hardwood surface for a long period of time from tub and shower use.

This can lead to stains and warped boards, which will eventually cause other problems for your home. 

While we don’t recommend using hardwood in a full bathroom, if you are choosing to do so, there are many different types of hardwoods available now that resist moisture a little better than traditional hardwoods like oak or maple wood. More on that below.

Hardwoods Require Proper Waterproofing 

The costs of waterproofing hardwood flooring are also something to consider.

In general, hardwood floors are naturally water-resistant. However, if your bathroom has a hardwood floor, it’s likely that the room will become wet from time to time as a result of splashing or spills on the hardwood surface. We suggest cleaning up spills immediately when they happen and not leaving puddles on the hardwood.

Polyurethane seals the wood and helps make it waterproof. It also serves as a protective coating that hardwood floors need to maintain their beauty and durability over time.

These sealers can be applied by professional hardwood flooring companies or you could choose one of the many water-based polyurethane products available at your local home improvement store and do it yourself.

Hardwoods May Need Periodic Refinishing To Maintain Their Beauty

A hardwood floor that is properly maintained and has a high-quality finish can last for up to 20 years or more before it needs to be refinished. However, if you care for your floors correctly, they will last much longer.

Refinishing hardwood floors is a big job, but it can be worth it to keep your floor looking beautiful for years to come. The basic steps to hardwood floor refinishing are:

  • sand hardwood floors with a special sander
  • apply hardwood flooring stain, if desired
  • finish by applying hardwood floor protective coating

If done correctly, this process can take anywhere from four to eight hours per room depending on the size of your space and how many coats are needed to get an even coat.

What Are The Best Wood Options for Waterproof Hardwood Floors?

Hardwoods that are the least susceptible to water damage are often hardwoods that are naturally more water-resistant. These hardwood floors may include:

  • Maple (hard, durable).
  • Hickory (very hard and dense). 
  • Red Oak Wood Flooring (moderately hard but still more resistant to water than most other types of wood flooring)

What About Engineered Hardwoods For Water Resistance?

Engineered hardwoods are great for water resistance because they are constructed from hardwood planks with a veneer of hardwood on top. The hardwood veneer provides the durability that is necessary for high-moisture areas like bathrooms, while engineered hardwoods can help you save money because they require less finishing and sealing than solid wood floors do.


Getting Help With Your Hardwood Floor Purchase

Hardwood flooring is a popular and beautiful choice for many homeowners, but it can also be difficult to choose the right style. There are so many different types of hardwood floors with so many different looks! You have to consider cost, durability, color, and finish when making your selection.

That’s why it can be helpful to get expert advice when choosing hardwood flooring for your home. A professional hardwood flooring company can help you select the right type of wood and the right finish for your specific needs and preferences. They can also give you a quote on how much the installation will cost.

GC Flooring Pros is here to help you make the best decision possible by providing you with professional advice, guidance, and recommendations based on your unique needs. We’re happy to answer any questions about our products or services at any time during your purchase process. Our experts are always available via phone call or email whenever you need them!

If you are in the Dallas, TX area and you would like hardwood flooring installed in your home, we can help with any hardwood style or finish that appeals to you. Request an in-house estimate today!

About Floors, Blog, Hardwood Flooring, House Renovation

Is Engineered Wood the Answer to Sustainable Wood Flooring?

Sustainable Wood Flooring: Eco-Friendly Choices for a Greener Home

Sustainable living is becoming a major priority for homeowners, and with good reason. Research shows that 77% of people want to live more sustainably, yet many aren’t sure where to begin. One of the most meaningful ways to make an eco-friendly impact is by choosing environmentally responsible materials inside your home—starting with your floors.

If you’re exploring sustainable wood flooring, engineered wood is one of the best ways to combine beauty, durability, and environmental stewardship. Below, we break down what engineered wood is, why it’s greener than solid hardwood, and how to select the best style for your home.

What Is Engineered Wood?

Engineered wood is a carefully manufactured flooring product designed to use less raw material while delivering the same timeless look as traditional hardwood. Each plank is built using multiple layers:

  • A plywood or recycled wood core — made from fast-growing or repurposed materials
  • A real hardwood veneer — providing the natural grain, color, and visual appeal

This layered structure not only reduces the amount of hardwood needed but also increases durability and allows the flooring to perform better in areas that experience moisture or temperature fluctuations. Compared with solid hardwood, engineered wood uses natural resources more responsibly, making it an excellent choice for homeowners committed to sustainability.

Sustainable Wood Flooring Examples

Not all wood flooring is created equal. Some materials require extensive harvesting, while others can be produced more sustainably. Common sustainable species used in engineered wood include:

  • Hickory — extremely durable and widely available
  • Pecan — strong, stylish, and sourced from fast-growing trees
  • Oak — one of the most renewable woods in North America
  • Maple — loved for its light tone and sustainability

These options are popular for engineered wood flooring installations because they maximize visual appeal while minimizing environmental impact.

Hardwood vs. Engineered Wood: Key Differences

Construction

Traditional hardwood is made from a single solid piece of wood. Engineered wood, however, is composed of multiple layers, using less hardwood per plank. A cross-section reveals the difference—engineered planks include various wood layers while hardwood shows a consistent grain throughout.

Durability & Hardiness

Contrary to common assumptions, engineered wood can be just as durable as hardwood. In some cases, it actually performs better. Engineered planks are more resistant to warping, cupping, or swelling due to their layered structure. While hardwood is easily affected by moisture, engineered wood offers enhanced stability and moisture resistance—especially important in Texas homes where humidity can fluctuate.

Additionally, engineered wood is less prone to damage during installation and everyday use. Homeowners researching differences often learn that engineered flooring’s improved moisture stability makes it suitable for more rooms in the house, including basements and kitchens.

Why Engineered Wood Is a Sustainable Wood Flooring Choice

Reduced Environmental Impact

Engineered wood minimizes how much hardwood is used by relying on recycled or fast-growing woods for its core layers. Because manufacturers can use materials that are otherwise discarded or underutilized, fewer trees are cut down while still delivering a beautiful final product.

Less Pollution During Production

The environmental benefits go beyond tree usage. Manufacturing engineered wood also reduces waste and energy consumption. For example, in traditional hardwood production, creating veneer slices generates large amounts of waste, sawdust, and emissions. Engineered wood minimizes this by cutting veneers more efficiently and using composite layers underneath.

Studies show how traditional hardwood processing contributes significantly to pollution. Engineered wood’s streamlined manufacturing process produces fewer pollutants and uses less fuel overall.

Popular Styles of Engineered Sustainable Wood Flooring

Engineered wood is not only eco-friendly—it’s also highly customizable. Homeowners can choose from a variety of formats and installation patterns to create unique and visually stunning spaces.

Plank Flooring

The most common style, plank flooring offers versatility and ease of installation. You can stagger plank lengths, vary widths, and explore endless stain options to achieve the perfect look. Its realistic wood veneer makes it almost indistinguishable from solid hardwood.

Sheet or Wide-Panel Flooring

Some engineered floors are produced as wide sheets or panels, creating a seamless appearance. These are especially popular in minimalist, modern, or Scandinavian-inspired interiors where clean lines and smooth surfaces are key.

Chevron & Herringbone Patterns

Chevron flooring is an eye-catching design created using diagonal cuts to form repeating “V” patterns. Engineered wood makes this style more accessible, stable, and cost-effective than traditional hardwood. Homeowners interested in intricate design installations can learn more about the process through our guide to hardwood installation patterns.

Why Sustainable Wood Flooring Is Worth the Switch

Choosing sustainable wood flooring is more than a design decision—it’s a smart, responsible investment. Engineered wood is:

  • More eco-friendly than traditional hardwood
  • Cost-effective with beautiful hardwood aesthetics
  • Durable and moisture resistant for everyday use
  • Versatile in style from rustic to modern designs
  • Long-lasting with proper care and refinishing

If you’re designing a greener home, engineered sustainable wood flooring offers the best blend of beauty, value, and environmental responsibility.

Start Your Sustainable Wood Flooring Project

Ready to reduce your carbon footprint while elevating your home’s style? Our team at GC Flooring Pros can help you choose, install, and care for your eco-friendly wood floors. Explore sustainable options, compare species, and schedule expert guidance for your project.

Have questions or want hands-on support? Contact our team to book your free consultation. Together, we’ll help you create a home that’s beautiful, durable, and environmentally conscious.

Blog, Floor Care, Laminate Flooring, Recommended Blog, Tips & Tricks, Water Damaged Floors

How to Fix Laminate Flooring That is Lifting [And Why It Happens]

The quick answer

Most laminate floor repair starts with one question: what caused it? Lifting and buckling usually come from moisture, missing expansion gaps or an uneven subfloor. Gaps come from dry air or joints that never fully locked. Scratches and small chips can be filled with a color-matched repair kit.

Peeling, swollen or water-damaged planks can’t be dried back to normal. Replace those boards, one at a time if the damage is small, after the moisture source is fixed.

Laminate is one of the toughest, most budget-friendly floors you can put in a home, and when something goes wrong, the fix is often smaller than it looks. Whether a few boards are lifting, gaps are opening between planks, the dog left a chip by the back door, or a leak got under the floor, this guide shows you how to repair laminate flooring the right way, problem by problem.

Fixing laminate flooring is mostly about matching the repair to the cause. We start with the most common issue, lifting, then cover gaps, chips and scratches, replacing a single plank, and water damage. If you’d rather hand it off, our team at GC Flooring Pros can inspect, diagnose, and repair or replace damaged sections for a long-lasting, seamless finish.

What’s Wrong With My Laminate Floor? Find Your Fix

Find the card that matches what you’re seeing, then jump to that section below.

Boards rising, bouncing or peakingLifting / buckling

Usually moisture, a floor pinned too tight to the walls, or an uneven subfloor. See the lifting fixes below.

Lines opening between planksGaps between planks

Often dry winter air or joints that didn’t fully lock. Many gaps can be tapped closed.

Fine lines or scuffs on the surfaceScratch repair

Light scratches blend out with a laminate repair kit or touch-up marker.

A dent or missing chunkChipped laminate

Small chips fill with color-matched putty or wax. Big or edge chips mean one new plank.

Top layer flaking or bubblingPeeling laminate floor

The wear layer is separating, usually from moisture in the core. Replace the plank.

Swollen seams after a leak or spillWater damage

Swelling is permanent. Fix the source, dry the subfloor, then replace what’s damaged.

Laminate Floor Repair at a Glance

Problem Most likely cause DIY-friendly? The fix Relative cost
Lifting or buckling Moisture, no expansion gap, uneven subfloor Sometimes Fix the cause, then relay or replace boards $–$$$
Gaps between planks Low humidity, unlocked joints, pinned floor Yes, for a few gaps Tap joints closed; relay rows if widespread $
Scratches Grit, pet nails, furniture Yes Repair kit, wax pencil or touch-up marker $
Chips Dropped items, impact at edges Yes, if small Color-matched putty or hard wax; replace plank if large $
Peeling surface Moisture in the core, heat, wear Replace only Replace the affected planks $–$$
Water damage Leaks, spills left standing, slab moisture Small areas only Stop the source, dry out, replace damaged planks or the room $$–$$$

Why Is My Laminate Floor Lifting?

“Lifting” isn’t a single problem, it’s a symptom. Pinpoint the cause first, then choose the matching fix below.

1) Underlying Moisture Problem

Excess moisture in the subfloor or slab causes planks to swell and rise. If substrate moisture is above about 6–9% per NALFA guidance, acclimation alone won’t save the install. Dehumidify, correct leaks, and use proper vapor barriers/underlayments before re-laying.

To reduce future risk, select an appropriate underlayment and verify moisture levels with a reliable moisture test prior to installation. You can also review general indoor moisture control tips from the EPA’s moisture guidance.

2) Not Properly Installed

Laminate relies on precise joints and “floating” clearances. If click-lock seams aren’t fully engaged, you’ll see gaps and peaks. If planks are jammed tight to walls, seasonal expansion has nowhere to go—leading to buckling. And if material wasn’t acclimated to site conditions, post-install movement is likely.

When in doubt, have a pro evaluate the locking profile, acclimation timeline, and edge clearances. Our crew at GC Flooring Pros can quickly spot and correct these issues.

3) Uneven Subfloor

Waves, dips, or humps telegraph through floating floors, creating bounce or lift. Minor highs can be ground; lows can be filled. If the slab or wood subfloor is significantly out of spec, a self-leveling compound or structural remediation may be required. Here’s a helpful primer on identifying issues with uneven substrates: how to address a wavy subfloor.

4) No Expansion Gaps

Floating floors need room to move—typically ~1/4″ around all fixed verticals (walls, cabinets, pipes, hearths). Without proper gaps and transitions, the floor will push against restraints and peak. This often appears at doorways or long runs.

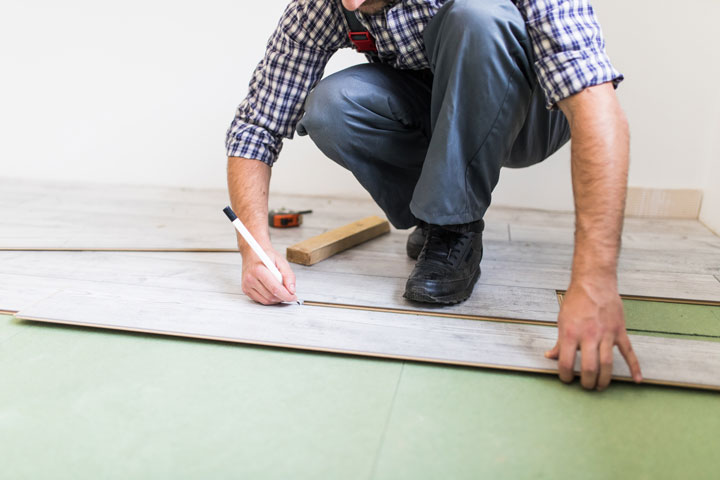
Laminate flooring repair in a North Texas home

How to Fix Laminate Flooring That’s Lifting

Match your repair to the underlying cause. Here are the proven approaches our technicians use in the field.

Fix 1: Level an Uneven Subfloor

  1. Remove affected planks.Take them up carefully and set them aside.
  2. Find the highs and lows.Grind down peaks; fill dips with an appropriate patch or self-leveler per manufacturer instructions.
  3. Clean and check.Vacuum thoroughly; confirm smoothness with a straightedge.
  4. Add the right underlayment.It absorbs micro-variations and reduces sound transmission.
  5. Reinstall the planks.Tap joints with a block and mallet to fully lock the profile.

If the surface is severely out of tolerance, schedule a professional inspection through our Contact page. We’ll advise the most efficient, code-compliant fix.

Fix 2: Resolve Moisture Intrusion

  1. Track down the source.Plumbing leaks, slab moisture, or ambient humidity. Reference the EPA’s moisture control basics to stabilize indoor conditions.
  2. Remove and dry.Take up swollen or damaged planks and let the area dry thoroughly (fans and dehumidifiers as needed).
  3. Test before you relay.Check the slab or subfloor with a moisture meter or calcium chloride/RH test to verify acceptable levels.
  4. Barrier, then boards.Install a vapor barrier or appropriate underlayment before relaying planks. Replace any damaged boards with matching stock.

Need help sourcing like-for-like replacements or confirming moisture thresholds? Our laminate specialists can assist: Laminate Flooring Supply.

Fix 3: Add or Restore Expansion Gaps

  1. Pull the trim.Remove baseboards or quarter-round to inspect perimeter clearances.
  2. Trim to a full gap.Undercut or trim planks to achieve a continuous ~1/4″ gap at all walls and fixed obstructions.
  3. Break up long runs.Add T-moldings or reducers at long runs, room transitions, and thresholds.
  4. Reinstall the trim.Nail base or quarter-round to the wall, never down into the floating floor.

Fix 4: Reseat Mislocked Joints

  1. Lift the row with gaps.Inspect the click profile for damage or debris.
  2. Clean and replace.Clean tongues and grooves; replace any crushed or chipped boards.
  3. Reassemble carefully.Use a pull bar at end joints and a tapping block along long joints to fully engage.

Pro tip: Always follow the manufacturer’s installation pattern and expansion rules. If the original product line is discontinued, we can recommend visually compatible replacements through our laminate flooring team.

How to Fix Gaps Between Laminate Planks

Small gaps along the ends or long edges of planks are one of the most common laminate complaints, and one of the easiest to fix. They usually show up for one of three reasons: the air got dry and the boards shrank slightly, a joint was never fully clicked together, or something is pinning the floor (a kitchen island, heavy furniture or trim nailed into the floor) so it can’t move back into place.

  1. Start with humidity.If gaps appeared in winter, run a humidifier to bring the home back into the 35–55% range. Some seasonal gaps close on their own.
  2. Tap the joints closed.Use a floor gap fixer (a rubber-gripped block) or a tapping block and mallet. Press it onto the plank next to the gap and tap toward the gap. Work along the row so you’re not just moving the gap one board over.
  3. Unpin the floor.Check for trim, cabinets or furniture locking the floor in place. Free it so the floor can float again.
  4. Relay if it keeps coming back.Widespread or recurring gaps usually mean damaged locking edges or an uneven subfloor. Lift the affected rows, check the subfloor, and reinstall with fresh boards where joints are worn.
🛠️
Crew tip: don’t fill laminate gaps with wood filler

Filler cracks and pops out as a floating floor moves with the seasons. Close the gap mechanically instead. For a hairline end-joint gap that won’t close, a color-matched laminate putty is the cleaner fix.

How to Repair Chipped or Scratched Laminate Planks

Laminate can’t be sanded and refinished like hardwood, because its look is a printed layer under a clear wear coat. The good news: most surface damage is small enough to hide with a laminate floor scratch repair kit, which you can find at most flooring and hardware stores in your floor’s color family.

Light scratches and scuffs

Clean the area first, then try a laminate floor cleaner and a soft cloth. Many scuffs are just residue sitting on top. For true scratches, rub a color-matched wax pencil or touch-up marker into the line, wipe off the excess, and buff with a dry microfiber cloth. Blend two shades if your floor has a lot of grain variation.

Chipped laminate floor

  1. Clean the chip.Remove loose flakes and dust so the filler can bond.
  2. Fill it.Press color-matched laminate putty into the chip with a plastic putty knife, or melt a hard-wax repair stick into it with the kit’s heating tool.
  3. Level it.Scrape the filler flush with the surface while it’s still soft. Overfill slightly, then trim.
  4. Draw the grain back in.Use a fine-tip touch-up marker to continue the wood-grain lines across the repair.

If a chip is larger than a coin, sits right on a joint, or exposes the core, replacing that one plank will look better and last longer (see the next section).

Peeling laminate floor

When the top layer starts to flake, bubble or peel, the core underneath has usually taken on moisture, or the board has simply worn through. Glue doesn’t hold a peeling surface down for long, so the fix is to replace the affected planks. Before you do, check what caused it: a slow leak at a dishwasher, fridge line or exterior door is the usual suspect, and new boards will peel too if the moisture keeps coming.

How to Replace a Single Laminate Plank

One damaged board doesn’t mean a whole new floor. There are two ways to swap it out, and the right one depends on where the plank sits. Either way, you’ll need a matching replacement board, which is why we always recommend keeping a spare box from your original install.

Option A: Unclick the rows (best near a wall)

  1. Remove the trim.Take off the baseboard or quarter-round on the wall closest to the damaged plank.
  2. Unclick row by row.Lift each row at an angle to release the locks, numbering the boards on painter’s tape so they go back in the same order.
  3. Swap the damaged plank.Click the new board into place in its row.
  4. Reassemble.Click the rows back in, in reverse order, and reinstall the trim with your expansion gap intact.

Option B: Cut it out (for planks in the middle of the room)

  1. Mark and cut.Mark a rectangle about 1.5″ inside the plank’s edges. Set a circular or track saw to the plank’s thickness only, so you don’t cut the underlayment, and cut along the lines. Add diagonal relief cuts from the rectangle to each corner.
  2. Remove the pieces.Lift out the center, then work the edge strips loose carefully so you don’t damage the neighboring boards’ locking edges.
  3. Prep the new plank.Trim off the bottom lip of the groove on the long side and the locking tab on the short end so the new board can drop straight in.
  4. Glue and set.Run laminate or wood glue along the edges of the new board (not underneath it, since the floor still floats), press it in, wipe off squeeze-out, and weigh it down for about 24 hours.
🛠️
Crew tip: keep your leftover boxes

Laminate collections change fast, and a close-but-not-exact match stands out in a sunny room. If you don’t have spares, pull a plank from inside a closet to use for the visible repair, and put the near-match in the closet.

Laminate Floor Water Damage: Repair or Replace?

Most laminate has a high-density fiberboard core. When water gets into the seams, that core swells, and once it swells, it doesn’t shrink back, even after it dries. That’s why laminate floor water damage usually means replacing boards rather than repairing them. The real question is how many.

What you see Verdict What to do
Spill wiped up quickly, edges flat a day later Keep it No repair needed. Keep an eye on the seams for a week.
A few planks with raised or swollen edges Replace those planks Fix the source, let the area dry, then swap the damaged boards.
Peaking, peeling or soft spots across a room Replace the room Pull the floor and underlayment, confirm the subfloor is dry, then reinstall.
Standing water, a burst pipe, or musty smell Dry-out first, then rebuild Call a water mitigation company to extract and dry the space. Then the floor gets rebuilt.
  1. Stop the water.Shut off the supply or fix the leak. Repairs won’t last until the source is solved.
  2. Get it dry.For anything more than a spill, a mitigation company should extract water and dry the subfloor and walls. Laminate traps moisture underneath, which can lead to mold.
  3. Document everything.Take photos and videos before anything is removed. If you’re filing an insurance claim, your carrier will want them.
  4. Rebuild with fresh material.Once the slab or subfloor tests dry, replace damaged planks and underlayment, or install a new floor. This is the step we handle.

After the drying is done, GC Flooring Pros handles the water damage repair and rebuild: new flooring, baseboards and the finish work that makes the room feel like home again. We can work from your insurance-approved scope. If you’re choosing a new floor for a kitchen, laundry room or bath, it’s worth looking at water-resistant laminate or LVP.

Laminate Repair Myths, Busted

MythSwollen laminate goes back to normal once it dries.
FactThe fiberboard core stays swollen. Drying stops the damage from spreading, but the raised edges need new boards.
MythYou can sand out deep scratches.
FactSanding goes right through the printed wood look. Fill and color the scratch instead, or replace the plank.
MythOne bad board means a whole new floor.
FactSingle planks can be replaced, even in the middle of a room, with a matching board.
MythNailing or gluing down a lifting board fixes it.
FactPinning a floating floor makes buckling worse. Find the cause: moisture, a missing gap or an uneven subfloor.

Prevention: Keep Your Laminate Flat and Beautiful

Homes across Frisco, Plano and Prosper sit on concrete slabs over clay soil, and North Texas swings from humid summers to dry, heated winters. That combination is why slab moisture testing, a proper vapor barrier and steady indoor humidity matter so much here.

Before installAcclimate properly

Store unopened cartons in the space for 48–72 hours per manufacturer guidance.

All yearControl humidity

Keep indoor RH within the recommended range (often ~35–55%).

On slabsTest substrates

Verify moisture before install (see NALFA installation guidelines).

At the edgesHonor expansion

Maintain perimeter gaps and use transitions on long runs.

UnderneathChoose the right underlayment

Moisture barriers for slabs; sound and minor-deflection control for upper floors.

Day to dayWipe spills fast

Use a barely damp mop, never a steam mop, and add mats at sinks and exterior doors.

When to Call a Professional

If lifting involves widespread moisture intrusion, significant leveling, or you can’t identify the root cause, bringing in a specialist will save time, material, and headaches. The same goes for water damage, peeling across several boards, or a repair you can’t match. Most laminate flooring repair jobs we see take less than a day. We’ll assess the floor, measure moisture, check flatness, and provide a clear plan: repair where possible, replace where necessary.

Let our crew take it from here

From single-plank swaps to new laminate flooring and water damage rebuilds, we serve Frisco, Plano, Prosper and across North Texas. In-home estimates are always free.

Book my free in-home estimate

Frequently Asked Questions

Can laminate flooring be repaired?

Yes, in most cases. Scratches and small chips can be filled with a color-matched repair kit, gaps can often be tapped closed, and damaged boards can be replaced one at a time. Swollen or peeling boards can’t be restored, so those get replaced.

How do you fix a peeling laminate floor?

Replace the peeling planks. Peeling usually means moisture got into the core or the surface wore through, and glue won’t hold it down for long. Find and fix any moisture source first so the new boards don’t peel too.

Can water-damaged laminate be fixed?

Not once it swells. The fiberboard core stays swollen after it dries. Stop the leak, dry the subfloor, then replace the damaged planks. If water spread across a room or sat under the floor, replacing the room’s flooring and underlayment is usually the better fix.

How do you fix scratches on laminate flooring?

Clean the area, then rub a color-matched wax pencil or touch-up marker into the scratch, wipe off the excess and buff. Deep scratches can be filled with laminate putty. Don’t sand laminate, because sanding removes the printed wood look.

Can you replace just one laminate plank?

Yes. Near a wall, unclick the rows back to the damaged board and swap it. In the middle of a room, cut the board out, trim the new plank’s locking lip, and glue it in by its edges. You’ll need a matching board, so keep spares from your install.

Why are gaps appearing between my laminate planks?

The most common causes are dry winter air shrinking the boards, joints that never fully locked, or something pinning the floor so it can’t move. Raise indoor humidity, free any pinned edges, and tap the planks back together with a floor gap tool.